
I nearly ruined my best Christmas cactus by repotting it. It had loads of buds one November and I decided the pot it came in wasn’t good enough for it.
So I moved it into something bigger and that I thought looked nicer. Bit a week later it had dropped all it’s buds on the floor.
This is a stupid mistake that’s very common. And it’s the opposite of what most people assume.
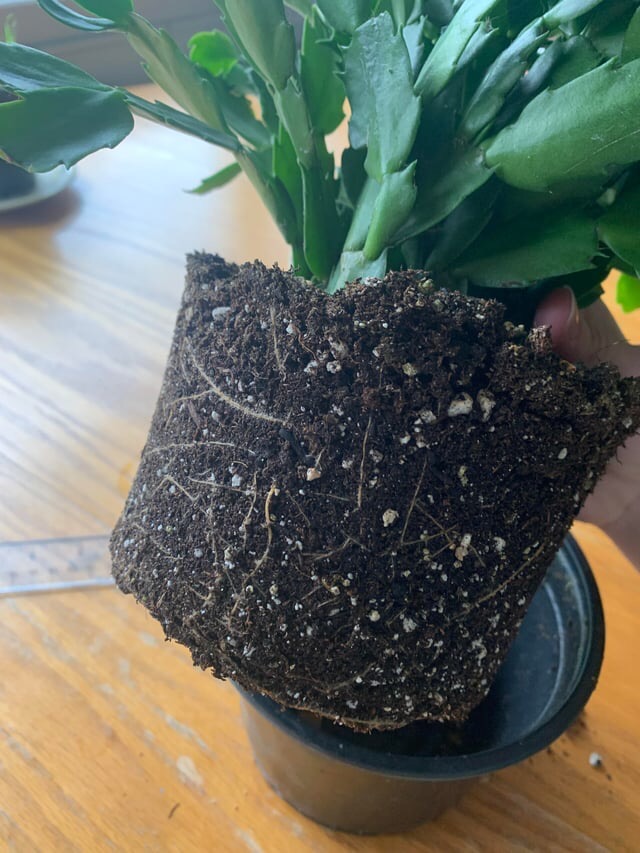
A Christmas cactus doesn’t want a big pot. It flowers better when it’s a bit cramped and root bound. So a lot of the time the best thing to do is leave it exactly where it is.
But, confusingly, not always. Sometimes a Christmas cactus really does need repotting and if you get the timing and the soil right it’ll give you years of blooms. If you get it wrong you’ll be picking buds up off the carpet like I was.
So this guide will show you how to repot a Christmas cactus the right way. When to do it, when to leave it alone, what soil to use and the steps to follow so you don’t shock the plant.
Quick Answer
- Only Repot Every 3 Years or So: Christmas cacti like being a bit root bound. Most only need repotting every 3 years so don’t rush it.
- Wait Until After Blooming: Repot in spring once the flowers have faded. Never repot while the plant is in bud or bloom or it’ll drop everything.
- Go One Size Up in Well Draining Soil: Move it into a pot just one size bigger with a light, well draining mix. Christmas cactus are epiphytes so they do not like heavy, wet soil.
Does Your Christmas Cactus Actually Need Repotting?
Before you go any further its a good idea to check if your plant even needs it. Because most of the time it doesn’t.
We all think a bigger pot will mean a happier plant. With most houseplants that’s roughly true. With a Christmas cactus it’s not.
In the wild these aren’t desert cacti at all. They’re epiphytes from rainforests in Brazil where they grow in the crooks of tree branches, not in the ground.
The tree branch is tight and airy and drains in seconds. So your plant is genetically wired to be happiest when its roots are tight and snug.
Keeping a Christmas cactus slightly pot bound is one of the recognized ways to get more flowers. The Clemson Cooperative Extension notes these plants only need repotting about once every three years. Some sources say they can go for even longer.
So a snug pot isn’t a problem to fix. It’s often the reason your plant blooms at all.
Signs It Does Need Repotting
That said there’s a point where being cramped becomes stressed. And that’s when you should repot.
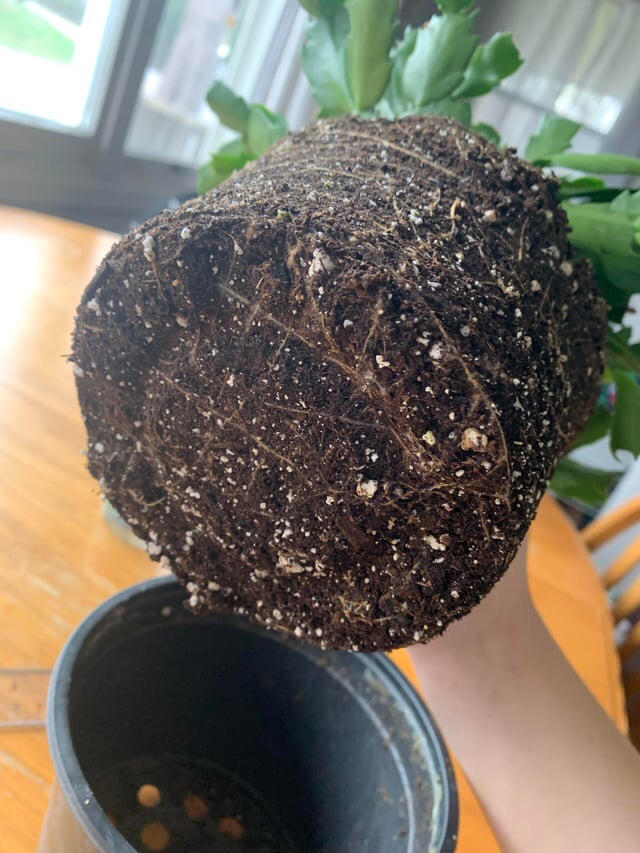
- Roots growing out of the drainage holes. A few is fine. If you’ve got tons of roots coming out of the bottom it means the plant has run out of room.
- Water runs straight through. If you water and it pours out the bottom in a couple of seconds the pot is more root than soil. There’s nothing left to hold on to the moisture.
- The plant lifts itself up. Sometimes the roots get so dense it starts pushing the whole plant up above the rim of the pot.
- It’s stopped growing and won’t bloom. If a mature plant that’s been well looked after has stopped growing completely it can be that it’s very root bound that’s the cause.
- Soil that’s turned to dust or gone sour. Old potting mix breaks down over the years and stops draining. If it’s been in the same tired soil for 4 or 5 years a refresh does it good even if the pot size stays the same.
Signs You Should Leave It Alone
- It’s flowering or covered in buds right now.
- It’s blooming happily every year where it is.
- You only bought or repotted it in the last year or two.
- The roots look full but aren’t growing out of the pot or lifting the plant.
If none of the warning signs apply then I’d just leave it. I know it’s tempting to do something but with these plants doing nothing is often the right way to go.
When to Repot a Christmas Cactus
Timing is the most important part when it comes to this. Get it wrong and it doesn’t matter how good the soil is or watering – it won’t work.
The rule is simple. Repot a Christmas cactus in spring after it has finished flowering and the last of the blooms have faded. Late spring into early summer is the best time because the plant is heading into its active growing season and will settle into fresh soil quickly.
What you must never do is repot it while it’s blooming or budding. Penn State Extension is blunt about this. Wait until the blooming period has ended and the flowers have wilted and never repot the plant while it is actively blooming.
This is just one of the mistakes I’ve made. My Christmas cactus was in full bud in November which felt like the right time to give it a bit of a freshening up.
But a Christmas cactus in bud is in the most sensitive state it’ll ever be in. Any disturbance to the roots, plus the shock of new soil, and it gets stressed and unhappy. And it reacts to that unhappiness and stress by dropping its buds.
So even though you get given or buy most of these things around the holidays the holidays are the worst time to repot them. Enjoy the flowers. Make a note in your phone for April or May. Then do it.
Stop killing your plants by accident.
Get my free guide 7 Gardening Mistakes That Are Killing Your Plants — the most common reasons plants fail, and the simple fixes that turn them around.
The Best Soil and Pot for a Christmas Cactus
Once the timing’s right the two things that decide if repotting will work out are your soil and your pot. Get these two right and the repotting itself is easy.
The Right Soil Mix
Remember the tree branch. Your job is to recreate that light, fast draining pocket, not to shove the roots into dense soil that stays wet.
The worst thing you can do is use straight, heavy potting soil out of the bag. It holds far too much water for an epiphyte and that will cause root rot, which is the biggest killer of these plants.
The medium needs to be well drained with good air flowing though it because these cacti do not grow well in heavy, wet mixes.
You’ve got a couple of simple options:
- Buy a cactus and succulent mix. The simplest route. A bagged cactus and succulent potting mix is going to drain fast and works well straight out of the bag.
- Make your own. This is what I do now. I use roughly two parts regular potting mix to one part perlite, and I’ll often throw in a nit of orchid bark for extra chunkiness. It drains really well and the roots love the air pockets.
 Back to the Roots 100% Organic Perlite
The test is easy. When you water it the water should run through quickly and the mix should feel damp but not soggy. If your finger comes out muddy the mix is too heavy.
This is the same principle behind potting up other epiphytes. If you’ve ever tackled repotting an orchid you’ll recognize it straight away. Chunky, lots of air, fast draining. Roots that can breathe.
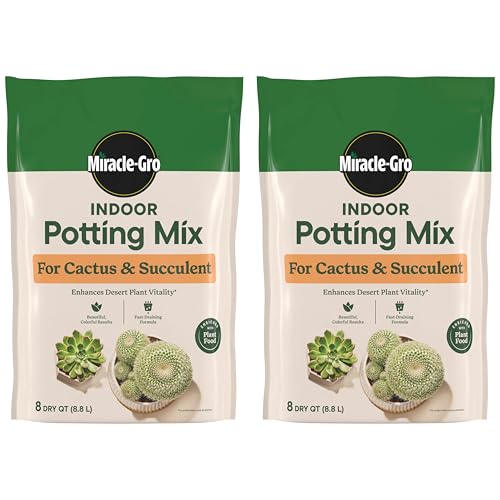 Miracle-Gro Indoor Potting Mix for Cactus & Succulent, 8 qt. (2-Pack)
Choosing the Pot
Two rules here and they’re both about restraint.
First, only go one size up. If it’s in a 4 inch pot move it to a 6 inch, no bigger. It’s so tempting to give it loads of room but a pot that’s too big holds a huge amount of wet soil the small roots can’t take up fast enough.
That soil stays soggy and, again, you get root rot. Going one size up also keeps the plant snug which, as we covered, is how it likes to be for flowering.
Second, use a pot with drainage holes. You have to.
I love a terracotta pot for these because the clay is porous and wicks extra moisture out of the soil. For a plant this prone to overwatering it can really help.
If you love a decorative pot with no hole keep the plant in a plastic nursery pot and just sit that inside the other one.
How to Repot a Christmas Cactus Step by Step
It should take you about ten minutes to get it done and it’s a less less scary than it might first look.
- Water lightly a day or two before. Slightly damp soil holds together and slides out of the pot much more easily than very dry soil that crumbles everywhere. Don’t soak it just a little bit beforehand.
- Take the plant out. Tip the pot on its side and support the base of the plant where the stems meet the soil. Squeeze a plastic pot or run a knife around the inside of a terracotta one to loosen it then slide all the roots out. Never pull it by the stems as they snap really easily.
- Look at the roots. Remove the old loose soil from around the outside. Healthy roots are firm and pale. If you see any that are brown, black or smell bad that’s root rot and you’ll want to trim those off before doing anything else.
- Add fresh mix to the new pot. Put a layer of your fresh, well draining mix in the bottom of the new pot. Then put the plant on top and check the height. The top of the roots should end up about an inch below the rim, sitting at the same depth it was before. Not deeper.
- Fill in around the sides. Trickle fresh mix around the roots turning the pot as you go so it fills evenly. Tap the pot on the bench a few times to settle it and then firm it with your fingers. Don’t push it down too hard. You want it snug but still airy.
- Wait to water. This is the last step. Don’t water it straight away. Leave it a few days, ideally up to a week, before the first watering.
And that’s it. Segments will occasionally snap off during repotting but that’s not a problem. Keep them somewhere safe for a day and you can root them into a fresh pot which is the easiest plant propagation around.
How to Care for a Christmas Cactus After Repotting
The days after you’ve repotted are where you can ruin your good work. The plant is a bit shocked and its instinct, and yours, will be wrong. So this is what not to do.
Don’t water immediately. When you disturb the roots you always tear a few tiny ones. Watering straight into those fresh wounds is going to lead to rotting. So give it a few days to a week for those little tears to callous over then water for the first time. If your home is very warm and dry four or five days is fine.
Then water sparingly. When you do start do it gently. The plant isn’t taking up much while it re-establishes. University of Minnesota Extension points out that too much water is what causes dropped buds, wilting and root rot, so let the top inch of soil dry out fully between watering. When in doubt, wait a day.
Keep it out of harsh light. Bright but indirect light is what it wants. An east facing window is ideal. Don’t put a freshly repotted plant into afternoon sun, that’s going to be a second stress on top of the first.
Hold off on fertilizer. Fresh potting mix already has some nutrients in it, and feeding a stressed plant with damaged roots does more harm than good. Wait about a month then start a diluted balanced feed every couple of weeks through the growing season.
Give it a few weeks of this treatment and you’ll see new growth appear at the tips of the segments. That’s when you know the plant has settled in and is happy.
What If Your Christmas Cactus Has Root Rot?
Sometimes you take the plant out and find it has brown, mushy, nasty smelling roots. Which is root rot. It’s bad but if you’ve caught it before it’s got the whole plant then repotting is how you save it.
Trim away every soft, dark, mushy root until only firm, pale, healthy tissue is left. Don’t be scared of doing too much – rotten roots won’t recover and leaving them just spreads the problem.
If the rot is bad you may need to cut the plant back hard too so the smaller surviving roots aren’t trying to support a load of growth at the top it can’t feed.
Then repot it into fresh, dry, well draining mix in a clean pot and water very sparingly, just enough to dampen the area around the surviving roots. From there you just have to be patient.
If you’re dealing with a sick plant it’s worth reading our guide on how to revive a dying succulent, since a lot of the principles are the same. And prevention is better than trying to cure it every time, so it’s worth understanding the early signs of root rot across your houseplants so you catch it fast.
Christmas Cactus Repotting Mistakes
Repotting while it’s in bud or bloom. This a big one. It causes bud drop and it’s something that’s easy to avoid. Wait for spring.
Going up too many pot sizes at once. More room feels like it will help. It’s actually going to cause soggy soil and root rot.
Using heavy garden or standard potting soil. These are epiphytes. Dense wet soil suffocates the roots. Light and airy is what it wants.
Watering the second you’ve finished. The instinct is to give it water straightaway. Resist that feeling. Let the torn roots heal first.
Repotting a perfectly happy plant. If it’s blooming every year and not bursting out of its pot you don’t need to do anything. I’ve repotted plants because the pot was ugly and regretted it. Put it inside a nicer pot instead and leave the roots in peace.
Fertilizing straight away. A stressed plant can’t use it and it can burn the new roots. Give it a month.
How Often Should You Repot a Christmas Cactus?
Far less often than you think.
An established Christmas cactus typically only needs repotting every three years and plenty of them go for longer than that. They can live for 20, 30 years or more. So a plant that outlives its owner is not unusual at all.
The one exception is a young growing plant. Those can be potted up yearly in their first few years then moved onto the every few years schedule once they mature.
Final Thoughts
Learning how to repot a Christmas cactus is really about learning when not to. They aren’t particularly needy plants and instead they’re tough and don’t ask for very much.
When you do repot it to keep it simple. Wait until spring after the flowers have faded.
Go one single size up in pot, never more. Use a light, fast draining mix and be careful with that first watering. Do those four things and your plant will barely notice the move.
Do the opposite – repot it in bud into a huge pot of heavy soil and give it loads of water straight away and you’re almost guaranteed to lose buds.
Stop killing your plants by accident.
Get my free guide 7 Gardening Mistakes That Are Killing Your Plants — the most common reasons plants fail, and the simple fixes that turn them around.
