Repotting an orchid may feel intimidating at first. You want to get it right and keep your orchid healthy and growing.
But thankfully with the right approach you can make it straightforward and even fun.
This guide will show you how to repot your orchid in an ways way and one that works.
Quick Answer
- Pick the Right Time (Most Common): Repot right after it’s stopped blooming when the new roots atet starting to show.
- Trim Old Roots: Take the orchid out of its pot and cut off any soft or dark roots so only the helathy roots are left.
- Use Fresh Mix: Put the plant in a pot a little bit bigger than the roots and fill it with fresh orchid bark so air can get to the roots.
For more help see 7 Mistakes You’re Making with Your Orchids (And How to Fix Them).
When to Repot Orchids
Orchids need repotting every one to two years. The time to so it is usually after their blooming period. Late spring or early summer is the best time.
The main signs that show your orchid needs repotting are:
- The roots are growing out of the drainage holes or over the edge of the pot it is in.
- The potting mix is breaking down and doesn’t drain well anymore.
- Your orchid is top heavy in it pot and might be falling over or unsteady
If your orchid is showing any of these signs then it’s a good time to repot it.
Preparing to Repot
Before getting in to the repotting it’s best to do a bit of preparation first. Get together all the tools and materials you’re going to be using:
- A new pot for your orchid (with good drainage)
- Fresh orchid potting mix (bark, sphagnum moss etc.)
- Sterilized shears or scissors
- Rubbing alcohol or a flame for sterilizing your tools
- Gloves (optional but recommended)
Step by Step Guide to Repotting
1. Prepare Your Workstation

Where you’re going to be doing your work should be clean. Lay down newspaper or plastic to catch the soil and other bits and pieces you will drop.
Make sure all your tools are properly sterilized. You don’t want to spread any infections.
And soak your potting mix in boiling water for about 20 minutes to sterilize it before letting it cool down.

2. Remove the Orchid from Its Pot

You don’t want to damage your orchid when you take it out of the pot. So gently squeeze the sides of the pot as it will loosen the roots.
If it won’t come out easily after doing that then you may have to use a knife. You’re going to have to separate the roots from the pots but do it slowly and carefully. You absolutely want to avoid damaging the roots.
3. Clean the Roots

Once you’ve removed your orchid you’ll want to get rid of the old potting mix from the roots.
Inspect the roots and trim away any that are dead, mushy or rotten. Healthy roots should be firm and white or green.
4. Prepare the New Pot

Choose a pot that is slightly larger than the previous one. Orchids like to be tight in their pot so don’t pick one that is too big.
That pot you choose should have a lot of drainage holes too.
If the pot is brand new then sterilize it with boiling water or a bleach solution before using it for repotting (5% bleach, 95% water).
5. Pot the Orchid

Put a small amount of potting in the bottom of your new pot. Place your orchid in the center of the pot or with the oldest growth on one side.
Use fresh potting mix to fill in around the roots and make sure the orchid is stable. However you don’t want it to be too tightly packed.

6. Watering and Aftercare

After you’re done repotting you should water your orchid to help the potting mix to settle. Be sure that all the water drains out completely because if you leave it sitting in water the roots can rot.
Finally put your orchid somewhere it will get indirect light and at the same time it won’t be getting direct sunlight for the first few days.
For the week after mist it lightly so it maintains humidity. Gradually resume regular watering and the way you would usually be looking after it.
Tips for Successful Repotting
If you followed the above steps you should have a well repotted orchid. But if you want a few extra tips to really help try these:
- Use Cinnamon: Sprinkling cinnamon on cut roots works as a natural fungicide. This can help to stop any infections from happening.
- Clear Pots: Transparent pots can let you see how you’re orchids doing. So you can keep an eye on the roots and how moist the soil is.
- Airflow: Orchids need good airflow around their roots. If you’re worried about yours then a fan can help the air to circulate better, especially when the humidity is high.
- Potting Mix Composition: The different varieties of orchids have different preferences. Phalaenopsis, for example, like a mix of bark and sphagnum moss. Vandas orchids prefer a coarser mix than that or even leaving their roots bare.
Extra Steps
These aren’t strictly necessary but can help to make the process easier.
Choosing the Right Pot
The pot is actually really important. Orchids need specific types of pots that have the right drainage and lets the air flow well.
These are a few good tips for choosing the right pot:
- Size: The new pot should be one size larger than the old one. Orchids like cramped conditions because it copies how they would grow in their natural environment.
- Material: Clay pots provide good airflow but can be tricky if the roots stick too much. Plastic pots are easier to manage but they have got to have enough drainage holes.
- Design: Clear pots are good because you can see the roots and how moist the soil is.
Preparing the Potting Mix
Different orchids require different potting mixes. A breakdown of common types:
- Phalaenopsis: A mix of medium sized bark and sphagnum moss.
- Cattleya and Oncidium: Medium to coarse bark mix.
- Paphiopedilum: Finer mix with small bark particles and perlite.
- Vanda: Often grown bare root or with a very coarse mix.

Troubleshooting Common Issues
Sometimes things can go wrong or you run into an unexpected problems. Troubleshoot any of the issues you come across by:
- Root Rot: overwatering is the biggest culprit for this. But also poor drainage. If you do end up with root rot then trim the affected roots and repot the orchid in a fresh mix.
- Leaf Yellowing: Annoyingly this can be one of many things. It could be overwatering, underwatering or just poor drainage. You’ll have to try multiple things to figure out which it is, including getting a pot with better drainage and both more and less watering.
- Slow Growth: Make sure your orchid is getting enough light, the humidity is right for it and it isn’t too hot or cold.
Final Thoughts
Reporting is important and that can make it seem daunting. But it isn’t particularly difficult so as long as you follow then steps found here closely you shouldn’t have any problems. And your orchid will be much happier and continue to grow well.
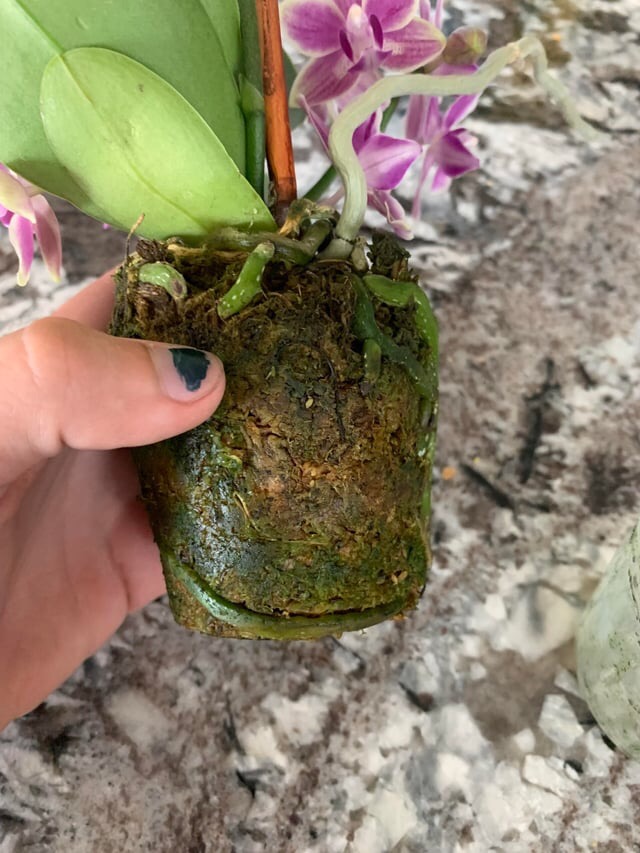
My orchid is about to start blooming again (3rd time). Some of the roots on the top surface are brown. Can I cut them off. I will check the bottom after the bloom is gone. Thanks.