
Every spring I make the same mistake. The first properly warm day arrives, you know the one – a bright, still morning in late February or early March where the light is different and the air smells like something is happening – and I go outside full of energy and start doing things in the wrong order.
I pull weeds from beds that haven’t been cleared. I start sowing seeds before I’ve checked whether my seed compost is still any good. I prune something that didn’t need pruning yet and leave something that really did.
Being enthusiasm about gardening in the spring is a wonderful thing but it will work so much better if you have a plan. The tasks themselves aren’t too complicated – clearing, pruning, feeding, sowing, planting etc. But the order you do them matters more than most people realize.
Pruning roses before you’ve cleared the beds around them means working around a mess. Sowing seeds indoors before you’ve sorted out where the seedlings will go will end up with you panicking in April. Feeding beds before you’ve improved the soil structure means feeding weeds as much as your plants.
So this guide works through the spring gardening checklist in the order it makes sense to tackle things. Each section explains not just what to do but why it comes where it does and what you’re setting yourself up for by doing it in the right order.
Work through it from the top, change the timing to your climate and your last frost date and your spring garden will start the season in much better shape than if you just got stuck in on the first nice day and did whatever seemed most important.
Step One: Look at Winter Damage and Clear the Garden
This is always the first job for a simple reason: you can’t do anything else properly until you know what you’re working with and have a clear area to work on. Winter does things to gardens – some of them useful, some of them damaging – and a proper assessment before you start any other tasks saves a lot of wasted time and effort.
Do An Assessment Walk Before You Touch Anything
Before you pick up an any tools walk around the garden slowly and take stock. Look at every bed, every shrub, every climber.
Make a note of what has died back completely, what looks damaged, what has survived better than expected and what has spread or self seeded somewhere useful or somewhere you don’t want it. Bring a notebook if you’re the kind of person who uses one, use a note app on your phone or just take photos – you’ll refer back to them more than you expect.
This walk is the way to discover information you can gather in a quick fifteen minutes of looking that will save you hours of doing the wrong thing.
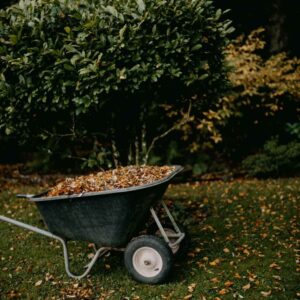
Clearing: What to Remove and What to Leave
The instinct on a spring day is to cut everything back, clear every bed and start fresh. Resist it, at least partially.
Some of what looks dead in early spring is not dead – many perennials die back completely above ground but have perfectly healthy roots and crowns waiting to give you new growth. Cutting back prematurely is fine for most plants but can be damaging for a few, and more importantly, old stems and seed heads left standing through winter have been giving a habitat for overwintering insects.
Hollow stems are shelter for bees. Seed heads feed birds.
Waiting until the soil is warming up and when you start to see the real signs of spring insects before doing your big clearance is better for the garden than clearing in the first mild week of the year.
What is safe to remove as soon as you’re out there:
- Clear dead annual stems from last year’s cosmos, zinnias, sweet peas and other annuals. These are finished and there’s no reasons to leave them there.
- Wind damaged or frost damaged material – broken branches, bent stems, any growth that’s black from frost. Remove it.
- Fallen leaves and debris that have built up over beds during winter. A little leaf litter is useful to the life in the soil. When it’s thick though it can be a home to slugs and stop bulbs from growing.
- Annual weeds that germinated over mild spells in winter. Remove before they flower and set seed.
- Any diseased material or that’s been damaged by pests – out it in the bin, don’t compost it.
What to wait on:
- Perennial stems and seed heads you left for winter to help the wildlife. Wait until you can see the soil temperatures rising and the first spring insects appearing.
- Any plant you’re not sure is dead. Wait two to three weeks longer than you think you should. The number of plants that look completely dead in March and then push up new growth in April is more than you’d think.
- Ornamental grasses. Cut these back in late winter to early spring but do it just before the new growth starts coming through from the base, not months earlier.
- Walk around every bed and note what’s happened over the winter
- Remove dead annual stems and frost damaged material
- Clear thick leaf litter from beds, especially around emerging bulbs
- Pull annual weeds before they set seed
- Mark any plants you’re not sure about – don’t remove yet
- Check for self seeded plants worth keeping and possibly moving elsewhere
- Note any areas where perennial weeds have spread and will need attention
Step Two: Soil Preparation and Feeding Beds
Once beds are cleared you can see and get to the soil properly which means it’s the right time to improve it. Soil work done in spring – before planting, before sowing and before weeds get established – will pay dividends for the whole growing season. Soil work done after you’ve planted things is awkward and risks damaging roots.
Test Before You Treat
If you’ve never tested your soil pH and you have plants that are struggling for no obvious reason then spring is a good time to do it. Inexpensive pH test kits are available from any garden centre or online and take about five minutes.
Most garden plants prefer slightly acidic to neutral soil (pH 6.0 to 7.0). If your soil is outside that range you can change it by adding garden lime to raise pH on acidic soil or sulphur or acidic organic matter to lower it on alkaline soil. But adjust gradually over multiple seasons rather than trying to do it all at once.
More useful for most gardeners than pH testing is a simple assessment of the structure of the soil. Dig a small hole with a trowel and look at what you’ve got.
Does the soil crumble easily or does it clump together in sticky lumps? Does it look dark and rich or pale and thin? Are there earthworms?
Earthworms are one of the best indicators of healthy soil. Having them means good organic matter levels and active soil biology. A shovel of good healthy soil should have several worms in it. No worms at all is a sign that the soil needs some attention.

Add Organic Matter as Your Foundation
Whatever your soil type one way you can always improve it is with organic matter. Garden compost, a bit of well rotted manure, leaf mould or a mix of all three spread across beds in spring feeds the soil, improves it’s structure, helps clay soils drain better and sandy soils hold on to moisture better and releases nutrients slowly as it breaks down. It is by some distance the best thing you can do for your soil and your plants.
Apply a layer 5 to 8cm (2 to 3 inches) deep across the surface of cleared beds and let the rain and worms incorporate it, or work it lightly into the top layer with a fork. You don’t need to dig it in deeply – in fact doing so can disturb the structure of the soil and brings up buried weed seeds to the surface.
Feed Beds That Are Already Planted
For established borders with perennials already in them you can’t add organic matter without working around existing plants but you can still top dress. So scatter a layer of compost or well rotted manure across the surface of the bed between plants and then leave it.
Rain and worms will do the rest. Top dressing established beds in early spring is going to benefit you hugely in the long run and takes almost no time. So no excuses to not do it.
For areas that will be getting new plants or direct sown seeds a light dressing of balanced granular fertiliser worked into the top few centimetres as well as the organic matter helps give young plants and seedlings the nutrients they need to establish quickly. Don’t do this until you’re prepared to plant or sow as fertiliser left on the surface feeds weeds as efficiently as it feeds your plants.
Step Three: Pruning Shrubs, Roses and Perennials
Pruning is probably what most gardeners feel the least confident about and the one where the fear of doing it wrong causes them to sort of freeze. The reassuring truth is that most plants are able to deal with pruning mistakes better than you’d think.
If you cut something at the wrong time it usually just doesn’t flower as well that season. Which is disappointing, sure, but not fatal. The one exception worth knowing about is spring flowering shrubs, which is covered below.

The Pruning Timing Principle That Solves Most Confusion
The rule that covers most situations: prune after flowering. If a shrub or rose flowers in spring, prune it immediately after it finishes blooming – because it’s flowering on growth it made last year and pruning before flowering removes the growth that would have flowered.
If a shrub or rose flowers in the summer or fall prune it in late winter or early spring because it flowers on growth it makes this season and pruning in the spring encourages that new growth.
In practice this means:
- Spring-flowering shrubs (forsythia, flowering currant, lilac, weigela, early flowering clematis like Clematis montana): prune immediately after flowering in spring. Do not touch them now.
- Summer and fall flowering shrubs (buddleja, lavatera, hardy fuchsia, late flowering clematis): prune hard in early spring before growth really gets going.
- Roses: Prune in late winter to early spring when you can see the buds beginning to swell but before they’ve broken into leaf. Cut to an outward facing bud, remove dead, diseased, and crossing stems and aim for an open framework.

Cutting Back Perennials
Perennials that were left standing over winter for wildlife value – echinacea, rudbeckia, sedums, ornamental grasses – can now be cut back to the ground or to the base of new growth. Look carefully before you cut: for many perennials new shoots are already emerging from the crown at soil level and you want to cut above those, not into them.
A helpful tool for this job is a pair of good secateurs rather than a hedge trimmer. Cutting back individual stems lets you see what you’re doing and avoid the new growth.
For large ornamental grasses wrapping the clump with some string before cutting makes the whole thing easier to manage and removes the material in one bundle rather than an explosion of stems across the bed.
Shrub Roses vs. Climbing Roses
These need slightly different approaches. Shrub roses – including the David Austin English roses – are pruned by removing dead and weak material, reducing the remaining stems by about a third and cutting to outward facing buds to encourage an open habit.
Climbing roses are pruned by removing one or two of the oldest, woodiest stems entirely each year to encourage younger growth and tying in new stems as horizontally as possible, which stimulates more flowering side shoots. The two approaches are different enough that it’s worth knowing which type you have before you start.
- Identify which shrubs flower in spring – do not prune these now
- Cut back summer flowering shrubs (buddleja, lavatera, hardy fuchsia) hard
- Prune roses as buds swell – remove dead, diseased, crossing growth
- Cut back perennial stems left standing over winter
- Cut ornamental grasses back to the base before new growth emerges
- Check clematis pruning group and act accordingly

Step Four: Sowing Seeds Indoors and Direct Sowing
Seed sowing is where a lot of spring gardening energy goes and where timing mistakes cost the most. Sow too early and you end up with leggy seedlings that have outgrown their pots before it’s warm enough to plant them out. Sow too late and you lose weeks of growing time.
The temptation is always to start too early because the warm house and the seed packets and the general enthusiasm of early spring conspire to make you want to begin long before conditions are right.
Sowing Indoors: What, When and How
The starting point for sowing timing is your last expected frost date. Most things sown indoors are started 6 to 10 weeks before that date – which means working backwards. If your last frost is usually mid May your indoor sowing window for most half hardy annuals and vegetables is late March to early April. Earlier than that and you’re creating problems for yourself.
What benefits from indoor sowing:
- Half-hardy annuals that need a long growing season to perform – dahlias from seed, zinnias, cosmos, nicotiana, pelargoniums. These are frost tender and can’t go outside until after the last frost so getting them started indoors gives them extra weeks of growing time.
- Vegetables with long growing seasons – tomatoes, peppers, aubergines, celery. These need starting indoors in most temperate climates because there simply isn’t enough frost free outdoor time for them to mature if direct sown.
- Perennials from seed – many perennials can be grown from seed started indoors in spring, though they’re usually slower and less straightforward than annuals.
Use fresh seed compost rather than garden soil or multi-purpose compost as seed compost has the right texture and nutrient level for germination without being so rich that it causes problems. Sow thinly (crowded seedlings compete and become leggy), cover to the depth indicated on the packet, label everything immediately (you won’t remember what you sowed where) and keep warm until germination.
Once seedlings are up, they need good light – a south or west facing windowsill, a cold frame or a greenhouse bench – to stay compact and sturdy rather than stretching toward inadequate light.

Hardening Off
Hardening off – gradually acclimatising indoor raised seedlings to outdoor conditions before planting them out – is the step that impatient gardeners skip and then wonder why their plants look ruined after transplanting. A seedling raised in a warm house and then planted directly into a cold border on a windy April day has essentially been transplanted to another planet. Give it time to adjust.
The process: move seedlings to a cold frame or sheltered outdoor spot during the day for a week or two, bringing them in at night. Gradually increase the time they spend outside and reduce the temperature they’re sheltered from.
After two weeks of this most seedlings are tough enough to plant out. It’s not complicated, it’s just time consuming – and the results in terms of transplant survival and early establishment are very noticeably better.
Direct Sowing: Hardy Annuals and Vegetables
Some plants just like to be sown where they’re going to grow either because they don’t transplant well or because they’re hardy enough to germinate in cool conditions without any indoor head start. Hardy annuals – nigella, cornflowers, ammi, calendula, larkspur – can be direct sown into prepared beds from early spring as soon as the soil is workable. Fall sowing of hardy annuals can also work well in milder climates, producing earlier flowering plants the next year.
For direct sowing prepare the soil surface to a fine tilth – raked to remove large clumps and debris – and sow thinly in drills or broadcast across the area. The temptation is to sow thickly in the hope of a better display but crowded seedlings produce weak plants.
Thin ruthlessly once they’re up, spacing to the distance recommended on the packet. The thinned seedlings of most hardy annuals can be transplanted elsewhere in the garden if you can’t bear to throw them away.

Step Five: Planting Bulbs, Tubers and Bare Root Plants
Spring is a major planting season. Not just for the obvious warm season plants but for a range of bulbs and bare root plants that need to go in at specific times to establish properly. Getting the timing right for each category is the main challenge; the planting itself is generally straightforward.
Summer Flowering Bulbs After Frost Risk Has Passed
Spring flowering bulbs – tulips, daffodils, alliums – were planted last fall and are already in the ground doing their thing. What goes in the ground in spring is summer flowering bulbs and tubers: dahlias, gladioli, begonia tubers, lilies (though these can also go in fall) and cannas.
The critical rule for frost tender subjects is patience. Dahlia tubers, gladioli corms and begonia tubers planted before the last frost risk is past will rot in cold, wet soil. It feels desperately late to be planting in May but a dahlia planted in late May in frost safe soil will catch up to one planted in cold soil in April within a few weeks. And will be a much healthier plant for it.
Lilies are the exception. They can go in from early spring as soon as the soil is workable as they’re much hardier than dahlias and don’t mind cool conditions. Plant them at a depth of three times the bulb’s height, in soil that drains well, with some grit under the bulb if drainage is at all questionable. Lily bulbs left sitting in wet soil will quickly get basal rot.
Bare Root Plants: Act Quickly
Bare root plants – roses, fruit trees, hedging and some perennials sold without soil around their roots – are only available in their dormant season, from late fall through to early spring. If you ordered bare root plants and they arrive in spring, plant them as soon as possible.
Bare root plants out of the ground are in a race against time. They need to get their roots into soil before they break dormancy and start drawing on resources they can’t replenish without any proper roots.
If you can’t plant them straightaway then heel them in temporarily – dig a trench in a spare patch of ground, lay the roots in and cover with soil to keep them moist and protected. This buys you a few weeks. What you cannot do is leave them in a bag in a shed for a month and expect them to survive.
Planting Out Hardy Bedding and Perennials
Hardy perennials bought from a garden centre in spring can go in the ground as soon as conditions allow – they’re generally tough enough to handle cool spring weather, especially if hardened off first. Water in well after planting, mulch around the roots to retain moisture and water regularly through the first season while they establish.
Half hardy bedding plants – petunias, begonias, impatiens, tender salvias – must wait until after the last frost. These are the plants that fill garden centre trolleys in April, looking beautiful and tempting, but that will be ruined by a May frost if planted too soon.
Buy them if you want to, keep them in a frost free greenhouse or indoors, and plant out when the nights are reliably above freezing.
- Plant lily bulbs as soon as soil is workable
- Plant bare root plants immediately on arrival – heel in if not ready to plant
- Plant hardy perennials from garden centres as conditions allow
- Wait until after last frost for dahlias, gladioli, cannas, and begonia tubers
- Wait until after last frost for half hardy bedding plants
- Water all new plantings in thoroughly and mulch to keep them moist
Step Six: Lawn Care and Maintenance
The lawn is often the last thing gardeners think about in spring which is a mistake – a well maintained lawn will make everything else in the garden look better and spring is when the work you do has the most impact. Lawns recover well from spring attention because the growing season ahead means grass can fill in gaps, establish from seed and recover from any renovation work you carry out.
When to Start
The urge to mow on the first mild day of spring is strong, I know. Resist it if the ground is still waterlogged.
Mowing or working on wet, soft ground compacts the soil under the lawn and damages the grass roots. Wait until the ground feels firm and the grass is growing before beginning spring lawn work.
In practice this means that in a mild year you might be doing initial lawn work in late February or early March. In a cold year it might be April before conditions are right. The lawn will tell you when it’s ready to be worked on – watch for growth instead of looking at the date.
First Mow of the Year
The first mow of the year should be set high – much higher than your usual summer cutting height. Cutting cold, newly growing grass too short stresses it badly and can set the lawn back weeks.
Set the blade to its highest setting for the first cut or two then gradually lower it over subsequent mowings as the grass gets into active growth. From late spring onward you can settle into your regular summer mowing height – but never remove more than a third of the grass blade in a single mow, which shocks the grass and causes yellowing.

Raking, Scarifying and Aerating
If your lawn has a layer of thatch – the mat of dead grass stems and roots that builds up at soil level – spring is a good time to deal with it. Light thatch removal can be done with a spring tine rake; heavy thatch buildup benefits from scarifying, which uses a machine with rotating blades to cut through and remove the thatch layer. It looks a bit scary when you’ve done it – the lawn looks half destroyed – but it recovers quickly once the growing season kicks in.
Compacted lawns benefit from good air flow, which involves pushing a fork or hollow tine aerator into the soil to create channels for the air and water to get into. For a small lawn a garden fork pushed in every 15cm (6 inches) and wiggled a bit does the job.
For larger areas a hired hollow tine aerator is going to be much faster. After aerating brush sharp sand into the holes to keep them open and improve drainage.
Reseeding Bare Patches
Spring is one of two great times to reseed bare or thin patches in a lawn, the other being in early fall. Prepare the area by roughing up the soil surface with a fork, scatter grass seed appropriate for your conditions (shade mix under trees, wear tolerant mix in high traffic areas), rake in lightly and keep the area moist until germination.
New grass seed needs consistent moisture to germinate – in a dry spring this means watering every day or two. Keep anyone from walking on the newly seeded patches for at least six weeks.
Feeding the Lawn
A spring lawn feed using a fertiliser with a higher nitrogen content than fall feeds, which promotes leafy growth instead of roots makes a real difference to how the lawn looks through the summer. Apply when the grass is growing and rain is forecast or water in after applying. Granular fertilisers are easier to apply evenly than liquids for most home gardeners – a wheeled spreader takes the guesswork out of how much to use.
One thing to note: don’t apply a spring high nitrogen feed in fall or winter. The soft growth it stimulates is much more vulnerable to damage from frost and fungal disease in cold, wet conditions.
Spring and summer feeds have high nitrogen; fall feeds have high potassium and phosphorus. They’re different products for different purposes – read the label before you buy.
- Wait until ground is firm and grass is growing before starting work
- First mow on highest setting – lower gradually over subsequent cuts
- Rake out thatch with a spring-tine rake or scarify if buildup is heavy
- Aerate compacted areas with a fork or hollow-tine aerator
- Reseed bare and thin patches – keep moist until established
- Apply spring lawn feed when grass is in active growth
- Edge lawn borders for a defined look

Final Thoughts
The reason order matters in spring gardening is that each task makes the conditions for the next one.
Clearing gives you access to soil. Improving soil before planting means plants go into the best possible conditions. Pruning before new growth gets too far along means clean cuts and quick recovery. Sowing at the right time means seedlings are ready to go out when conditions are right, not weeks before or after.
A condensed version of everything:
- Walk the garden and look. Note everything before you do anything.
- Clear beds of dead material, winter debris and annual weeds.
- Improve the soil with organic matter while the beds are accessible.
- Prune – summer flowering shrubs, roses, perennials – before growth gets too advanced.
- Start seeds indoors at the right time relative to your last frost date.
- Plant bare root plants immediately, hardy perennials as conditions allow, tender subjects after frost risk has passed.
- Begin lawn renovation when the ground is firm and grass is actively growing.
None of this has to happen in a single weekend. Spring is a long season and the tasks spread themselves across it naturally.
Some things are ready to do in late winter, others not until late spring. You just have to know what comes first and not getting ahead of yourself.
The mistake I described at the start – going out on the first bright March morning and doing everything in the wrong order. That sort of thing gets easier to avoid each year.
Not because you become less enthusiastic things but because experience teaches you that the garden rewards you being patient. Do the preparation properly and everything that follows is easier, more productive and more enjoyable. The spring garden practically runs itself once you’ve set it up right.