
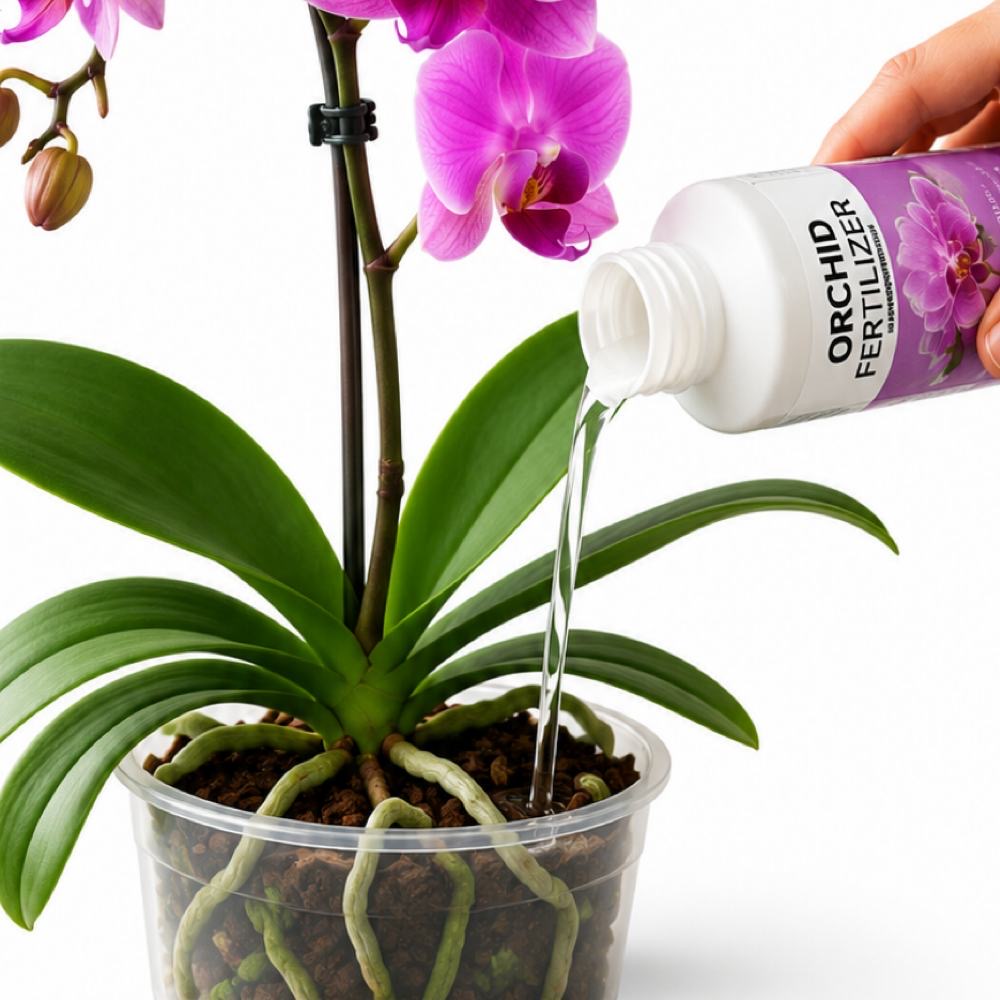
Fertilizing orchids is trickier than you might think. Orchids in general can be difficult and when it comes to fertilizing it’s mostly justified.
If you use the wrong fertilizer you can damage the roots. Feed at the wrong concentration and you burn a plant that was otherwise perfectly healthy.
Feed at the wrong time and the nutrients build up as salts that stop the roots functioning properly. Don’t feed at all and the plant survives but never thrives as it should – the flowers get smaller and grow less frequently and new growth will almost stop completely.
But orchid fertilizing isn’t really complicated when you understannd what you’re doing. The principles are different from those that apply to most other houseplants, which is where the confusion tends to come from.
Orchids are epiphytes – they grow on the surface of trees in their natural habitat, not in the soil – and that affects how they absorb nutrients, what they need and how much they can handle at once. That’s important to be aware of when you’re fertilizing (as you’ll find out).
This guide will take you through why orchids need specific fertilizer instead of using general houseplant feed, which types of fertilizer work best and why, the seasonal feeding schedule that will get you good results, how to apply fertilizer without damaging the roots and the mistakes most people make as well as how to avoid them.
Why Orchids Need Specific fertilizer
The most important thing to understand about orchid nutrition is where orchids come from and what that means for their roots. Most orchids are epiphytes – they grow on tree bark, branches and the faces of rocks. Not in the soil.
In that environment their roots are exposed to air, rain and organic material (decomposed bark, animal droppings, airborne dust etc.) that builds up on surfaces in a tropical forest. They get nutrients in very diluted concentrations which comes from the rain and is absorbed quickly through the roots that are adapted for fast and efficient uptake.
This is very different from how garden plants growing in soil get their nutrients. In that case the roots are surrounded by nutrients that they can take from the soil.
Orchid roots evolved for low concentration, high frequency nutrients – not an occasional high concentration dose that a general houseplant fertilizer will give them.
The Problem With General Houseplant fertilizer
Standard houseplant fertilizers are made for plants growing in soil where they’re delivered to the roots in a moderate concentration. Applied to orchids at standard strength these fertilizers can deliver nutrient concentrations that do damage to orchid roots – making the tips of the roots burn and salt builds up in the growing medium. This leads to the roots working less well, which will show up as yellowing leaves, smaller flowers and eventually a plant that stops growing.
There is also the urea question. Many general purpose fertilizers use urea as their source of nitrogen.
Urea is a cheap form of nitrogen that works well in soil because soil bacteria convert it into the ammonium and nitrate forms that plants use. Orchid growing media – so the likes of bark chips, perlite, sphagnum moss and similar materials – lets urea based nitrogen pass through without being converted and so unavailable to the plant.
An orchid that’s fed with a high urea fertilizer is getting less nitrogen than the label suggests and the urea that isn’t used builds up as a waste product in the medium.
What Orchids Need From Their fertilizer
Orchids need the same three nutrients as other plants – nitrogen (N) for growth, phosphorus (P) for root and flower development and potassium (K) for overall plant function and resistance to diseases – but in different proportions and at much lower concentrations than most houseplants. They also like secondary nutrients (calcium, magnesium, sulphur) and some trace elements (iron, manganese, zinc, copper, boron, molybdenum), most of which should be present in any complete orchid fertilizer but wont be in a lot of basic general purpose feeds.
The form of nitrogen matters quite a lot. Nitrate nitrogen (NO3) and ammonium nitrogen (NH4) are the forms orchid roots can use. A fertilizer that gets its nitrogen from these rather than from urea is described as “urea free” and is much more effective for orchids than one that relies on urea.
You won’t find this distinction on most fertilizer labels in bold letters – you need to look at the ingredients or buy a product that’s marketed as urea free orchid fertilizer.
Best fertilizer Types for Orchids
There are a few categories of orchid fertilizer and each have some advantages and appropriate uses. Knowing how they differ will help you to choose what suits your orchid instead of just buying whatever is on the shelf at the garden centre.
Liquid Orchid fertilizer: The Most Versatile Option
Liquid fertilizers – either ready to use or concentrated formulas diluted in water before – are the most widely used and most versatile. They give you all the control you’ll need over the concentration, can be used at different dilutions for different growth stages and seasons and are absorbed quickly by the roots as they’re watered. For most people a good liquid orchid fertilizer is the starting point and probably the only product you’ll need.
The main thing to look for is whether the fertilizer is urea free. Good orchid specific liquid fertilizers will make this obvious on the packaging.
If the source of nitrogen isn’t made clear on the label look for “nitrate” or “ammonium” in the ingredients – or choose a product thats marketed for orchids. General liquid houseplant feeds, even when they’ve been diluted below the recommended strength will still contain urea and may not include the full range of micronutrients orchids really benefit from.
The concentration is the most important part to get right with liquid fertilizers. The standard recommendation for most orchid growers is weakly, weekly – fertilizer applied at a quarter to half the manufacturer’s recommended strength every week during the growing season.
This copies the low concentration, high frequency orchids would get in nature and is a lot more effective than doing it every month at full strength.

Orchid Specific fertilizers: Growth vs. Bloom Formulas
A lot of the orchid fertilizer ranges offer two formulations: a “grow” or “balanced” formula for the growing season and a “bloom” or “flowering” formula for the period when you want to get flower spikes to grow. The difference is mainly in how much phosphorus there is – bloom formulas usually have more phosphorus, which helps with flowering and roots. Grow formulas have more nitrogen which helps with new leaves.
Switching between grow and bloom formulas at the right times does get better results than using a single one all year round. The time to do it is usually in late summer or early autumn – moving from the grow formula to the bloom formula as the plant finishes its main growth and starts getting ready for flowering.
For Phalaenopsis orchids specifically a spell of cooler nights along with a feed that has lots of phosphorous in the fall is the best way to get spikes to grow in an orchid that has been reluctant to rebloom.

Slow Release fertilizer Pellets or Granules
Slow release fertilizer products – small pellets or granules that release nutrients over a few months as they absorb moisture – are a more convenient choice that work best if you find it difficult to keep to a fertilizer schedule. They’re put on the surface of the orchid’s growing medium and left to work over the following months without you needing to do anything else.
The tradeoff is control. With a liquid fertilizer you can adjust the concentration and how often you use them depending on how the plant is growing and the season. With slow release pellets the amount of nutrients being delivered is fixed once the pellets are put in place.
This makes them less suitable for the seasonal adjustments that get the best results and more prone to over fertilizing in the winter when the plant isn’t growing and the nutrients being released continuously has nowhere to go. If you do use slow release products use orchid specific formulations and apply them only at the start of the growing season, not all year.

Seaweed and Organic Liquid Feeds
Seaweed extract and other organic liquid feeds are sometimes used as supplements to a main orchid fertilizer rather than the main one. Seaweed extract has a lot of trace elements, plant hormones and other things that support the health of the roots and resistance to stress without the build up salt risk that comes with synthetic fertilizers.
It’s not a complete fertilizer and shouldn’t be used as the only source of nutrients. But a lot of experienced orchid growers use a dilute seaweed feed as a monthly supplement alongside their regular orchid fertilizer with good results. If you use it at very dilute concentrations that are recommended on the label (or even more diluted – seaweed extract is definitely a less is more type of product) it probably won’t cause any harm and may give some benefits.
During active growth: look for a balanced or slightly nitrogen heavy ratio – something around 20-10-20, 20-20-20, or 30-10-10 (N-P-K). The higher nitrogen helps with leaves and roots.
During the pre flowering period: move to a higher phosphorus ratio – 10-30-20 or similar – to get more flower spikes to grow and the roots to develop.
These ratios are guidelines rather than precise needs that you have to stick to. What matters most is that the fertilizer is specific to orchids, urea free and has a full range of micronutrients – the exact ratio matters less.

Feeding Schedules by Season and Growth Stage
Orchid fertilizing is not something you do uniformly all year round. What the plant needs changes significantly across the seasons and across its growth cycle and a feeding schedule that matches those changes will get you better results than a fixed programme regardless of what the plant is doing.
Different orchids have somewhat different seasonal patterns, so the schedule below includes notes on the main types where they differ.
Spring and Early Summer: Active Growth – Feed Regularly
As the light levels increase and the temperatures rise in the spring most orchids begin their main period of growth – new leaves, new pseudobulbs (in Cattleya, Dendrobium and Oncidium) and new roots. This is when they need the most nutrients and regular feeding will make the most difference.
During active growth use a balanced or growth formula liquid orchid fertilizer at a quarter to half the recommended strength every time you water – or every week if you water less often than weekly. This “weakly, weekly” method keeps a low and steady level of nutrients in the medium that supports growth without any spikes of the concentration that can cause damage to the roots. Make sure you flush the growing medium with plain water every fourth watering to stop any build up of salt.
Midsummer: Continue Feeding, Watch for Heat Stress
Through the midsummer continue the growth feeding programme. In very hot weather orchid roots struggle to take up nutrients as well.
If the plant shows signs of being stressed by the heat (wrinkled leaves, unusually quick drying of the medium), reduce the concentration of the fertilizer some more and make sure the plant stays hydrated rather than focusing on the nutrition until the conditions ease. A plant under heat stress doesn’t need more nutrients; it needs to hold on to it’s the resources it already has.
Late Summer and Autumn: Move to Bloom Formula
From late August or September onward switch from a growth formula to a formula with more phosphorus. Reduce how often you’re feeding slightly – every ten to fourteen days rather than every week.
For Phalaenopsis, a temperature differential of around 5 to 8 degrees Celsius (10 to 15 degrees Fahrenheit) between day and night temperatures for four to six weeks in autumn is the main trigger for flower spikes. The phosphorus rich feed is there to support the process.
Moving the plant near a window where it gets cooler temperatures at night in September and October, as well as the bloom fertilizer, well be the best way to get a reluctant Phalaenopsis to spike.
Dendrobiums and Cattleyas have a dormancy that’s more defined and usually need a proper rest with reduced or no feeding in the fall before they’ll put out flower buds. Pushing them with continued feeding into the fall can stop any flowering by keeping them in a growth mode when they need to be signalled to go into their rest period.
Winter: Reduce or Stop Feeding
For most orchids in growing in conditions at home the winter is when they will have less growth and less of a need for nutrients. Phalaenopsis, which tends to grow more continuously than other genera, can continue to receive a very dilute feed (quarter strength or less) every two to three weeks through winter if it is givinf you new leaves or has a flower spike that’s developing.
Orchids that are resting and have no signs of new growth or the growing medium is taking longer to dry should get very little or no fertilizer through the coldest and darkest months.
The reason for less in the winter is the same as for other houseplants: fertilizer used on a plant that isn’t growing will build up as salts in the medium rather than being used. The difference with orchids is that their medium, which is often based around bark, results in salt building up which affects the roots faster and more severely. Less feeding in winter is almost always the right choice.
When the Plant is Flowering
This is where lots of people don’t agree. Some recommend stopping or feeding less while the plant is in flower on the grounds that the plant’s energy should go towards keeping it’s existing blooms going, not trying to support new growth. Others continue the regular programme without any change.
The truth is that a bloom formula fertilizer used at reduced concentration while the plant is flowering does no harm to it and may support the how long the flowers survive by keeping the plant’s nutrient levels healthy. What is worth avoiding is switching back to a high nitrogen formula while the plant is flowering as it can cause some orchids to drop their flowers early.
- Spring to midsummer: Balanced / growth formula, quarter to half strength, weekly (flush with plain water after every fourth watering)
- Late summer to autumn: Bloom / high phosphorus formula, quarter to half strength, every 10 to 14 days
- Winter: Little or no feeding for resting orchids; very dilute (quarter strength or less) every 2 to 3 weeks for growing Phalaenopsis
- While flowering: Bloom formula at reduced concentration or pause the feeding – don’t switch to a high nitrogen growth formula

How to fertilize Without Damaging the Roots
Orchid roots are more sensitive to fertilizer damage than most houseplant roots for two reasons. First, they’re adapted for low concentration nutrient absorption – the velamen (which is the outer layer of the roots) absorbs moisture and nutrients quickly, which means concentrated fertilizer solutions are taken up fast and have little time to be buffered before reaching the cells of the roots.
Second, many orchids are grown in clear pots or with aerial roots you can see. This means damage to the roots from over fertilization can be seen as brown root tips long before it shows up in the leaves.
Always Water Before fertilizing
The most important technique for protecting orchid roots from fertilizer damage is watering with plain water before you apply the fertilizer instead of applying the fertilizer to dry roots. Dry roots absorb any liquid quickly and the concentrated hit of a fertilizer applied to dehydrated roots is more likely to cause the tips to burn than the same solution given to roots that are already hydrated.
Water the orchid with plain water, let it drain and then use the diluted fertilizer solution. Doing it this way – water first, feed second – will mean there’s less risk of damage.
Use the Right Dilution Every Time
Quarter to half the recommended strength is the appropriate concentration for most orchid fertilizers used every week. If the label says dilute one cap to one litre of water use half a cap to one litre or a quarter cap to one litre.
The temptation when growth is slow or there’s no flowering is to increase the concentration. You, understandably, think that more nutrients will get a faster response. Sadly it rarely does.
Orchid growth rate is mainly down to light and temperature, not by fertilizer concentration. Once you get past the threshold of adequate nutrition and add more fertilizer it doesn’t make it grow more – it just increases the salt build up in the medium.
Flush Regularly to Remove Accumulated Salts
Even when fertilizer is applied at appropriate concentrations, regular watering with fertilizer solution leads to a little build up of salt in the growing medium over time. If you don’t do anything about it then it can lead to the medium affecting how the roots function. You end up with the same effect as over fertilizing only it happens more slowly.
The solution is to flush the medium regularly with plain water: once a month, or every fourth watering, run a generous amount of plain water through the pot without fertilizer. This dissolves any salts that have built up and flushes them out through the drainage holes.
Signs that salt accumulation has become a problem: white or pale crusty deposits on the rim of the pot or on the surface of the growing medium, brown tips on the roots, leaves that are slightly yellow or dull and a plant that seems to have stopped responding to feeding. A thorough flush, followed by a two to three week pause before resuming fertilizing often gets an improvement in root colour and how well the plant is growing within a few weeks.
See our orchid watering guide for more help.
Aerial Roots and How to Handle Them
Many orchids, particularly Phalaenopsis, produce roots that grow out of the pot and into the air – aerial roots that are very normal and not a sign that the plant needs to be repotted. These roots should be treated like any other when fertilizing: allow the fertilizer solution to come into contact them during application or mist them lightly with the diluted fertilizer solution.
Don’t try to stuff aerial roots back into the pot – they’re adapted to aerial conditions and forcing them into the bark medium can damage them. If you’re fertilizing by immersion (that is putting the pot in a container of diluted fertilizer solution for a short period), the aerial roots will take up some of the solution as they absorb moisture – this is fine and normal.
fertilizing Mistakes and How to Avoid Them
Most orchid fertilizing problems come from a small number of recurring mistakes. These are the ones worth being aware of before you start rather than learning through the loss of a plant you really liked.
Using General Houseplant fertilizer at Standard Strength
This is the mistake that people make the most by quite some margin. A general houseplant fertilizer used at the concentration that’s recommended on the label – designed for soil grown plants that can buffer the concentration – is too strong for the roots of orchids and will usually contain urea that doesn’t get converted by the orchid growing medium.
If a general houseplant fertilizer is all you have then dilute it to a quarter of the recommended strength and treat it as a temporary measure while you get hold of a proper orchid specific product.
The improvement from switching to a urea free orchid fertilizer at the right concentration is usually noticeable within a few weeks.
Feeding on a Fixed Schedule Regardless of Growth Stage
Feeding every week through the winter when the plant is resting, or not adjusting from growth formula to bloom formula in the fall, treats the orchid as if its needs are constant when they very much aren’t. The seasonal and growth stage adjustments that have been described in this guide shouldn’t be considered optional as they’re what gets reblooming, healthy orchids and not ones that survive without ever growing at their best.
fertilizing a Stressed or Sick Plant
A plant with damaged roots, that’s been repotted recently or that is clearly stressed or declining should not be fertilized. Fertilizer used on on damaged roots causes more damage and won’t help with any recovery.
The instinct to feed a struggling plant – to give it a boost – is understandable but counterproductive. Address the underlying cause of the stress first: treat root rot, let it recover after being repotted, sort out whatever environmental problem is causing the decline. Resume fertilizing only once the plant is clearly in active growth and the roots looks healthy again.
Fertilizing Dry Roots
Applying fertilizer solution to an orchid that hasn’t been watered first concentrates the nutrients against dehydrated roots that absorbs liquid quickly. This will very quickly burn the tips of the roots even with a properly diluted orchid fertilizer.
Always water first, let it drain then fertilize. It takes an extra few minutes but will make a big difference to the health of the roots over time.
Never Flushing the Growing Medium
An orchid that has been fed regularly for a year or more without flushing it with water will have a big build up of salt in the growing medium. This is invisible until the root damage is already happening – the symptoms appear gradually as the roots lose their ability to work properly.
It will pay off to work in a monthly water flushing to your feeding routine from the beginning as it will stop that build up from ever reaching levels that cause problems. If you’ve been feeding without flushing for a long time do a big flush now: run a few full pots of plain water through the medium, leave it for two to three weeks then go back to feeding at a reduced concentration.
Expecting fertilizer to Compensate for Poor Light or Conditions
This is probably the most important mistake to understand and to avoid. Fertilizer supports growth but does not drive it.
An orchid in poor light, in the wrong temperature or with damaged roots will not respond to more feeding with better growth – it isn’t nutrition that’s holding it back. Adding more fertilizer to a plant that isn’t growing for reasons that aren’t to do with nutrition will only add salt to it and not get any benefit from it.
Before you change your feeding programme in response to a plant that seems slow or unresponsive, check that the light, temperature, watering and root health are all spot on. Nutrition should be the last thing you look at, not the first.

Final Thoughts
The best fertilizer for orchids is free of urea, orchid specific formula – liquid for most growers – used at a quarter to half the recommended strength every week during the growing season (adjusting for the seasons). That’s the main part.
The rest of the detail in this guide are all around those main principles: protecting the roots from damage, timing the feeding to match what the plant is doing and understanding why orchids respond differently from other houseplants so that you make the right decisions.
I spent two years feeding a Phalaenopsis with a general houseplant fertilizer at standard strength and kept wondering why the roots were turning brown at the tips and the plant never rebloomed. The leaves stayed green so nothing seemed obviously wrong.
Switching to a urea free orchid fertilizer at quarter strength and adding some high phosphorus feed got me a spike within ten weeks and a lot more new roots within a month. The plant wasn’t sick, I was just fertilizing it the wrong way.
That’s almost always the story with orchid fertilizing problems – not a mysterious deficiency, just the wrong product at the wrong concentration and at the wrong time.
Get those three things right and orchid fertilizing becomes one of the simpler parts of orchid care. The plants are less demanding than their reputation suggests.
