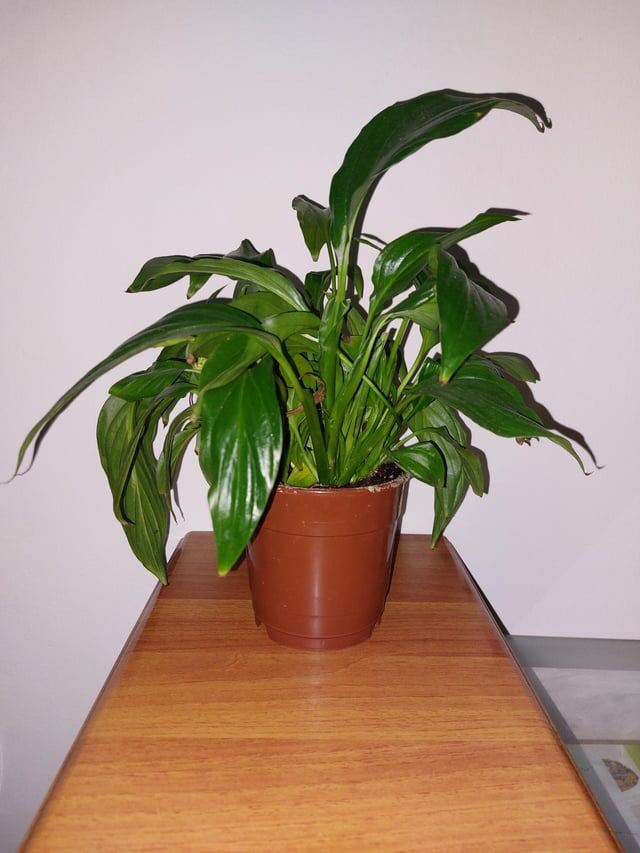
Peace lilies are some of the most popular houseplants. And one reason why is because they are generally pretty easy to look after.
But that doesn’t mean they can’t struggle or have problems if you’re not caring for them the right way.
So if you’re having issues with your peace lily and it’s dying you’re probably looking to figure out why.
Well the I’m going to take you through the 9 most common signs your peace lily could be in trouble. And more importantly I’ll show you what you can do to save it.
Quick Answer
- Yellow or Black Leaves (Most Common): These color changes point to issues with the roots from either too much or too little water. Let the top inch of soil dry before you water it again.
- Severe Drooping: Limp leaves that don’t improve after you’ve watered the plant shows it’s stressed at the roots. Check for rot and repot it if needed.
- No New Growth: A peace lily that stops producing fresh leaves or blooms usually needs better light, some fresh soil or changing up how you’re caring for it.
For more help see Peace Lily Care Guide to Get Thriving Plants.
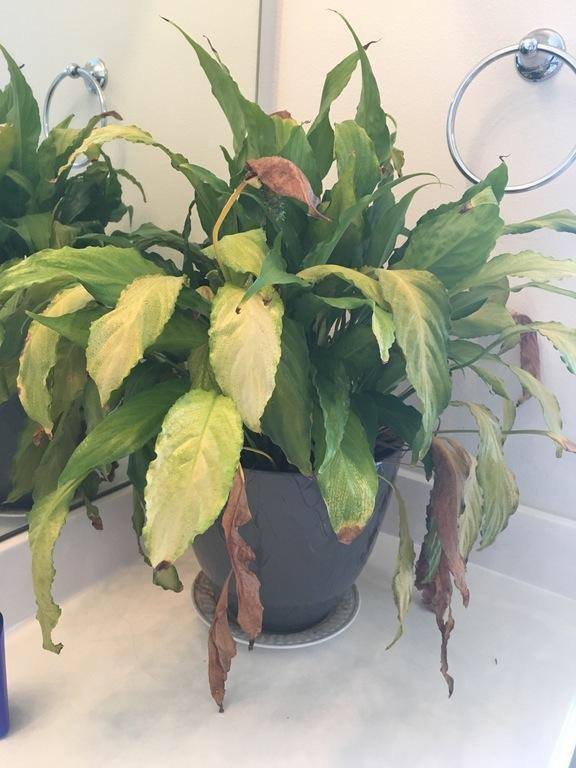
1. Yellowing Leaves: Understanding the Causes and Fixes
Yellow leaves are probably the most noticeable sign something is wrong. It’s hard to miss your once green leaves turning yellow.
There are a few causes for yellow leaves and understanding the underlying what is going is going to be important to fixing it.
Why it Happens:
- Overwatering: The most common cause is overwatering. If you make the soil too wet then the oxygen can’t get to the roots and this can cause root rot and yellow leaves.
- Underwatering: but if the soil dries out completely and does so for a long period of time then the plant starts to struggle to get any water or nutrients and will go into survival mode. This can also turn the leaves yellow.
- Nutrient Deficiencies: If you haven’t given your peace lily any fertilizer for a while then it may not be getting enough nitrogen. This can make the older leaves turn yellow.
How to Fix It:
- Adjust Watering: Let the top inch of soil dry out between each time you water. Peace lilies like the soil to be consistently moist (but not soggy). If you have overwatered your peace lily then let the soil dry out a little before you water again.
- Check for Root Rot: If you can’t fix your yellow leaves then take the plant out of its pot and look at the roots. If you see any that look black or mushy then cut them off and repot your peace lily in fresh soil.
- Fertilize: If you haven’t fertilized in a while then use a balanced fertilizer that you’ve diluted to half strength. Give your peace Lily some every 6 to 8 weeks during the growing season.
For more help with this issue see our guide to reasons for and treating yellow peace lily leaves.
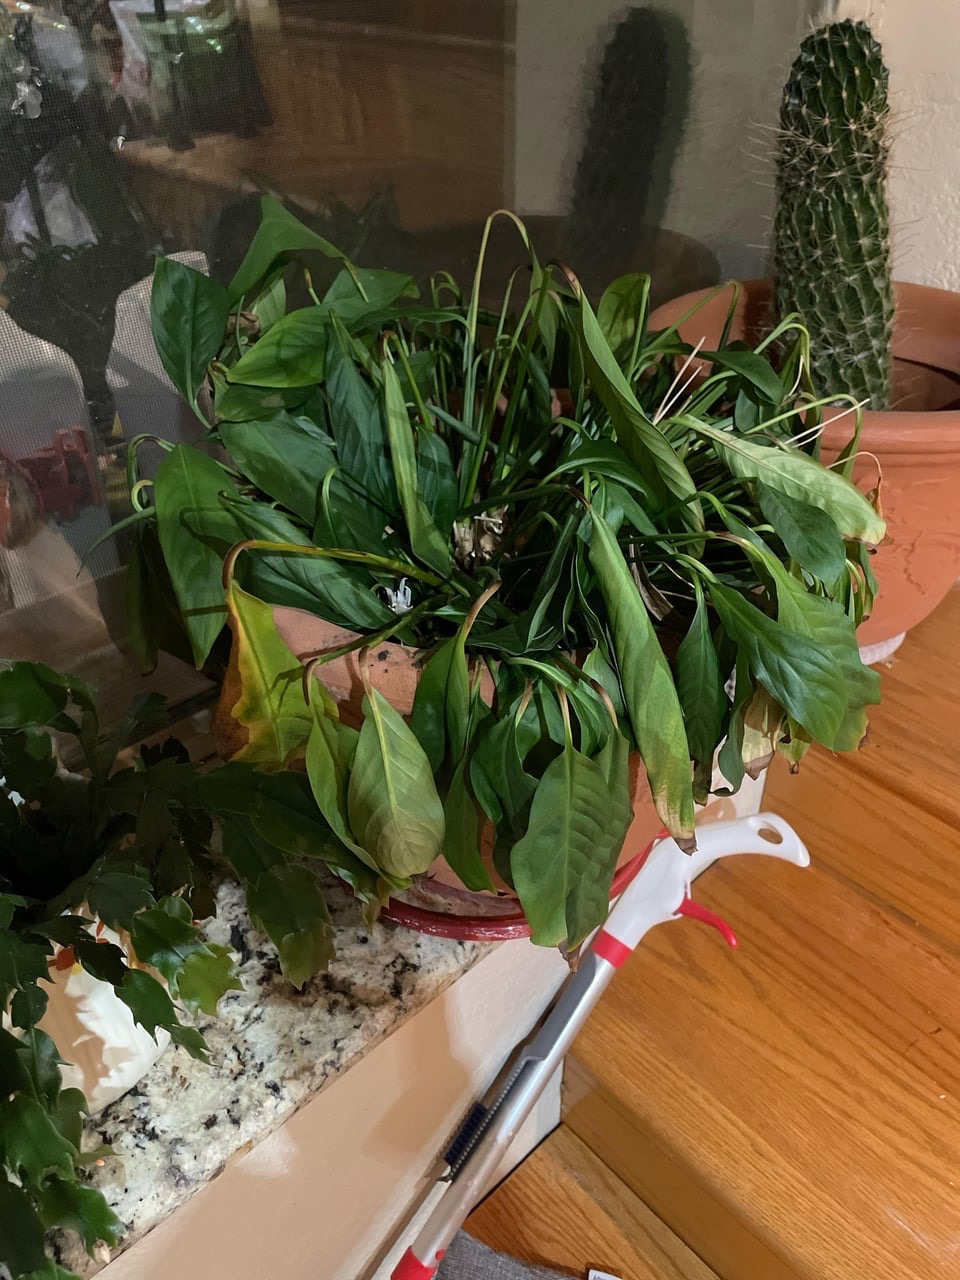
2. Drooping or Wilting Leaves
Drooping leaves can look awful and like your peace lily is on its last legs. But don’t panic as they’re known for dramatically “fainting” when they need some water.
Once they’ve had a drink they usually perk up again quickly.
Why it Happens:
- Underwatering: If a peace lily hasn’t been watered enough they wilt. So you may have simply not watered it for a while or it’s a hot day.
- Overwatering: Surprisingly overwatering can also cause wilting leaves. It’s because the roots drown in too much moisture and can’t take in oxygen.
- Rootbound Plant: If your peace lily has been in the same pot for a while it’s roots could be cramped. This makes it difficult for it to absorb water, which will again cause the leaves to turn yellow.
How to Fix It:
- Watering Check: Check the soil for dryness. If the top inch or so feels dry then water thoroughly. If it’s damp or wet then you can let it dry out a little before you give your peace lily another water.
- Repot: If you think it might be rootbound then remove it from it’s pot and look at the roots. If the roots are circling the pot or clearly too big for it then repot it into a bigger container. 1 or 2 inches larger is all that should be needed.
READ MORE: 8 Reasons your Peace Lily is Drooping and How to Revive it
3. Brown Tips
Brown tips are frustrating (and ugly!). They’re usually a sigh that your peace lily is unhappy, often from it’s environment.
Why it Happens:
- Low Humidity: Peace lilies love higher humidity. This comes from them being tropical plants that grow naturally in rainforests. So often our homes can’t match up in the way of humidity.
- Chemicals in Tap Water: Peace lilies are particularly sensitive to fluoride and chlorine. These chemicals are often found in tap water which most of us water our plants with.
- Excess Fertilizer: Too much fertilizer can build up in the soil and will burn the tips of the leaves.
How to Fix It:
- Increase Humidity: Misting regularly works well to increase the humidity, as does using a humidifier. Putting a pebble tray filled with water under your peace Lily can also help.
- Switch to Filtered Water: Use distilled or filtered water. Alternatively let the tap water sit out for 24 hours as the chemicals will be gone by the time you water your peace lily.
- Cut Back on Fertilizer: Peace lilies don’t need a lot of fertilizer. So do so every 6 to 8 weeks in the spring and summer but don’t fertilize in the fall and winter.
4. Brown Spots
Brown spots can be caused by sunburn. Less often pests like spider mites or fungal infections can also be the cause too.
Why it Happens:
- Sun Exposure: Peace lilies like indirect light and direct sun can burn the leaves.
- Pests: Spider mites, aphids and mealybugs will, given the chance, sap nutrients from peace lilies. This will eventually lead to brown or yellow spots on the leaves.
How to Fix It:
- Move to Indirect Light: if your peace lily is in spot that gets direct sun then move it somewhere else that gets bright but indirect light.
- Treat Pests: Look at the undersides of leaves for pests. If you find any then wipe the leaves using a mix of water and dish soap. Alternatively you can use insecticidal soap which will definitely do the job.
For more help see this guide to peace Lily brown leaves.
5. Flowers Browning Before Opening
When the flowers on a peace lily turn brown before they’ve even opened that’s a sign it’s stressed from either a lack of nutrients or not getting the right sort of watering.
Why it Happens:
- Water Stress: as mentioned earlier peace lilies don’t like being both under and overwatered. Doing so can cause the flowers to die early.
- Improper Pruning: Ir you’ve pulled or tugged at your peace lily instead of cutting it properly then you may have caused some damage. This can affect how well or if at all it can then produce new flowers.
How to Fix It:
Stop accidentally killing your peace lily.
My free guide 7 Gardening Mistakes That Are Killing Your Plants covers the most common reasons peace lilies fail — and the simple fixes that bring them back.
6. Curling Leaves
Curling or curled leaves are usually a sign that your peace lily has been stressed by a temperature extreme (very hot or very cold) or has been in too much direct light.
Why it Happens:
- Cold Drafts: Peace lilies do not like the cold air. If the temperature is below 65°F it can cause the leaves to curl and droop.
- Direct Sunlight: Too much direct light can cause the leaves to curl. It’s their way of defending themselves from the sun.
How to Fix It:
- Relocate to a Warmer Spot: Make sure your peace lily isn’t in a window or door that has a cold draft. You should be putting it where the temperature ranges from about 65°F to 85°F.
- Shade from Direct Light: Move it to a spot that gets lots of shade or alternatively use a sheer curtain and filter out the direct sunlight.
For more tips: 11 Reasons your Peace Lily Leaves are Curling and How to Fix
7. No Blooms
A peace lily that isn’t blooming probably isn’t getting enough light or nutrients. Being root bound can also stress it and stop flowers from blooming.
Why it Happens:
- Insufficient Light: Peace lilies need bright, indirect light to flower. If they’re in too much shade they either won’t flower at all or will stop flowering.
- Nutrient Deficiency: A lack of phosphorus, which is a big part of producing flowers, can stop them from blooming.
How to Fix It:
- Improve Lighting: Move the spot your peace lily is in so it’s getting more light but not direct sunlight. Or you can use a grow light to supplement the lack of light.
- Fertilize: Use a balanced fertilizer with an emphasis on phosphorus as that will encourage your peave lily to flower. Feed it every six weeks during the growing season.

8. Root Rot
Root rot is one of the more severe problems a peace lily can get. It’s usually down to overwatering or bad drainage. It can be fatal if you don’t address it quickly enough.
Why it Happens:
- Overwatering: When the soil stays too wet for too long the roots can’t get enough oxygen. This will eventually cause decaying.
- Poor Drainage: If your pro doesn’t have any holes for the water to drain from or the soil is too compacted it will mean the water doesn’t go anywhere and the roots will begin to rot.
How to Fix It:
- Repot with Fresh Soil: Take your peace lily out of the pot, trim any roots that you can see are rotting and then repot it in fresh soil that drains well.
- Improve Drainage: Make sure the pot it’s in has a good amount of drainage holes. Also the potting mix should be one that is designed for houseplants.
9. Foul Smell from the Soil
A sour or musty smell is almost certainly a sign of root rot and maybe even a bacterial infection.
How to Fix It:
- Repot Immediately: Take the plant out of its pot, get rid of the soggy soil and trim the damaged roots.
- Prevent Future Rot: Again, a pot that has good drainage is very important. And don’t overwater it.
Final Thoughts
As long as you understand the reasons behind these issues and take the right steps you can keep your peace lily healthy doing well.
The signs we’ve been through here are clear signs and your plants way do saying it’s struggling or unhappy. As long as you react and respond in the right way you shouldn’t have any problems bringing it back to full health.
Stop accidentally killing your peace lily.
My free guide 7 Gardening Mistakes That Are Killing Your Plants covers the most common reasons peace lilies fail — and the simple fixes that bring them back.