If you want to know how to really keep Monsteras happy – it’s all starts with the soil. Might sound too simple but it’s true.
I used to think a plant was a plant and dirt was dirt. Which was far too naive of me.
What changed my mind? Well my first monstera looked amazing for about three weeks before the leaves started turning yellow and it developed root rot. It was
Then that I started to get serious about soil mixes.
So I’m going to share how to create the perfect soil mix for your Monstera. One that will keep it happy and thriving for many years.
Why Soil Matters for Monsteras
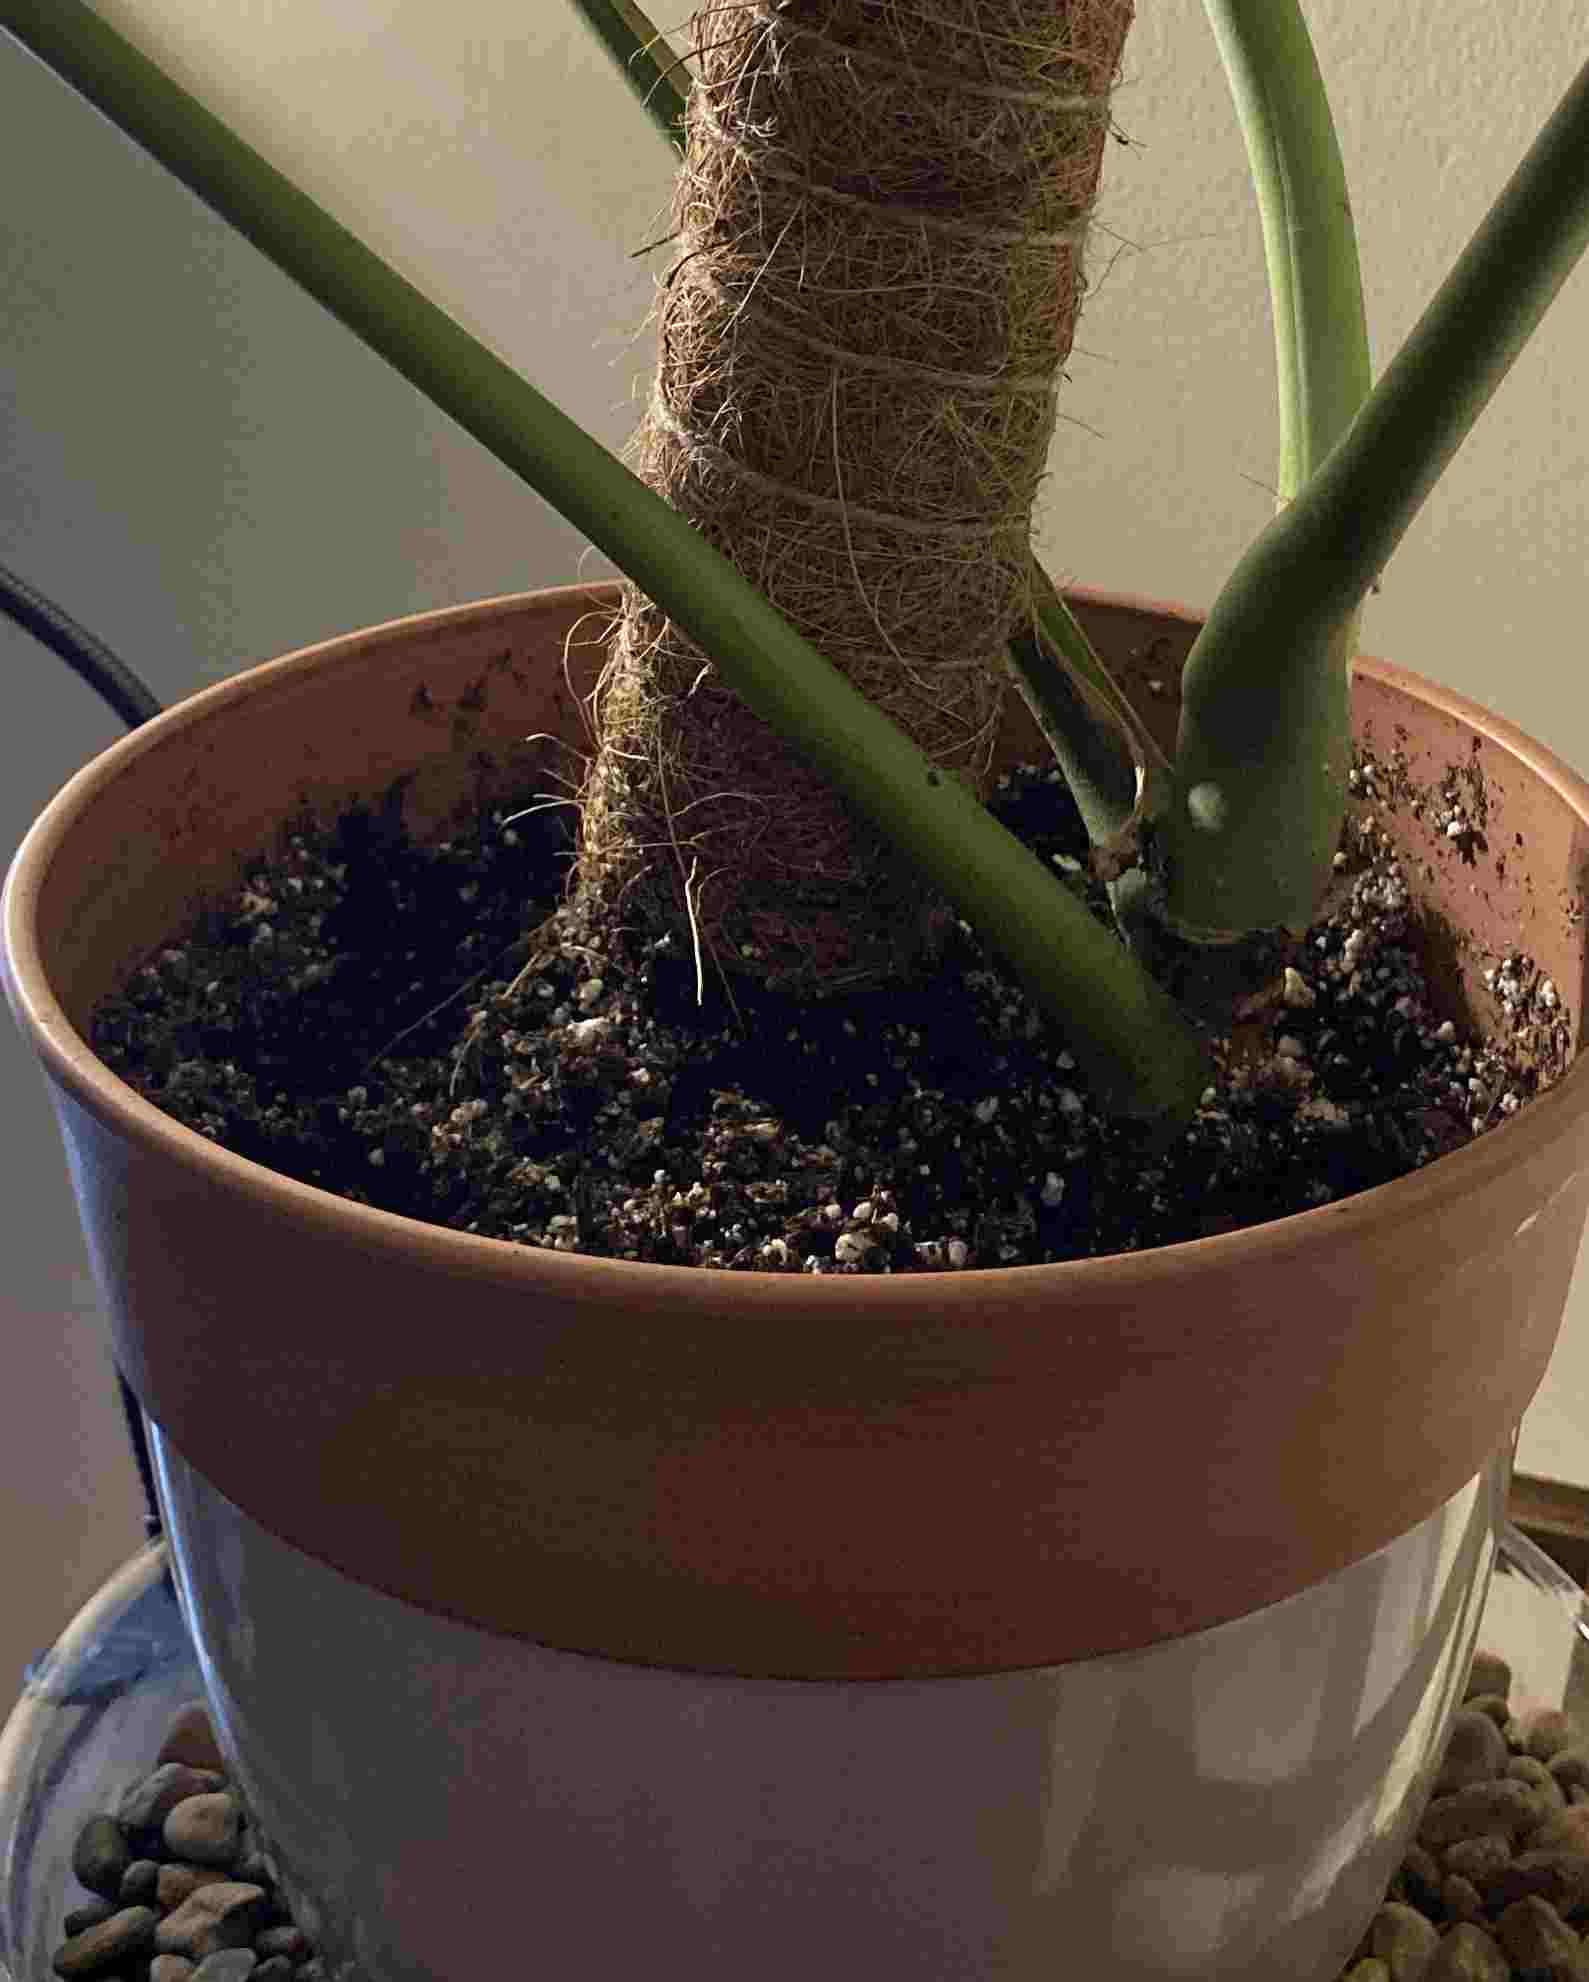
Something that isn’t really talked about enough is that monsteras aren’t just sitting in soil – they’re interacting with it. In their natural habitat they would grow up tree trunks in chunky forest floors. They’re not meant to sit in dense, water logged pots.
If you find your Monstera roots sitting in a soggy mess of soil you’ll see just how unhappy they are. They need oxygen just as much as water. The wrong soil will simpym suffocate them slowly.
The perfect monstera soil though creates a balance of moisture, oxygen and nutrients that lets the roots breathe while staying hydrated. If you don’t get this right you’ll be fighting an uphill batter no matter how good the light you provide is or how well you water it.
Key Qualities of a Good Monstera Soil Mix
Most potting mixes are different, especially when it comes to tropical aroids like monsteras. I’ve found the four most necessary qualities any good monstera mix needs.
Drainage
This is literally number one. Your soil must allow excess water to flow through it freely. Don’t ever let your Monstera sit in a pool or water for more than a few minutes. The water should move through the soil and out of the drainage holes fairly quickly.
I test every batch of soil mix by filling a pot and pouring water through first. if it takes forever to drain or pools on the top then it’s back to the drawing board.
Aeration
Monstera roots need breathing room. The soil should have plenty of little air pockets and spaces. When I squeeze a handful of good monstera mix it should feel light and fluffy, not dense and compacted.
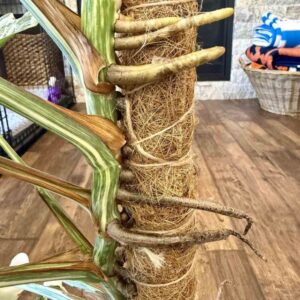
Most monsteras in nature grow as epiphytes (that is plants that grow on other plants). They start life high up in tree crevices and their roots are designed for environments that have good airflow.
Moisture Retention
Here’s where balance comes in. Drainage is crucial, of course, but the soil still needs to hold just enough moisture to keep the roots hydrated between waterings. So if it doesn’t retain moisture you’ll be watering constantly. But too much and you’re going to have a root rot problem on your hands.
The perfect mix feels slightly damp (not wet) a few days after watering.
Nutrient Content
Monsteras aren’t heavy feeders when compared to some plants. But even so they still need a steady amount nutrition to grow and thrive. Your soil mix should either contain slow release nutrients or provide a good environment for added fertilizers.

Basic Ingredients for Monstera Soil
Now for the fun part – let’s talk ingredients. These are the components that make up my monstera soil mix.
Potting Soil (The Base)
This provides the foundation and holds nutrients and some moisture. I avoid miracle gro because I’ve had issues with fungus gnats. But really any quality indoor potting mix can work as a starting point. Just don’t use it alone!
Look for something labeled for indoor plants or tropical plants if possible. These usually have a bit more perlite already mixed in than your standard potting soil.
The potting soil should make up about 30 to 40% of your final mix. Don’t use more than that or you’ll lose the drainage you’re working so hard to create.
Perlite
Perlite are little, white volcanic rock particles. And they are an absolute must for my monstera mix. They create very important air pockets and hugely improve the drainage. When you break open a good mix you should see perlite throughout it.
Perlite is extremely lightweight. This means it won’t compact over time like some ingredients might.
I add about 25 to 30% perlite to my mix. This seems to be the perfect amount. Any less and the drainage suffers. Use more and the mix doesn’t hold enough moisture.
Orchid Bark or Pine Bark
This is the secret weapon in a good monstera mix. Bark chunks create larger air spaces and copy the natural growing environment of monsteras. They would often grow up trees in the wild, so bark chunks is what they’re used to.
The first time I added orchid bark to my mix my monstera put out three new leaves in a month. It really had a big impact and fast.
Orchid bark is finer and pine bark often comes in larger chunks. Either works well but I prefer orchid bark for smaller plants and pine bark for the larger ones. The bark should make up about 20 to 25% of your mix.
Coco Coir or Peat Moss
Both of these help retain just enough moisture without it going soggy. I’ve switched from peat to coco coir for sustainability reasons (peat bogs are important carbon sinks and slow to regenerate).
Coco coir comes from coconut husks and works brilliantly for retaining water while still having good drainage. It’s also slightly more resistant to compaction than peat.
This should be about 15% to 20% of your mix. If you live somewhere very dry you could increase it just a little. If you’re in humid areas then maybe decrease it.
Optional: Activated Charcoal
I started adding a small amount of activated charcoal (about 5% of the total mix) after one of my pots began to smell a bit off. It helps keep the soil fresh ans it absorbs toxins and too much moisture.
This is especially useful if your pots don’t have great airflow or if your soil is staying too wet. It’s also good insurance in case you overwater.
Optional: Worm Castings or Compost
For a natural nutrient boost I add a small handful of worm castings (about 5 to 10% of the mix). They provide nutrients that don’t burn the roots of your Monstera.
Worm castings are, without beating aprons the bush, worm poop. But as gross as that may sound they are packed with tons beneficial microorganisms that will help your Monstera absorb the nutrients more efficiently. They’re basically plant superfood.
Recommended Soil Mix Ratios
I’ve spent a while tweaking the ratios to get it right. So this is the recipe that has given me the best results:
Standard DIY Monstera Mix (Beginner Friendly)
This is the mix I’ve found works for most monsteras in average home conditions:
- 1 part indoor potting soil
- 1 part perlite
- 1 part orchid bark
- Small handful of worm castings (optional but recommended)
Why this mix is so good is how simple it is while at the same time ticking all the boxes for what Monsteras need.
Chunkier Mix for Large Monsteras
For bigger Monsteras I use a slightly modified version:
- 1 part potting soil
- 1 part coco coir
- 1 part perlite
- 1 part pine bark (slightly larger chunks)
- Sprinkle of activated charcoal
The larger bark pieces create better air pockets that seem to work well with bigger roots. I’ve also found that mature Monsteras can handle (and seem to prefer) an even chunkier mix than the younger ones.
Store Bought Mixes That Work
Not everyone wants to blend their own soil, I get that, and it’s totally fine. If you’re short on time or space these pre made options work well too:
Fox Farm Ocean Forest is decent right out of the bag. Although I still like to add a bit of extra perlite and bark.

Espoma Organic Potting Mix works well with some amendments.

The best ready to use option though is actually sold as “aroid mix” at specialty plant shops or online stores. These are specifically formulated for plants like monsteras, philodendrons and pothos.

Whatever pre made mix you choose there’s a quick test should do: squeeze a handful when it’s moist. If it compacts into a tight ball then it needs more perlite and bark. It should hold its shape loosely and break apart easily when given a poke.
How to Mix and Prepare Your Soil
The actual mixing process matters too.
This is how I do it:
I start by spreading a tarp in my garage (you can use a large plastic bin or bucket if you’re working with smaller quantities). As things are bound to get messy this will help to contain it.
Pre moisten any coco coir bricks by following the package directions before mixing. Dry coco coir won’t properly mix and can actually repel water.
Add all dry ingredients to the mix and combine thoroughly with your hands or a small garden trowel. I mix until I can’t see any layers of the ingredients.
The final mix should feel light and fluffy. When you grab a handful and squeeze gently it should hold its shape momentarily before crumbling apart when you poke it. If it stays in a tight ball it’s too dense. If it won’t hold any shape at all it probably isn’t holding on to enough moisture.
I usually make enough for my whatever I’m repotting at the time as well some extra to keep in a sealed container for any top ups I need or emergency repottings.
Mistakes to Avoid
Using Garden Soil
Just don’t. Garden soil is way too heavy for container plants and will often contain pests, weed seeds, pathogens etc. Plus it compacts like crazy. Especially in pots.
Only Using Regular Potting Soil
Standard potting soil alone is too dense and hold on to too much moisture for Monsteras. It might seem fine at first but over time it compacts and suffocates yhe roots. It’s a mistake that a lot of people do and a big reason for struggling Monsteras. So be warned.
Skipping Drainage Holes
No matter how perfect your soil mix it wont work properly without drainage holes. Even just one decent sized hole makes a huge difference. If you have a decorative pot without holes that you want to use try making it a cover pot instead with a plastic nursery pot inside.
Forgetting to Refresh or Replace Soil
Soil breaks down over time. The bark decomposes, the mix compacts and nutrients get used up. I refresh my monstera’s soil every 1 to 2 years, either by completely repotting it or by carefully removing and replacing the top few inches.

Frequently Asked Questions
How often should I repot my monstera?
Young Monsteras that are growing benefit from being repotted once a year. More mature Monsteras can go 2 to 3 years. Instead of scheduling a certain time I watch for signs it needs it. That could be the roots coming out of the drainage holes, water running straight through without being absorbed or slowed growth during the growing season.
Can I reuse old monstera soil?
I don’t recommend reusing soil directly from one plant to another (there’s a risk of pest/disease transfer) but you can compost it or use it in garden beds. If you must reuse it then bake it in the oven at 180°F for 30 minutes so it’s sterilized. Afterwards mix it with fresh components since the structure will be degraded.
What if my plant is in the wrong soil now?
If your Monstera is struggling (yellowing leaves, soggy soil etc.), it’s worth repotting it immediately. Remove as much old soil from the roots as possible. If it seems OK but the soil doesn’t match these recommendations you can wait until the beginning of the growing season (spring) so it is shocked less.
Can I use LECA or other soilless methods?
Yes. Monsteras can thrive in LECA, pon or semi hydroponics. The transition can be awkward though. I lost some roots in my first attempt so consider whether it’s worth it. If you want to try though then start with a small Monstera cutting to experiment.
Final Thoughts
A healthy monstera really does start with healthy roots. And that begins with the right soil.
The time you spend getting the perfect soil mix will pay dividends for years to come. Whether you follow my exact recipes or create your own variation focus on these four qualities: drainage, aeration, moisture retention and nutrient content.
If you’re new to mixing your own soil then it’s best to start small and experiment. Thankfully not houseplants are forgiving. So if you make a mistake it shouldn’t matter too much. And Monsteras will show their appreciation quickly when you get things right.