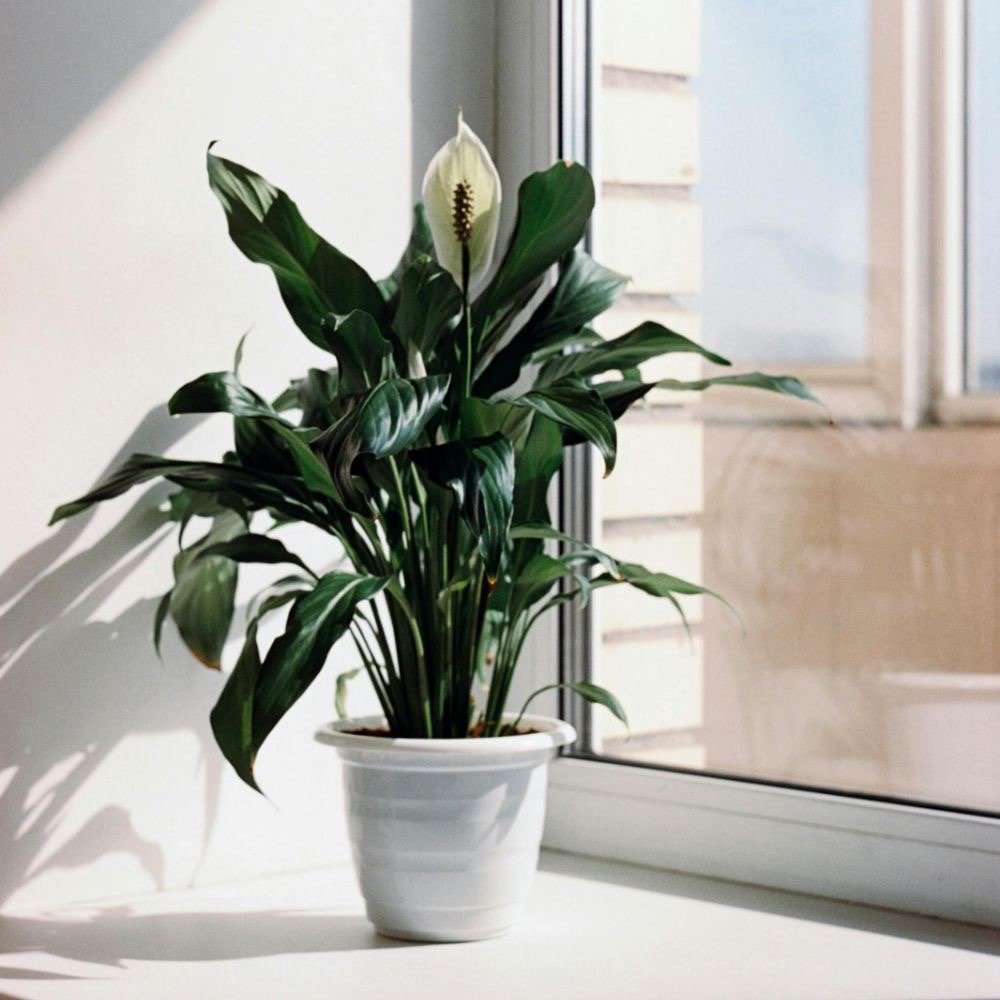
Peace lilies can and do survive in low light and forgive irregular watering. But “surviving” and “thriving” are different states, and a peace lily that’s merely surviving looks a lot different to one that’s growing well.
The surviving peace lily sits in the same corner with little light for years growing the occasional new leaf. The thriving peace lily, on the other hand, gives you a steady new growth, keeps its glossy leaves and flowers each year without fail.
The gap between those two states is not a matter of luck or genetics. It comes down to conditions.
Peace lilies grow faster and more consistently when specific things are right – light above all, then watering, then feeding, then soil and pot, then temperature and humidity. Get those things right and the plant will be happy.
Keep it in survival conditions and it will keep surviving, just not growing at anything like it has the potential to do so.
The following guide works through everything that affects how fast peace lilies grow, explaining not only what you should do but also why it works – because understanding the reason makes it much easier to apply the advice correctly and adapt it to your plant and conditions.
It also covers the mistakes that slow down growth because sometimes the best way to get a faster growing plant is just stopping the things that are holding it back.
Quick Answer
- Increase Bright, Indirect Light: Peace lilies grow faster with steady light. Move the plant closer to a window without direct sun.
- Feed Regularly: Use a balanced houseplant fertilizer every 4 to 6 weeks during the spring and summer to help the new leaves.
- Keep Water and Humidity Balanced: Water once the top inch of the soil dries and keep the humidity moderate for steady growth.
For more help see Peace Lily Care Guide: Tips to Get Thriving Plants.
Tip 1: Give It More Light Than You Think It Needs
Light is the most important aspect for any plants growth. And it’s no different for peace lilies.
If you want your peace lily to grow faster then you have to get the light right. It’s also the thing most people get wrong.
The low light reputation means people think of the peace lily as a shade plant that does best in dim conditions. It doesn’t. It tolerates dim conditions.
Its best growth – more new leaves, more often, with larger and glossier foliage – happens in bright indirect light.
The Difference Between Tolerating and Thriving
In proper low light a peace lily enters something close to a holding pattern. The existing leaves stay alive on the plant’s stored resources but photosynthesis is too limited to get the energy needed for consistent new growth.
New leaves appear slowly or not at all. The plant looks fine but its pretty much static. This is the peace lily tolerating its conditions, not doing well in them.
Move the same plant to bright indirect light and the change over the following weeks is often very striking. More photosynthesis means more energy, more energy means more growth and more growth means a noticeably different plant within a single growing season.
A peace lily in good light can grow a new leaf every two to four weeks during the growing season. In low light the same plant might only grow three or four new leaves over an entire year.
What Bright Indirect Light Means for a Peace Lily
Bright indirect light means close enough to a window to benefit from good natural daylight but not in the direct line of sunlight through the glass. Direct sun will burn peace lily leaves. The best place is a somewhere the plant gets good ambient light without any direct rays.
That is roughly one to three feet back from a south or west facing window, directly in front of an east facing window (morning sun is gentle enough for most peace lilies to handle without leaf scorch), or as close as possible to a north facing window.
If you can read a book in natural light without struggling at the position you’re considering the light is probably good enough. If you need to turn on a lamp or light to read comfortably then it’s too dim for peace lily growth.
Using a Grow Light to Supplement
If your space doesn’t get a bright indirect light anywhere then a full spectrum LED grow light will work as a substitute. A grow light running 12 to 14 hours per day gives enough energy for peace lilies to grow in spaces that natural light can’t reach.
Put it around 30 to 60cm above the plant. This is even more useful in winter when natural light levels drop and the plant’s growth slows even in a normally well lit spot.
Stop accidentally killing your peace lily.
My free guide 7 Gardening Mistakes That Are Killing Your Plants covers the most common reasons peace lilies fail — and the simple fixes that bring them back.
Tip 2: Water Correctly to Keep Growth Moving
Watering affects peace lily growth rate in two directions: too much water damages the roots and stops their ability to support new growth. Too little water means the plant can’t get the moisture it needs to keep producing leaves.
You’ll want to find a middle ground – consistently moist but never waterlogged.
See our full peace lily watering guide for more help.
Water When the Top Inch Is Dry, Not Before and Not Much Later
The finger test is the most reliable watering guide for peace lilies: push a finger about 2 to 3cm (an inch) into the compost. If it feels dry at then water thoroughly. If it still feels damp or cool, wait and check again in a day or two.
This sounds simple but it’s a lot more reliable than watering on any kind of fixed schedule because the rate at which peace lily compost dries out depends on things like the light levels, temperature, pot size, compost type, and season – all of which vary.
Watering before the top inch has dried keeps the compost consistently too wet, which damages the roots over time and limits the plant’s ability to support new growth. Waiting until the plant is wilting before you water – which is easy to do with peace lilies because they show they need water so dramatically – means it goes though drought stress cycles that slow the growth and cause the brown crispy leaf tips. Catch it before the wilt and you keep the growth momentum going.
Water Thoroughly When You Do Water
When you do water, water properly. Pour water slowly and evenly over the soil until it runs from the drainage holes at the base of the pot.
This makes sure all of the roots gets moisture, not just the top layer. Shallow watering – just wetting the surface – keeps roots concentrated at the top of the pot where they’re most vulnerable to drying out, and means the lower roots aren’t ever getting enough.
After watering let the pot drain completely and empty any water that collects in the saucer after 30 minutes. A peace lily sitting in standing water has its roots in permanent damp which is where root rot is most likely to start from.
Water Quality: A Detail That Matters
Peace lilies are among the houseplants most sensitive to the fluoride and chlorine in tap water. Fluoride in particular builds up in the tissues of leaves and causes brown leaf tips – tips that are then wronglg put down to underwatering or low humidity and never properly addressed.
If your tap water is heavily treated or hard, using collected rainwater, filtered water or water that has been left to stand overnight (which allows most chlorine to evaporate) will give you noticeably better leaf condition over time.
Water temperature matters too. Cold tap water given to a warm rooted plant causes a temperature shock that temporarily stops the roots function properly.
Let water come to room temperature before using it. Or run the tap until it’s no longer cold. It’s a two minute habit that reduces a stress the plant doesn’t need.
Tip 3: Feed Regularly Through the Growing Season
Feeding is the aspect of peace lily care most often neglected. Maybe because the plant’s low maintenance reputation gives the impression that it doesn’t need much.
It doesn’t need aggressive feeding though. But consistent, appropriate feeding through the growing season makes a big difference to how much it grows and the quality of the leaves. A well fed peace lily grows more new leaves and maintains larger leaves than an unfed one in otherwise identical conditions.
What to Feed and When
A balanced liquid houseplant fertiliser – one with roughly equal parts nitrogen, phosphorus and potassium, often labelled as a general or all purpose houseplant feed – given at half the recommended strength every two to four weeks from early spring through late summer is a reliable and gentle feeding programme.
Half strength rather than full strength matters: peace lily roots are sensitive to a build up of salts from fertiliser and over concentration causes more harm than under feeding. Consistent light feeding outperforms occasional heavy feeding in terms of both growth and longer term root health.
The nitrogen component of the fertiliser is what most helps and supports new leaves. Nitrogen is the nutrient responsible for vegetative the growth.
A feed with a slightly higher nitrogen ratio in spring, when the plant is beginning its most active growing period, can give the season an extra push. From midsummer onward a more balanced feed is better as the plant’s growth slows naturally ahead of autumn.
See this guide for the best fertilizer for peace lilies.
When to Stop Feeding
Stop feeding completely from early autumn and don’t start again until you see signs of new growth returning in spring – usually a new leaf spear coming from the centre of the plant, or existing leaves looking fresher.
Feeding a plant that isn’t actively growing means the nutrients build up as salts in the compost rather than being used, and those accumulated salts gradually damage roots and alter the chemistry of the soil in ways that become a problem the following season.
The Annual Compost Refresh
No feeding programme fully compensates for compost that has become old, compacted and depleted. The organic matter in potting compost breaks down over time, the physical structure collapses and built up salts from years of fertiliser and tap water change the chemistry of the soil.
Top dressing, which is where you remove the top 2 to 3cm of compost from the pot surface each spring and replacing it with fresh houseplant mix, is a quick way to refresh the root zone without a full repotting. It takes ten minutes, costs very little and makes a real difference to the nutritional environment the plant’s new growth emerges into.
Tip 4: Get the Soil and Pot Right
The soil a peace lily grows in will decide how everything else works out. The best watering habits in the world can’t compensate for a soil that drains so poorly that the roots are always waterlogged, or so fast that moisture disappears before the roots can use it.
Getting the growing medium right is going to give your plant a good foundation – it’s the environment the roots live in and root health is the so important for everything above ground.
What Peace Lily Soil Needs to Do
Peace lily soil needs to hold enough moisture to stay damp for a few days between waterings, drain freely enough that the air spaces in the compost are restored within a few hours of watering and stay open rather than compacting into a mass over time.
A standard houseplant or indoor plant compost with 20 to 30% perlite added does all three things for most peace lilies. The compost holds on to moisture and provides nutrients; the perlite improves the drainage and stops it compacting.
Don’t use garden soil though – it compacts pretty much straightaway in a pot, drains badly and introduces pathogens that aren’t a problem in the open ground but grow out of control in a container. Multi purpose compost can work but tends to be too dense for peace lily roots – if it’s what you have, add perlite at a 30 to 40% ratio to compensate.
The best ready made option is a dedicated houseplant or aroid compost which is made for the balance of moisture retention and drainage that tropical houseplants prefer.
Pot Size and Material
Pot size affects growth in a way that surprises many. A pot that’s much too large holds more compost than the roots can take moisture from, which means the outer parts of the pot stay wet long after the roots have had what it needs – creating permanently damp conditions around a section of the roots that’s particularly susceptible to rot.
A pot that’s the right size for the current roots – with roughly an inch or two of fresh compost around the roots – dries at the same speed that matches the plant’s water uptake, keeping the root environment healthier and supporting faster, more consistent growth.
Pot material affects drying rate too. Terracotta pots are porous and let moisture evaporate through the sides. This means they dry faster than plastic or ceramic.
In a bright, warm spot where the plant is being watered this can be an advantage – reduced waterlogging risk. In a cooler or lower light place where the plant is using water more slowly, terracotta can dry out too fast and make a mild drought which causes stress between waterings. Match your pot material to your conditions rather than defaulting to one or the other.
When to Repot
A peace lily that has outgrown its pot – so the roots growing out from drainage holes, the soil drying out too fast, the plant looking top heavy – needs repotting into a pot one size up with fresh compost. Repot it in spring as it gives the plant the full growing season to establish in the new space.
How growth responds to repotting a root bound peace lily into fresh compost is usually the biggest and most dramatic improvement you can get – plants that have been stalled for months will go on to grow multiple new leaves within weeks of being given room to expand.
Tip 5: Optimize Temperature and Humidity
Peace lilies are tropical plants and they do best in the conditions like warm, stable temperatures and reasonably good humidity. These two variables are often overlooked because they’re invisible – you can see a plant in poor light, you can feel soil that’s too wet or too dry, but temperature and humidity need more specific attention.
Yet both make a real difference to growth, especially in the winter when our homes, with central heating, become warm enough but too dry.
Temperature: Warm and Stable
Peace lilies grow most in temperatures between 18 to 27 degrees Celsius (65 to 80 degrees Fahrenheit). Within this range, metabolic processes happen properly, roots take up water and nutrients effectively and the plant produces new growth as fast as it naturally can.
Below about 15 degrees Celsius (59 degrees Fahrenheit), growth slows a lot – the activity of enzymes decreases, roots becomes less efficient and the plant begins to become sort of dormant even if it’s not technically dormant.
Try to keep peace lilies away from cold drafts coming from windows and doors, especially in the winter. Keep them away from any vents of air conditioners in the summer too.
Don’t put them in rooms that get a lot cooler at night – an unheated spare room that drops to 12 degrees on a winter night is not a good spot for a peace lily even if it looks bright and appropriate during the day. Consistency of temperature matters almost as much as the temperature itself – repeated cold shocks slows growth in a way that adds up over a season.
Humidity: More Than Most Homes Provide
Peace lilies come from humid tropical environments and like the humidity levels to be 50% or higher. Most centrally heated homes in temperate climates run at 30 to 40% humidity in winter, which is much less than what peace lilies would prefer.
The effect of low humidity isn’t always immediately obvious – the plant doesn’t dramatically wilt or drop leaves as a reaction to dry air the way it does to underwatering – but it shows up over time as brown leaf tips and edges, less glossy leaves and slightly slower growth than the plant is capable of in more humid conditions.
The best way to raise local humidity around a peace lily without a humidifier is grouping. That means putting the plant near other plants, which collectively release moisture through their leaves and this creates more humidity around all of them.
A pebble tray filled with water, with the pot sitting on the pebbles above the water level, gives some extra humidity as the water evaporates. A small room humidifier near the plant is the most effective solution for plants that really love humidity, and peace lilies kept in more humid conditions consistently produce larger, glossier leaves and more new growth than those in dry air.
Misting – spraying leaves with water – is widely recommended for humidity but is pretty ineffective as a long lasting solution. The water evaporates within minutes and so provides very little benefit.
In some situations wet leaves can encourage fungal problems. Pebble trays and plant grouping will give them more humidity with less effort and without the risk of fungus.
Tip 6: Adjust Your Care Across the Seasons
Peace lily care that works well in summer will harm the plant in winter if you don’t change it. The plant’s needs a big shift across the year in response to changing light levels, temperatures and its own growth cycle – and care that doesn’t adapt to those shifts either holds the plant back or stresses it.
Seasonal awareness is one of the marks of proper, good plant care and it makes a big difference to the plant’s health and growth all year round.
Spring: The Most Important Season for Setting Up Growth
Spring is when making an intervention will make the biggest difference. As the days get longer and light improves, the peace lily begins to stir from its winter slowdown – and the conditions it finds in early spring set it up for the whole growing season. Repotting (if needed) should happen in early to mid spring, before the plant is in full growth mode but after the risk of it sitting in cold, wet compost through the coldest weeks has passed.
Resume feeding once you see the first signs of new growth. Move the plant to its brightest position if it was shifted for winter. Check the compost – if it looks compacted or depleted, top dress or repot before the growing season gets fully underway.
Summer: Support Growth Consistently
Through the summer the peace lily’s growth rate is at its highest and its demands are greater too. Water more frequently – checking every few days rather than weekly – because warmth and active growth increase water uptake significantly.
Feed every two to four weeks. Watch for pests, which are more active in warmer conditions and can slow growth substantially if populations build up unchecked.
If the plant is in a position that gets afternoon sun through a south or west facing window maybe move it slightly back from the glass or add a sheer curtain during the hottest months – burnt leaves in the summer sun will damage existing leaves and also sends the plant’s resources toward repair rather than new growth.
Autumn: The Transition Period
From September onwards begin slowing down how often you’re watering as the plant’s water demand decreases with shortening days and cooler temperatures. Stop feeding by early to mid autumn.
The compost will take longer to dry after watering than it did in summer and continuing to water at the same frequency into autumn is one of the most reliable ways to make overwatering conditions in a plant that was being perfectly watered two months earlier. The plant itself guides you – fewer new leaves appearing is a signal that growth is slowing and that care intensity should follow suit.
Winter: Rest, Don’t Neglect
Winter is not a time to ignore your peace lily but it is a time to reduce input. Water when the top inch of compost is dry – which will happen less often than in summer.
Keep the plant in its brightest spot to compensate for less natural light. Maintain consistent warmth and keep it away from cold drafts.
Don’t feed. Don’t repot. If growth has slowed to one new leaf every six to eight weeks or less, that is appropriate winter behaviour and doesn’t need any sort of intervention.
A grow light on a timer can keep the plant more actively growing through winter if you want to maintain faster growth year-round – otherwise, accepting the seasonal slowdown and working with it produces a healthier plant than fighting it.
What Not to Do: Mistakes That Slow Peace Lily Growth
Sometimes the best way to get a faster growing peace lily is identifying what you’re currently doing that’s holding it back and stopping that. These are the most common mistakes that will come from good intentions but done slightly wrong.
Keeping It in a Dark Corner Because It Tolerates Low Light
This is the one that has the biggest impact on fast it grows. Tolerance of low light is not the same as preferring it.
Every peace lily being grown in a poor light spot – away from any window, or in a north facing room several feet back from a small window – is growing much slower then it could be. Moving it into bright indirect light will have a massive effect on how it grows. If this means accepting that your decorative dark corner needs a different plant, that is worth knowing.
Watering on a Fixed Schedule
Watering every Monday, or every seven days, or on any fixed schedule regardless of what the soil actually needs, is going to lead to either overwatering or underwatering – alternating between the two as conditions change through the year.
In the summer the plant might need water every four to five days; in winter every twelve to fourteen days. A schedule that worked in July is likely to be overwatering by November.
Check the soil. It will tell you when to water.
Using Cold Tap Water Directly
Cold water used on warm roots causes a stress response that temporarily stops then roots from functioning properly – small individually, but over months of regular watering it adds up.
Combined with fluoride and chlorine sensitivity, using cold tap water directly is a combination that produces brown leaf tips, mildly stressed roots and growth that’s slightly slower than it needs to be.
Fill the watering can the day before and let it come to room temperature. The improvement in leaf condition over time is usually visible within a few months.
Feeding in Autumn and Winter
Fertiliser applied to a plant that isn’t actively growing doesn’t support growth – it just builds up in the soil as salts. Salt build up will stop the roots functioning and can cause damage to the root tip that shows up as brown leaf tips and slowed growth.
Stop feeding in early autumn and don’t resume until you see spring growth. This is one of those counter intuitive plant care rules – doing less gets better results than doing more – that more experienced growers know well and beginners often resist.
Repotting Into a Much Larger Pot
The instinct when repotting a peace lily is to give it plenty of room – a much bigger pot so it doesn’t need repotting again for a long time. In practice a pot that’s much larger than the current roots holds more compost than the roots can draw moisture from, keeping the outer parts of the pot wet and creating the conditions for root rot.
Go up one pot size at a time – 2 to 5cm larger in diameter. It needs to be repotted more often as the plant grows, but it’s better for the plant’s root health and growth rate than jumping to a pot that’s too big.
For more help see our guide to the major signs your peace lily needs repotting.
Moving the Plant Repeatedly
Peace lilies, like most houseplants, take time to adjust to a new position – new light levels, new temperature range, new humidity etc. Each move restarts that adjustment period and can trigger leaf drop or a temporary pause in growth as the plant acclimatises.
The impulse to try a different spot when the current one doesn’t seem to be working is understandable. But frequent repositioning stops the plant from ever fully settling. Choose the best available position thoughtfully, move the plant there and give it at least two full months before seeing whether it’s working.
Ignoring Pests Until They’re Obvious
Spider mites, mealybugs and scale insects all feed on peace lily sap and take the plant’s resources from growth to repair the damage. By the time you can see a pest infestation – webbing, significant white cottony clusters, lots of sticky residue – it has usually been building for weeks or months.
During that time the plant has been putting energy into coping with the infestation rather than into new growth. Check under leaves and at stem junctions every few weeks as part of your regular care routine.
Early detection means a quick treatment rather than a prolonged battle and a plant that’s pest free consistently outgrows one that’s managing ongoing pest pressure.
This guide to treating peace lily pests will help.
The Realistic Picture
With all these variables optimised – bright indirect light, correct watering, regular feeding, good soil in an appropriate pot, warm stable temperatures, decent humidity, seasonal adjustments in place and nothing slowing it down – a healthy adult peace lily in active growth can grow a new leaf every two to four weeks through the growing season. That’s a very different plant by the end of a season compared to the start of it.
That’s also the upper end of the realistic range, not a baseline expectation. Most peace lilies, in most home conditions, produce something between one and four new leaves per month in the growing season.
Why you want to optimize it’s conditions isn’t to push the plant beyond its natural growth rate – it’s to remove the obstacles that are stopping it from reaching that rate in the first place.
My peace lily I’ve grown in the same east facing position for three years now grows from March through September – roughly one new leaf every two to three weeks in the peak of summer, maybe one every month or so as autumn arrives and then slowing to almost nothing through the darkest weeks.
It gets watered when the top inch is dry, fed every three weeks from April to August with a half strength balanced feed and repotted each spring into fresh compost in the same pot (it’s not yet root bound)
It’s not a complicated routine. It’s just a consistent one done in the right position. That consistency, more than any single tip, is what gets a peace lily to grows at its best.
Stop accidentally killing your peace lily.
My free guide 7 Gardening Mistakes That Are Killing Your Plants covers the most common reasons peace lilies fail — and the simple fixes that bring them back.