ZZ plant are one of those plants that is seen as being nearly indestructible. It doesn’t mind low light, fluctuating temperatures, irregular watering and some general neglect and will keep on growing.
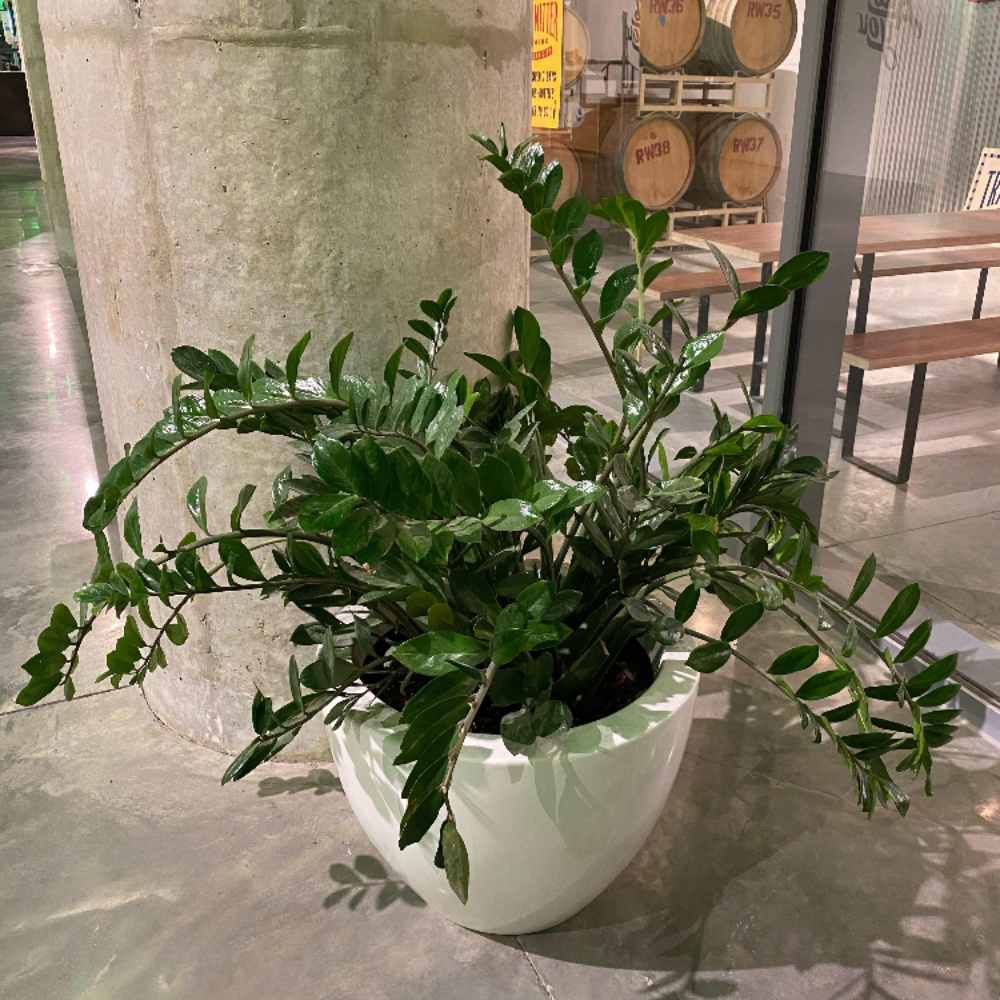
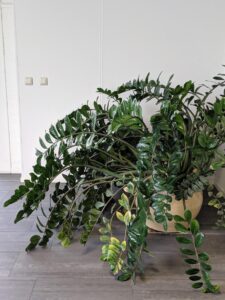
But there is one thing the ZZ plant is stubborn about, and that is growing quickly into a full and bushy specimen. Most ZZ plants spend years looking pretty much the same: a few arching stems, dark leaves, elegant but just a bit sparse.
Exactly the look that makes you want more of it! Sadly though the plant is largely indifferent to that want.
If you have a ZZ plant that looks thin, leggy or just less full than you’d like then the chances are you aren’t doing anything wrong. The ZZ plant is a a slow grower under any conditions and the gap between what it looks like and what you imagine it could look like is mostly a matter of time and the right conditions rather than any special technique.
That said there are things you can do to get it to grow faster and fuller. There are a few approaches that work surprisingly well.
I’m going to take you through all of it: why ZZ plants grow sparsely, how to get the best conditions for stem production, what pruning does and doesn’t achieve, how repotting and dividing fit into the picture and real expectations about how long it will take.
Quick Answer
- Increase Bright, Indirect Light: ZZ plants fill out more in stronger light. Move the plant closer to a bright window without direct sun.
- Prune Long Stems: Trim any leggy or stretched stems at the base to encourage new shoots to grow from the rhizomes.
- Rotate and Feed Lightly: Turn the pot every few weeks to get growth even and feed it lightly during the spring and summer.
Why ZZ Plants Grow Slowly and Sparsely
Understanding why the ZZ plant grows the way it does changes how you get fuller growth from it. It’s not a plant that responds in the same way as a pothos or a monstera and the reason comes from where it originates from and how it survives there.
The Rhizome
The ZZ plant is native to eastern Africa – specifically the dry grasslands and forests of Kenya, Tanzania and Zimbabwe – where the rainfall is seasonal and unpredictable. To survive the long period of dryness the plant evolved large underground rhizomes that store water and nutrients.
These rhizomes are what you find when you take a ZZ plant out of its pot: they look a bit like potatoes, are sometimes quite large and filled with reserves that the plant draws on when the conditions are poor.
This survival strategy is the why ZZ plants grow slowly. A plant that stores reserves for hard times doesn’t need to grow quickly – it can afford to be conservative.
When the conditions are good a ZZ plant takes some energy and puts it into new growth, but it doesn’t go mad with it the way a tropical plant from an environment full of resources would.
It’s playing a long game and no amount of fertiliser or light adjustment is going to turn it into a fast growing plant. The rhizome strategy is just put of its biology.
What New Growth Looks Like in a ZZ Plant
New growth on a ZZ plant grows as entirely new stems, not as extension of existing ones. A new stem starts as a small shoot from the soil at the base of the plant, grows upwards over a few weeks into a full arching stem and then the individual leaves on that stem don’t grow anymore once they’ve reached their mature size.
This is different from plants like pothos or monsteras where the growing tip of an existing stem keeps getting longer and producing new leaves continuously.
What that means is making a ZZ plant bushier comes down to encouraging more new stems to emerge from the rhizome – not making the existing stems grow more leaves. Pruning the tip of an existing ZZ stem doesn’t produce branching or new growth from that stem the way it might with other plants.
The way the plant grows is completely from the base and that’s where all your efforts at encouraging fuller growth need to be directed.

Light Optimisation
Light is the biggest thing that makes the most difference to ZZ plant growth rate. This surprises people because ZZ plants are usually marketed as plants for low light. Now, don’t get me wrong, they do survive in low light, which is part of their appeal.
But surviving in low light and thriving in low light are two different things and a ZZ plant in proper low light is in survival mode, not growth mode. The rhizome reserves let it to continue to live through months of dim conditions but the plant won’t be producing new stems at any decent rate.
The Difference Between Surviving and Thriving
In very low light – a north facing room a quite a few feet from a window, a dim corner of an office – a ZZ plant will stay alive for a very long time. The leaves on the stems will stay dark and glossy. The plant will look fine.
But it won’t grow any new stems because the plant is allocating what little energy it can gather from the available light to maintenance rather than growth. You will have the same number of stems in three years as you do today and you will wonder why the plant isn’t getting any fuller.
Move the same plant to a position with bright indirect light – a few feet from a south or east facing window, or directly in front of a north facing window where it gets the full light from that direction – and the difference in growth rate over a season is big. More light means more photosynthesis, more photosynthesis means more energy available for new stem and more stems will meanba noticeably fuller plant over time.
What “Bright Indirect Light” Means for a ZZ Plant
The best light position for a ZZ plant that you want to grow more is bright indirect light: close enough to a window that you can read a book by the natural light but not in the direct beam of that light through the glass. In a south or west facing room that general means one to three feet back from the window.
In an east facing room the gentler morning sun means the plant can sit closer to the window – even directly in front of it – without the risk of the leaves getting burnt. In a north facing room put the plant as close to the window as possible to get the most available light.
ZZ plants can handle some direct sun, particularly the gentler morning light through an east facing window. What they don’t handle well is intense afternoon sun through a south or west facing window, which can burn the leaves, sometimes even bleaching them.
The very glossy ans dark look of ZZ leaves is partly an adaptation to the light – the glossy surface reflects some light to prevent them from overheating – but this protection has its limits.
Grow Lights as a Supplement
If your home/space doesn’t have a bright indirect light spot available – a basement flat, a windowless office, a room with small north facing windows – a grow light on a timer is a good solution. A full spectrum LED grow light running 12 to 14 hours a day can substitute for natural bright indirect light and will give better growth than dim natural light alone.
Put the light 30 to 60cm above the plant’s canopy for the best results. This is becoming more affordable, thankfully. A decent LED grow light suitable for a ZZ plant costs less than most houseplants and lasts for years.
Watering and Feeding for More Stem Growth
The ZZ plant’s rhizome storage system makes it tolerant of underwatering to an unusual degree – but tolerance of neglect is not the same as thriving under neglect. A ZZ plant that’s been underwatered or underfed for years has smaller rhizomes than one that’s been well cared for and smaller rhizomes mean less energy stored and available for new stems.
Watering and feeding correctly won’t make a ZZ plant grow faster but doing it poorly will definitely keep it at the slow end of its already modest growth rate.
Watering: The Balance Between Too Much and Too Little
The standard ZZ watering advice is to let the soil dry out completely between waterings. And that’s right as a minimum standard for keeping the plant alive.
To get more growth you can be a little more generous without getting too close to overwatering territory. During the growing season (spring through early autumn) watering when the top two inches of soil are dry rather than waiting for the entire pot to dry out gives the roots slightly more consistent moisture.
You want to make sure to never let the plant sit in waterlogged soil. The rhizomes rot if they’re consistently wet even more than standard roots and a rotting rhizome is a serious problem that sets the plant back significantly.
Well draining potting mix and a pot with drainage holes are absolutely a must. Within those constraints the ZZ plant benefits from slightly more water during the growing season than its reputation for tolerating drought suggests.
In winter when growth slows or stops switch back to drought tolerance mode. That means watering every three to four weeks or when the soil is completely dry throughout the pot.
How much water the plant demands drops a lot in low light and cool temperatures and overwatering in winter is much more likely to cause rhizomes to rot than any amount of generous summer watering.
For more help see our ZZ plant watering guide.
Feeding: Be Consistent but Not Aggressive
Feeding is one of the most overlooked aspects of ZZ plant care among people who’ve accepted the plant’s reputation for tolerating neglect. The ZZ plant does not need heavy feeding but consistent, appropriate feeding through the growing season gives it the nutrients that support new stems and keeps the existing leaves in excellent condition.
A balanced liquid houseplant fertiliser used at half the recommended strength every four weeks from early spring through to the late summer is a good and gentle way to feed it that won’t risk over fertilisation but at the same time gives the plant nutrients over a season. Some people prefer a slightly higher nitrogen feed in spring when the plant is beginning to invest in new stem growth, shifting to a more balanced feed through summer. Either way works – the important thing is to be consistent rather than any particular formula.
Do not feed in autumn or winter. The plant is not growing and cannot use the nutrients which will just build up as salts in the soil and can damage roots over time. Resume feeding only when you see signs of growth returning in the spring – usually a new stem beginning to emerge or existing leaves looking particularly fresh and glossy.

Pruning and Encouraging New Growth
Pruning a ZZ plant is a topic where a lot of the advice circulating online is takeb from other plants and doesn’t apply well here. What pruning does and doesn’t achieve – given the ZZ plant’s specific growth habit – will save you from getting involved and doing something that look productive but don’t really help.
What Pruning Cannot Do on a ZZ Plant
On many houseplants, cutting the growing tip of a stem stimulates branching – the plant sends out multiple new shoots from the cut point, creating a bushier appearance on that stem. This is why you pinch out the tips of pothos, tradescantia, and many other trailing or climbing plants to make them fuller.
It does not work on ZZ plants. A ZZ stem that is cut does not branch. It does not produce new growth from the cut point.
The cut stem will seal over and the remaining leaves on it will persist but no new growth comes from that stem as a result of the cut.
This is a characteristic of the ZZ plant’s growth, not a sign that the plant is unhealthy or that you’ve done something wrong. Cutting stems to make a ZZ plant bushier is not worth hour time and if you cut a stem short you’ll be left with a shortened stem and no mechanism for it to become fuller.
What Pruning Can and Should Do
Pruning does have a legitimate role in ZZ plant care, just not for bushiness. Remove entire stems that are yellow, damaged or look wrong by cutting them off at the base of the plant, as close to the soil surface as possible.
This serves three purposes: it removes plant material that is consuming the plant’s limited resources without helping with its display, it improves the air flow around the base of the plant which can stop any fungal issues and it tidies the how the plant looks. None of these will produce new stems but maintaining the plant in good overall health – which removing damaged material contributes to – supports the conditions for more growth.
If a stem has become very long and leggy removing it completely is the better choice rather than cutting it partway. A clean removal at the base is best.
The space left by the removed stem may, over time, be filled by a new stem coming from the rhizome – though this is not guaranteed and should not be the main motivation for the cut.
Encouraging New Stems From the Rhizome
Since all new growth comes from the rhizome and emerges from the base of the plant the question of how to make a ZZ plant bushier is really the question of how to encourage the rhizome to send up more new stems. The answers are the same answers covered throughout this guide: more light, appropriate watering during the growing season, consistent feeding and a pot that isn’t stopping the rhizome’s from getting bigger. There is no pruning shortcut to this – it’s a combination of good conditions and time.
One thing that sometimes helps in practice: clearing the surface of the soil around the base of the plant in spring and removing any old compacted compost or debris that may be stopping emerging shoots. New ZZ stems are surprisingly fragile when they first emerge and a compacted or crusty soil surface can stop them from breaking through.
This is a minor intervention but worth doing as part of your spring care routine – use a chopstick or pencil to loosen the surface compost around the base without upsetting the rhizomes below.
Repotting and Dividing to Create a Bushier Plant
Repotting and dividing are two different interventions that serve different purposes when it comes to bushier ZZ plants. Understanding the difference – and knowing when each one is appropriate – is one of the more useful parts of this guide.
Repotting: Giving the Rhizome Room to Expand
A ZZ plant where the rhizomes have completely filled the pot has nowhere to expand. New rhizome growth and the new stems that rhizome growth produces need space in the pot as well as enough water and nutrients.
A severely root and rhizome bound ZZ plant will grow fewer new stems not because the conditions above the ground are wrong but because there is literally no room underground for the rhizomes to get any bigger.
Check the rhizome situation by sliding the plant out of its pot. Healthy ZZ rhizomes are firm, pale to a sort of brown and a little bit waxy. If the pot contains a dense packed mass of rhizomes with very little potting mix the plant needs a larger pot.
Go up one size – usually 2 to 5cm bigger in diameter. A pot that’s too large holds on to too much moisture that the roots can’t absorb, which makes it more likely the roots will rot. One size up is the right amount.
Use a well draining potting mix for the new pot – a standard houseplant compost with 20 to 30% perlite added works well. Pot up in spring at the start of the growing season which gives the rhizomes the entire growing season to expand into the new space and potentially send up new stems as a result.
Dividing: One Plant Becomes Several Fuller-Looking Plants
Division is the most effective way for getting a fuller looking ZZ plant – though it works by a different mechanism than you might expect. Rather than making one plant produce more stems, division involves separating a multi rhizome clump into two or more smaller sections and repotting each section separately.
Each section, given its own pot, looks a lot fuller than the original plant did because the stems it has fill the pot appropriately rather than being lost in a large container.
This is particularly useful if you have a ZZ plant that’s been in the same pot for a few years and has developed a large clump of rhizomes. Dividing it gives you multiple plants, each of which can be grown on independently, and each of which has a fresh start in new compost with room for its own rhizomes to grow.
How to Divide a ZZ Plant
- Water the plant the day before dividing to reduce transplant stress on the roots.
- Remove the plant from its pot and shake off as much potting mix as you can from around the rhizomes. You need to see the rhizomes clearly to divide it sensibly.
- Find the natural separation points in the rhizome clump – places where groups of rhizomes are connected by a thinner section that can be cut cleanly. Don’t force apart rhizomes that are tight together – look for divisions that the plant has already made.
- Separate the sections using scissors or a knife. Each section needs at least one or two stems and a healthy part of rhizome. Sections with more rhizome have more stored resources to draw on as it establishes and so will recover quicker.
- Dust any surfaces you’ve cut with powdered cinnamon or sulphur to reduce any risks of fungal infections at the wound.
- Pot each section into an appropriately sized pot – just large enough to accommodate the rhizome section with a couple of inches of fresh compost around it. Too large a pot and the excess compost stays wet too long.
- Water lightly and place in bright indirect light. Don’t feed it for four to six weeks while the divided sections reestablish.
Expect some leaves to turn yellow and there to be stem loss in the weeks after division – this is normal and is the plant shedding what it can no longer support while its roots reestablish. Don’t panic and don’t overwater in response.
By the end of the growing season divided sections usually look healthy and settled, and the following spring they often produce new stems more actively than the original crowded plant was doing.
Patience and Realistic Expectations
Everything in this guide will help. Better light will give you more new stems.
Consistent feeding will support more active rhizome growth. Repotting it into fresh compost with more room will stop anything holding back it from expanding.
Dividing will give you multiple fuller looking plants more quickly than waiting for one plant to fill out on its own.
But the ZZ plant will still be a slow grower. That is its nature and it is not a problem to be solved – more so it’s a characteristic to accept, understand and work with.
A ZZ plant in the best possible conditions will produce more stems per year than one in poor conditions but it will not become a different plant. It will still grow steadily rather than quickly.
It will still look much the same at the end of a season as it did at the beginning, with maybe three or four new stems added. The fullness you’re imagining is a matter of years, not months, even with everything optimised.
Setting a Realistic Timeline
A small ZZ plant with four or five stems, grown in good conditions, might realistically have eight to ten stems after two growing seasons. That is a fuller plant which is noticeably more substantial and impressive than where it started.
It’s not the m overflowing plant you might see in a photograph (which is often multiple plants in one pot, or a plant that’s been growing for a decade) but it’s some proper progress that you can see and appreciate.
The mistake most people make with ZZ plants is moving them around repeatedly in an attempt to improve the conditions. One month it’s a different window, a different room next month, then back to the original spot because it looked better there – each relocation interrupts the period of stable conditions that the plant needs to use for growth.
Pick the best available position, put the plant there, get the watering and feeding right and then leave it alone. Consistency will get you better results than constant adjustments.
Multiple Plants in One Pot
The fastest way to a full ZZ plant is to put multiple plants in one large pot. This is not cheating – it’s exactly what nurseries do to produce the impressive ones you see for sale.
Two or three small ZZ plants in a single large pot, given time to establish and grow together, produce a display that would take a single plant many years to achieve on its own (if it ever does).
If you want that full look quickly buy two or three inexpensive small ZZ plants, pot them together in a pot that’s the right sized for their combined roots, and grow them together. Their rhizomes will won’t compete with each other – ZZ plants don’t have particularly aggressive roots – and the combined stem count gives you the fullness you’re after from day one with the plant only getting better as all three grow through the subsequent seasons.
Final Summary
If you want your ZZ plant to become bushier this is the order of priority:
- Move it to brighter indirect light if it’s not getting enough. This is the change that will make the biggest difference.
- Water more consistently during the growing season – when the top two inches of soil are dry not when the entire pot is dry.
- Feed every four weeks from spring through late summer with a balanced liquid houseplant fertiliser at half strength.
- Repot into fresh compost if the plant hasn’t been repotted in two or more years going up one pot size if the rhizomes have filled the current pot.
- Consider dividing if you have a clump of rhizomes and want multiple fuller looking plants rather than one slow growing one.
- Or just add a second plant to the same pot for the quickest result.
- Then be patient. The plant will grow. It will just do so on its own schedule, which is slower than you would probably like but not as slow as you’re probably worried about.