
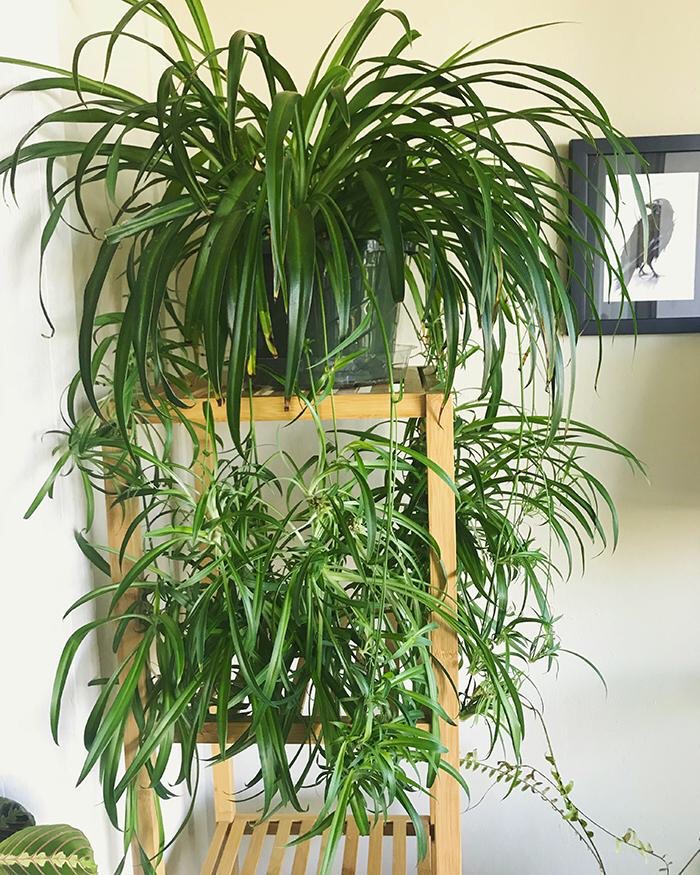
Spider plants get taken for granted a bit. They don’t cost a lot, you find them everywhere, they’re famously easy to keep alive – and it’s that ease of keeping them alive that means how impressive they can be when given conditions they like rather than conditions they merely tolerate gets overlooked.
A spider plant that’s just surviving looks quite different from one that’s really thriving. It’ll have fewer leaves, grow slower, smaller spiderettes (if any at all) and none of the fullness that makes the plant worth growing in the first place.
The gap between surviving and thriving is not difficult to close. Spider plants will react quickly to better conditions in ways that many slower growing houseplants don’t – put one in better light and feed it properly and you’ll see a difference within weeks, not months.
So the nine tips in this guide cover everything that affects spider plant growth, from what will have the most impact (light and you’ll notice it’s first for a reason) to the more subtle ones that get overlook until you’ve been through the obvious options.
Each tip explains not just what to do but why it works because understanding the reason makes it much easier to apply the advice and adapt it to your plant, pot and conditions at home.
Quick Answer
- Increase Bright, Indirect Light: Spider plants grow faster with lots of filtered light. Move the plant closer to a bright window without direct sun.
- Water When the Soil Starts to Dry: Let the top inch of soil dry out before watering thoroughly then let all the extra water drain.
- Feed During Active Growth: Use a balanced houseplant fertilizer every 4 to 6 weeks through spring and summer to support new leaves.
Need the full picture? See our Spider Plant Care Guide: Tips to Get Thriving Plants.
01 Give It Brighter Light Than You Probably Are
Spider plants can tolerate low light better than most houseplants. This is part of what makes them such good options for offices, dim hallways, rooms without great windows etc.
But tolerating low light is not the same as growing well in low light, and if faster growth is what you want, light is the biggest impact on how quickly your spider plant produces new leaves.
What Light Levels Actually Mean for Growth Rate
In low light – and by that I mean a room without a window or a position a few feet from a small north facing window – a spider plant produces enough energy through photosynthesis to maintain the leaves it already has but has little left over for any new growth. The plant survives but it progresses very slowly, only growing a handful of new leaves over an entire year.
In bright indirect light – in this case close to a window with good natural light but not in direct sun – the same plant has lots more energy available and can produce new leaves every few weeks through the growing season. That’s the difference light makes.
The ideal position for a spider plant you want to grow more is bright indirect light: within one to three feet of a window in a room that gets good natural daylight. East facing windows are particularly good – the morning sun suits spider plants and they can sit quite close to the glass without the risk of their leaves getting burnt.
South and west facing windows will give them stronger light and spider plants can handle a few hours of direct sun, particularly in the winter when the sun is less intense. But sustained afternoon direct sun in summer can cause the tips of the leaves to turn brown.
Variegated Varieties Need More Light Than Green Ones
If you’re growing one of the variegated spider plant varieties – the cream striped Chlorophytum comosum ‘Vittatum’ or the white-margined ‘Variegatum’ – it needs a lot more light than a solid green spider plant to grow at the same rate. The white or cream part of variegated leaves have no chlorophyll and so can’t photosynthesise.
A variegated spider plant in low light will grow noticeably more slowly than a green one and the same position. And its variegation may also fade as it produces more green growth in an attempt to compensate.
02 Water Consistently – Neither Too Much Nor Too Little
Spider plants are more tolerant of irregular watering than most houseplants, but consistent moisture during the growing season is noticeably better for growth than the swings of wet to dry that most people inadvertently put them through. A plant that spends a few days or a week thoroughly dry after each watering is spending some of that time in a state of mild stress. For the full method including how to check the soil properly, see the spider plant watering guide.
That means it’s prioritising survival over it’s growth.
Keeping the growing medium more consistently moist without it becoming waterlogged keeps the plant in growth mode rather than stressed.
The Right Watering Approach by Season
Through the active growing season – spring to early autumn – water when the top inch of compost is dry. This will
keep the soil consistently moist rather than switching back forth between wet and completely dry and the plant is able to get the water that supports it’s leaf and runner production.
In warm, bright conditions a spider plant may need watering every four to five days. In cooler or lower light it’s every seven to ten days.
In the winter, when growth slows a lot, reduce how much you water to when the top two inches of compost are dry rather than one inch. How much the water it uses drops in lower light and cooler temperatures, and watering at the same rate as summer is a going to cause root rot.
Water Quality and Brown Tips
Spider plants are famously sensitive to fluoride and chlorine in tap water – sensitivity that results in brown tips on the leaves. The tips turn brown, you assume because of a lack of water, so then water more frequently and the tips keep browning.
The real cause is chemical sensitivity rather than drought. Using collected rainwater, filtered water or tap water that has been left to stand overnight (allowing most chlorine to dissipate) makes a big difference to the brown tips within a few new leaf cycles. Water quality is only one of several causes though – there are 9 reasons spider plants get brown tips and it’s worth ruling out the others too.
03 Feed Regularly Through the Growing Season
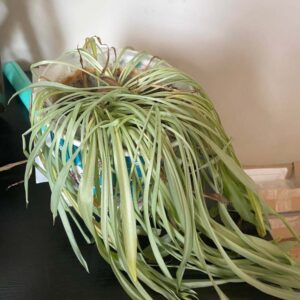
Spider plants are moderate feeders – not as hungry as something like dahlias or tomatoes but a lot more responsive to feeding than their reputation as a low maintenance plant might suggest. A spider plant that hasn’t been fed in a year or more is growing in depleted compost that can no longer give it the nutrients it needs which means slower growth, smaller leaves and reduced spiderette production.
Starting a regular feeding programme is often the quickest way to get faster growth in a plant that has been in the same pot and medium for a long time.
What to Feed and When
A balanced liquid houseplant fertiliser – one with roughly equal amounts of nitrogen, phosphorus and potassium – applied at half the recommended strength every two to four weeks from early spring through late summer is the right approach for most spider plants. The nitrogen supports the leafy growth that makes a spider plant lush and full. The balanced phosphorus and potassium support the roots.
Half strength rather than full strength matters for spider plants because their roots are sensitive to the build up of fertiliser salt. Light feeding at lower concentration is more effective and safer than occasionally feeding in large amounts – it maintains a steady low level supply of nutrients without the build up of salts that higher concentrations cause over time.
Stop Feeding in Autumn and Winter
Spider plants slow their growth a lot from late autumn onwards in response to less light and cooler temperatures. Feeding a plant that isn’t growing means the nutrients build up as salts in the compost rather than being used and those salts progressively damage the roots and cause the brown tips you’re trying to avoid.
Stop feeding in early to mid autumn and don’t start again until you see signs of new growth coming back in the spring. That will usually be a new leaf from the centre of the plant or existing leaves looking very fresh.
Refresh the Compost Annually
No feeding programme can compensate for compost that has been in the pot for two or more years without being renewed. The organic matter breaks down, the structure collapses, salts have built up from fertiliser and tap water alter soil chemistry, and nutrient reserves are depleted.
Top dressing – removing the top 2 to 3cm of compost from the pot surface and replacing it with fresh houseplant mix – is a quick way to refresh the roots without the disruption of a full repotting. Do this each spring before resuming feeding for much better growing conditions.
04 Use the Right Soil and Pot
The growing medium and pot a spider plant lives in affects almost every other part of its care – how quickly it dries, how well its roots can breathe, how available the nutrients are and how vulnerable it is to root rot. Getting these right is a must and getting them wrong creates major problems.
Soil: Well Draining but Moisture Retentive
Spider plants need a growing medium that drains freely enough to stop the roots getting waterlogged but also hold on to enough moisture to keep the roots consistently moist between waterings. A good quality houseplant or indoor plant compost with 20 to 30% perlite added will do both.
The compost holds on to the moisture, organic matter and nutrients and the perlite improves the drainage as well as stopping the compost from compacting over time.
Don’t use standard garden soil – it compacts very quickly in a pot, drains poorly and introduces pathogens that cause problems. Multi purpose compost can work but is usually heavier and holds more moisture than a dedicated houseplant mix, and benefits from a higher amount of perlite (30-40%) to compensate.
Pot Size: Snug but Not Cramped
You may have seen spider plants described as flowering and producing more spiderettes when they’re slightly root bound – and this is true to a degree. A slightly snug pot encourages the plant to send it’s energy to reproduction (runners and babies). However, a severely root bound spider plant in compost with no room to expand at all is not thriving – it’s stressed, and stressed plants don’t grow faster.
The way to balance this is to repot it when you can see the roots coming out of drainage holes or when the root ball is filling the pot with very little compost left. Go up one pot size – typically 2 to 5cm larger in diameter.
Going much larger means too much compost that stays wet too long relative to the root mass, creating the risk of root rot. The slightly too small end of the pot size spectrum is safer for spider plants than the slightly too large end.
Drainage Holes Are A Must
Spider plant roots rot easily in standing water and spider plant root rot is one of the harder problems to come back from once it takes hold. Any pot without drainage holes will eventually kill a spider plant – it’s not a question of if but when.
If you want to use an outer pot without drainage use the pot within a pot approach: grow the plant in a plastic nursery pot with good drainage and put that inside an outer pot. Then just remove the inner pot to water, let it drain fully and put it back. Never let the outer pot collect and hold standing water.
05 Optimise Temperature and Humidity
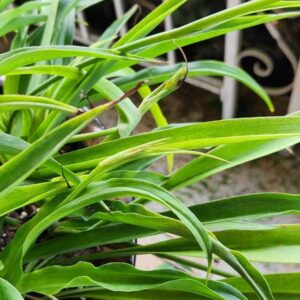
Spider plants are more temperature and humidity tolerant than many houseplants, but there’s a big difference between the range they tolerate and the range in which they grow best. Understanding that difference will get faster growth without any of the more difficult changes you have to make that some houseplants require.
Temperature: Warm But Not Hot
Spider plants grow most actively in temperatures between 18 to 27 degrees Celsius (65 to 80 degrees Fahrenheit). Within this range the plant produces new growth consistently.
Below about 10 degrees Celsius (50 degrees Fahrenheit) growth pretty much stops – the plant survives but enters a state of dormancy that it doesn’t really need and from which recovery in spring can be slow. Above about 32 degrees Celsius (90 degrees Fahrenheit) in combination with low humidity the plant experiences heat stress that also slows growth and causes brown tips.
In practical terms: keep spider plants away from cold drafts, away from air conditioners in the summer and away from radiators. A warm room temperature is going to get consistent growth rather than a space with big temperature swings, even if the average temperature is the same.
Humidity: Better Than Most Homes Provide in Winter
Spider plants prefer moderate humidity – around 40 to 60% – and can handle the lower humidity of most homes with central heating better than the likes of orchids or calatheas. But not without a cost.
The brown leaf tips that plague spider plants are partly a fluoride/chlorine sensitivity problem (as covered in the watering section) and partly a low humidity problem – dry air speeds up moisture loss from then leaves and the tips, being furthest from the plant’s supply of water, are first to show the effects.
Grouping spider plants with other houseplants raises their humidity through collective transpiration. Put the pot on a pebble tray with water below pot level creates more humidity.
Moving the plant away from radiators and heating vents in the winter stops the worst source of dry air in most homes.
06 Repot at the Right Time to Unlock New Growth
Repotting is underestimated when it comes improving spider plant growth. A spider plant that has been in the same pot for two or more years is almost certainly growing in compacted and depleted compost with roots that are running out of room.
That mix of poor growing medium, crowded roots and salt building up in the soil is going to stop the plant growing well because the underlying environment the roots are living just isn’t right.
When to Repot
The clearest signs that your spider plant needs repotting is roots growing out of the drainage holes, roots appearing above the surface of the soil, the plant drying out very quickly after watering (because there’s so little compost left) or growth that has stopped. Check by taking the plant out of its pot – if what you see is a dense mass with almost no compost then you’ll want to repot.
Spring is the best time to repot as it gives the plant the full growing season to establish in its new pot and compost. A spider plant repotted into fresh compost in March or April should shows noticeable improvement in its growth within four to six weeks.
How Repotting Affects Spiderette Production
One thing worth knowing: repotting into a significantly larger pot often temporarily reduces spiderette production. The plant, suddenly given more root room and lots of nutrients, sends its energy towards growing leaves rather than reproduction.
You’d usually want this if the overall plant size is the goal but if spiderettes are what you’re after, keeping the plant slightly root bound encourages their production. If yours isn’t making babies at all, pot size is just one of 9 reasons a spider plant isn’t producing babies.
07 Use Propagation to Create Fuller Looking Plants Faster
Propagating spider plants is one of the most straightforward propagation tasks in houseplant growing – the plant does most of the work itself by producing runners with fully formed spiderettes already starting to develop their own root systems.
Understanding how to use propagation rather than just as a way to make more plants can really improve how full and impressive your spider plant looks.
The Multiple Plants in One Pot Approach
The quickest way to get a full, lush looking spider plant is to grow several plants together in one pot. A single spider plant in a large pot will eventually fill it – but it takes time.
Three or four spider plants potted together quickly create the fullness that one plant takes a season or two to achieve alone. This is exactly what nurseries do to get the impressive plants you see in garden centres.
The plants are happy together, their roots don’t compete aggressively and the combined mass of leaves gives you the cascade effect you want from day one. If fullness rather than speed is what you want I’ve covered every technique in how to make your spider plant bushy.
Propagating Spiderettes: When and How
Spider plant spiderettes root most when they have already begun developing their own tiny root nubs – that’s the small white bumps you can see at the base of the plantlet. You can root them in one of three ways (the step by step propagation guide covers each in full detail):
- In water: Put the spiderette in a small glass of water with the base submerged, keeping it attached to the parent plant until the roots are 2 to 3cm long, then detach it and pot into compost.
- Direct into compost: Pin the spiderette onto the surface of moist compost in a small pot (using a hairpin or a bent piece of wire) while still attached to the parent plant. Once rooted and showing new growth, cut the runner away. This is the fastest method because the plantlet has the parent plant’s resources while establishing its own roots.
- Detached into compost: Cut the spiderette from the runner and plant directly into moist compost. Keep consistently moist until new growth appears. Slightly less reliable than the other two methods because the plantlet loses the parent plant’s support.
When to Leave Spiderettes on the Plant
A spider plant producing lots of runners with healthy spiderettes is a plant in good health. But those runners use up energy the plant could otherwise direct toward its own leaves.
If faster overall plant growth is what you want then removing the runners and spiderettes as they appear sends that energy toward the parent plant. If propagation or the hanging cascade of runners is what you want then leave them. One approach is to let one or two runners develop and remove the rest – a reasonable compromise. And if the cascade is what you’re after there’s a knack to getting long, trailing spider plant babies that goes beyond just leaving the runners alone.
08 Give It a Summer Outside
This tip surprises quite a few people but spider plants respond well to spending summer outdoors (as long as they’re sheltered). The combination of more intense light, natural humidity, fresh air and the temperature fluctuations that outdoor conditions provide gets growth that indoor conditions rarely match.
A spider plant moved outside for the summer months will usually come back indoors in autumn bigger and fuller than one that spent the entire year inside.
How to Do It Safely
You’ve got to get the transition and where you put it just right. Spider plants need a sheltered, partially shaded outdoor position – not full sun, which burns the leaves, and not an exposed spot where wind damages the foliage.
A north or east facing wall, under the canopy of a tree, a shaded corner of a patio or balcony etc. are all good choices. The light in an outdoor shaded spot is generally much brighter than indoor bright indirect light, even though it doesn’t feel like direct sun.
Transition matters too. Move the plant outside gradually over one to two weeks – starting with a few hours outdoors in a sheltered spot and increasing the time over the following days. A plant moved from indoors to full outdoor conditions in one step can get burnt leaves or stress from the sudden change in how intense the light is.
Bring the plant back indoors before night temperatures drop below 10 degrees Celsius (50 degrees Fahrenheit) – thats usually September in most temperate climates. Check for pests before bringing it back inside; outdoor plants occasionally pick up bugs that you don’t want to introduce to your other houseplants.
09 Stop Doing the Things That Are Slowing It Down
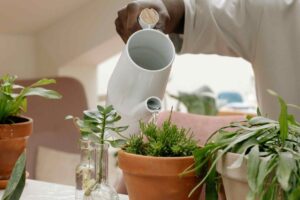
Sometimes the fastest route to a faster growing spider plant is figuring out what you’re currently doing that’s holding it back and then stopping them. The mistakes below are the most common things in spider plant care that hold them back – most of them come from good intentions but are done wrong. And if your plant hasn’t just slowed down but stopped growing entirely, that’s usually one of 3 specific problems with their own fixes.
Keeping It in a Dim Position Because It Tolerates Low Light
Tolerance of low light is not a preference for it. Every spider plant in a low light position – away from windows, in a dark corner, in a room without natural daylight – is growing at a fraction of its potential.
Moving it to bright indirect light will make a big change and its effect on growth is visible within weeks rather than months. If the position you want for it happens to be dim accept that the plant will grow slowly there and bring it somewhere brighter occasionally to compensate.
Watering on a Fixed Schedule
Watering every Sunday, or every seven days, regardless of what the soil needs is going to lead to alternating overwatering and underwatering as conditions change through the year.
In the summer the plant may need water every four days. In winter the same plant in the same pot may need water every twelve days.
A schedule that worked in July will overwater by November and underwater by the following July. So check the soil. Let it tell you when to water, not the calendar.
Using Cold Tap Water Directly
Cold tap water put on a warm rooted plant creates a temperature shock that will stop the roots working. Combined with spider plants’ known sensitivity to fluoride and chlorine, watering with cold tap water straight from the tap gets you brown tips, stressed roots and growth that’s not as good as it could be.
Fill the watering can the evening before you plan to water and let it come to room temperature overnight. The chlorine dissipates and the temperature equalises. The plant then gets watered with something much closer to what it likes.
Never Cleaning the Leaves
Spider plant leaves get a build up of dust over time, and dusty leaves absorb less light – the dust blocks the leaf surface where photosynthesis happens. For a plant where you’re trying to maximise light absorption for faster growth this matters more than it might seem.
A wipe with a cloth every month or two removes the dust. It takes five minutes and makes a bigger difference than most people expect – particularly for plants in positions that are already on the lower end of adequate light.
Feeding in Autumn and Winter
Fertiliser applied to a spider plant that isn’t actively growing doesn’t support growth – it results in salts building up in the compost. Salt build up stops roots functioning properly and causes the brown tips we all hate.
So stop feeding from early autumn and don’t resume until spring growth is clearly underway. Doing less in winter gets a healthier plant the following growing season than continuing the summer programme unchanged.
Leaving It in the Same Compost Indefinitely
Old compost can really stop spider plants growing. A spider plant that hasn’t been repotted or had its compost refreshed in two or more years is growing in a medium that has lost most of its nutrients and accumulated enough salts from fertiliser and tap water to impair the roots.
Final Thoughts
If you put in the effort and do the things listed here there’s a very good chance your spider plant will show you results within weeks.
If you want to prioritise start with light. Move the plant to the brightest indirect light position available and give it four to six weeks.
If growth noticeably improves you’ve found what was holding it back and can then build from there. If growth is still slow after addressing the light then look at compost age and root condition.
A spider plant in good light, with fresh compost, watered consistently with room temperature water and fed every three weeks through summer is about as well set up for fast growth as this plant gets.
Spider plant looking sad?
My free guide 7 Gardening Mistakes That Are Killing Your Plants covers the small habits that hold spider plants back from thriving — and how to turn yours around.
