We all want to see our plant collection growing. So being able to propagate your monstera and turn one into many plants id
I’ve been doing it for years now and so have a good idea of what works and what will ruin your chances.
So I’m going to take you through the propagation methods that have filled my apartment with more monsteras than I probably have room for.
Quick Answer
- Cut Below a Node: Take a cutting with at least one node and one leaf so it can grow new roots.
- Root in Water or Soil: Put the cutting in clean water or moist soil and keep it in bright, indirect light.
- Transplant Once Roots Grow: When roots reach a few inches long move the cutting into well draining potting mix.
Why Propagation Matters
Your monstera isn’t just a pretty face sitting in the corner. Given the chance it’ll happily be propagated multiple times.
Last year my neighbor paid $80 for a small monstera deliciosa at the local nursery. Me, on the other hand, propagated six identical plants from my original $20 monstera I got three years earlier.
And these monsteras are practically begging to be propagated. They’re epiphytes when growing in nature, which means they’re designed to grab onto trees and spread. Your living room monstera (or wherever it lives) has those same instincts – you just need to work with them.
What You Need to Know First
- Monstera propagation success rate is over 90% when done correctly
- The best time for propagating monsteras is in the spring through to early fall
- Identifying the nodes is the most important thing – no node, no new plant
- Water propagation is the best propagation to start with if you’re a beginner
- Soil propagation will give the plant stronger roots
- Timing has much more of an impact than you would think
Method 1: Water Propagation
This is where I started and it’s still the best choice if you to make sure your propagation works. Water propagation lets you watch every step of the roots growing and developing – which is both a lot of fun and reassures you it’s working (as you can see it happening) if you’re a bit nervous about the whole thing.
What You’ll Need
- Pruning shears
- Glass jar or vase (a clear one is best)
- Room temperature water
- Rooting hormone (not necessary but helpful)
- Good light
Step by Step Process
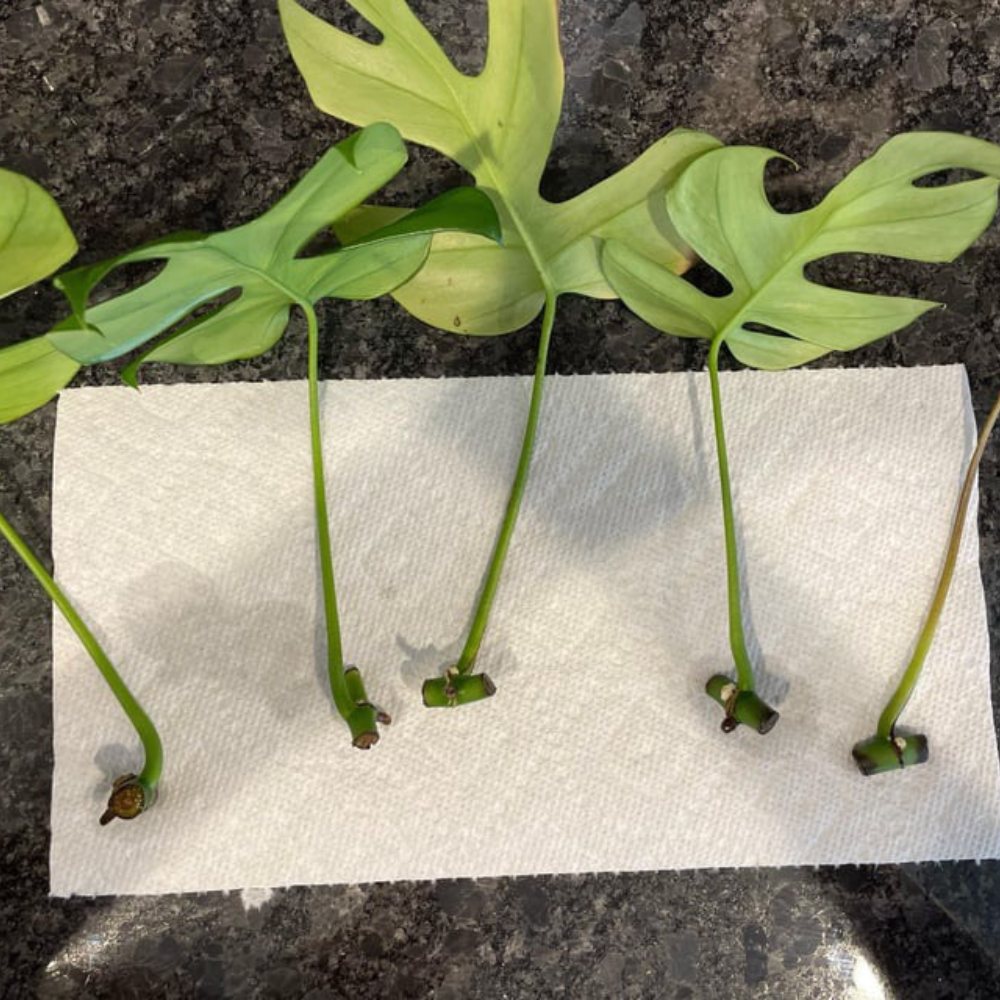
Finding the Right Cutting
Look for a healthy section of the stem with at least one node – that’s the bumpy part where roots will grow from. I remember I spent three weeks waiting on a leaf cutting with no node, wondering why nothing was happening. So finding that node is a must if you want your propagation to work.
The best cutting includes:
- One or two nodes
- At least one healthy leaf
- 4 to 6 inches of stem
- Aerial roots (not totally necessary but again quite helpful)
Making the Cut
Use your shears and cut just below a node. I try to clean my tools with rubbing alcohol first, which may sound like I’m going to a lot of trouble but bacterial infections can kill your cutting before it gets started. So for me it’s worth that extra bit of time to make sure the shears are clean.
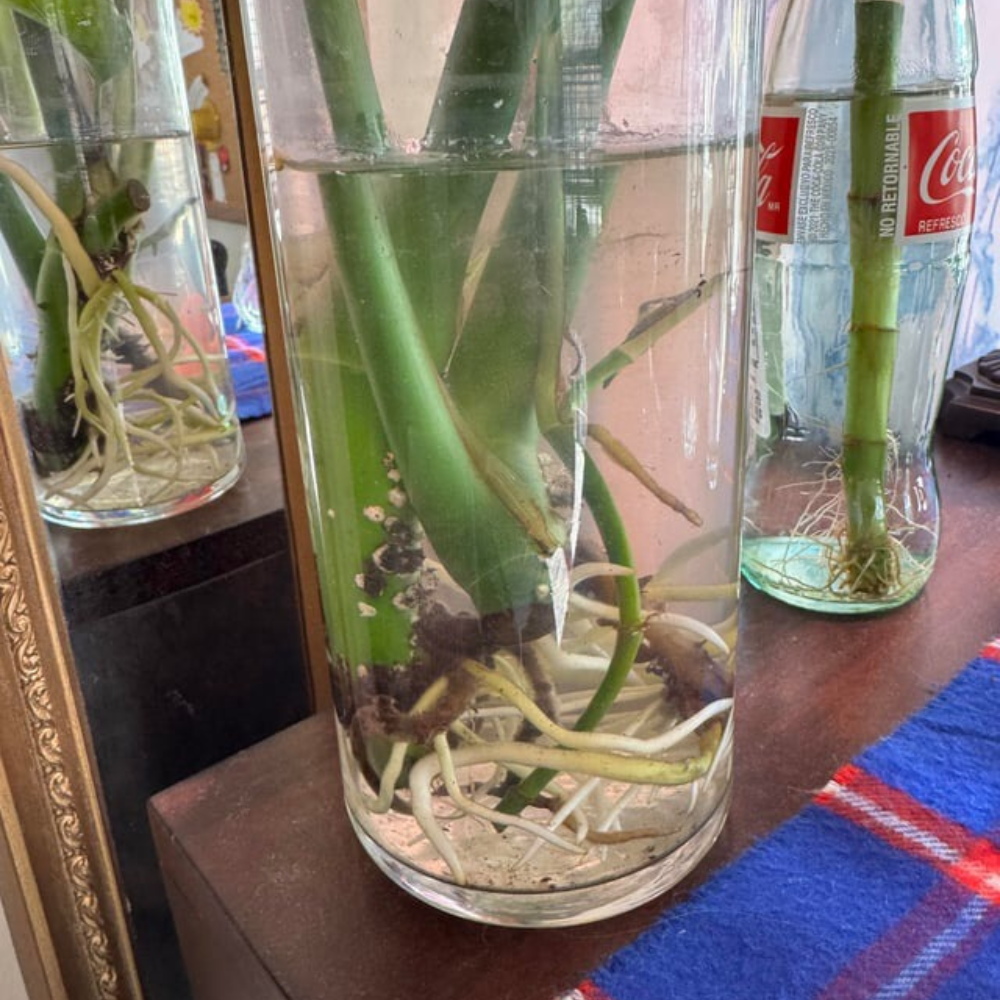
Setting Up Your Water Station
Fill your jar with room temperature water and put your cutting so the node is submerged but the leaves stay above water. I use mason jars because they’re the right size and as mentioned earlier they let you watch the roots growing easily.
Waiting
This is where your patience will pay off. You’ll see tiny root nubs within 1 to 2 weeks and the proper roots developing by around week 3 to 4. Change the water every few days to keep it fresh. If you see cloudy water that means bacteria, which could be serious and you’ll want to take some action.
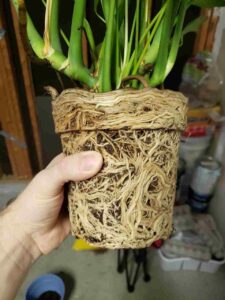
When to Transplant
Wait until you have a few roots that are 2 to 3 inches long. I’ve rushed this step before and it’s ended up with the newly planted cuttings struggling because their roots weren’t ready for the soil.
Method 2: Soil Propagation
Water propagation might be easier but soil propagation will give you a tougher plant.
The Soil Mix
You don’t need to use expensive propagation mixes – you can make your own with:
- 50% regular potting soil
- 25% perlite
- 25% coco coir or peat moss (holds on to moisture)
This mix gives you drainage without letting the cutting dry out completely. I killed a few cuttings in regular potting soil that stayed too wet and that’s how I figured out this mix.
The Process
Prepare Your Cutting
Use the same rules as water propagation – make sure you have a healthy stem, find a visible node and make a clean cut. But you have to let the cut end dry for 30 minutes before planting it. This stops it rotting at the cut.
Planting Depth
Bury the node about an inch in the soil mix. The node needs to be covered but don’t bury it so deep that you can’t see where it is. I use a toothpick to mark the spot so I know where to look for new growth.
Managing the Moisture
Keep the soil moist but not soggy. Ive found using a spray bottle to mist the surface of the soul every day rather than watering it heavily works well. Overwatering is the main reason soil propagation doesn’t work.
Creating Humidity
Cover your pot with a plastic bag that’s see though or use a humidity dome. Doing so will make a sort of greenhouse effect that will help to encourages the roots to grow. Just make sure to remove it when you see new growth otherwise you might get mold.
Method 3: Air Layering
This is my favorite method for bigger monsteras. Air layering lets you get a new plant while keeping the cutting attached to the mother plant.
When to Use Air Layering
- Your monstera has grown too tall
- You want to propagate a specific section with multiple nodes
- You’re nervous about cutting and want the best chance of success by playing the odds
- The plant has aerial roots you can use
The Process
Identify Your Area
Find a section of stem with nodes and preferably some aerial roots. This is what will become your new plant while it stays connected to the original.
Wrap and Wait
Wrap damp sphagnum moss around the nodes then cover it with some plastic wrap and keep that in place with twist ties. The moss needs to stay moist but not very wet.
Watch the Progress
Check every week by peeling back the plastic. You’ll see white roots growing into the moss after 2 to 4 weeks. Once you have a good set of roots you can cut below the rooted section and plant it.

Troubleshooting: When Things Go Wrong
I made some mistakes over the years when propagating my monsteras (I’ve already mentioned a few). So I’ll show you the big ones you won’t want to make.
Root Rot in Water Propagation
If you see any brown or mushy roots it means you have a bacteria problem. There have been too many cuttings I’ve killed by ignoring the early signs of rot. You’ve got to take it seriously.
The Fix:
- Remove the cutting immediately
- Trim away all the brown/mushy roots
- Rinse the cutting thoroughly
- Start over with fresh water and a clean container
For more help see our guide to rescuing monstera from root rot.
Cuttings That Won’t Root
Sometimes healthy looking cuttings don’t do anything even when you think you’ve done everything right. This usually means one of three things:
- There is no node (the most common mistake)
- The cut end has dried out too much
- The water or soil isn’t right

New Growth That Dies Immediately
This usually happens when you move a water propagated cutting to soil too soon. The roots coming out of water aren’t ready for the transition.
Prevention:
- Wait until you’ve got a few 2 to 3 inch roots before you transplant it
- Use a very loose soil mix that drains well
- Keep the humidity high during the transition
- Don’t fertilize for the first month
Advanced Techniques
Rooting Hormone
I had my doubts about rooting hormones until I did a side by side test. The cuttings that were treated with rooting hormone grew roots about so much faster than the untreated ones. The difference was more than enough that I now use it on every cutting.
Look for IBA (Indole-3-butyric acid) based products as they’re specifically designed for woody stem cuttings like monsteras.
A Heat Mat
Bottom heat will make the roots grow much faster. I’ve been using a seedling heat mat set to 75 to 80°F under my propagation setup for a while now. The warm soil is just like the tropical conditions monsteras would grow in and can cut how long rooting takes in half.
Propagation Areas
Instead of random jars left all around my apartment I now use a propagation area with:
- Grow lights set on a timer
- A heat mat for keeping the temperature just right
- A humidity dome to get the best conditions
- An area that’s properly organized so I can have more than one cutting

Timing: When Propagation Works
The different seasons will have an impact on propagating monstera. I’ve tried propagating in the winter, for example, and it took over four months before I got any roots. So you need to take the season into consideration.
The Best Time
Spring (March to May): Definitely the best time. Plants are coming out of being dormant in the winter and their growth hormones are beginning to really start flowing.
Summer (June to August): Still works very well. Warm temperatures and long days help with fast root development.
Fall (September to November): Possible but slower. Start earlier in the fall for the best results.
Winter (December to February): Try to avoid if you can. Slow growth, low light and cool temperatures work against you.
Environmental Factors
- Temperature: 65 to 80°F is ideal
- Humidity: 50 to 60% or higher
- Light: Bright, indirect light (never direct sun)
- Air flow: Gentle air will stop mild growing

Common Mistakes
Being Impatient
I’ve seen people give up on healthy cuttings after two weeks because nothing was happening fast enough for them. Monstera propagation takes time – usually 4 to 6 weeks for water propagation and 6 to 8 weeks for soil propagation. Don’t expect it to all happen instantly.
Fertilizer Mistakes
Never fertilize cuttings that haven’t established their roots yet. I killed quite a few promising cuttings by giving them with fertilizer before they were ready. New roots are delicate and can be burned even by weak fertilizers.
Light Problems
Too much direct light will stress the cuttings and stop any roots growing. I do all my propagating near a north facing window where it gets bright, indirect light all day.
For more tips see our guide to the right lighting for monsteras.
Crowding Issues
More than one cutting in one container means they will fight over the resources and end up with stagnant air. Give each cutting its own space and you’ll see better results.
Building Your Monstera Collection
Once you get to the point of feeling confident about propagation you’ll probably have more plants than you know what to do with. That means you’re going to have to work out what to do with them all.
Gifting
Propagated monsteras make amazing gifts. I’ve given away dozens over the years and it’s meant I’ve got loads of friends who share cuttings when they find interesting varieties.
Trading Network
Local plant groups and online communities love trading propagated plants. Your basic monstera cuttings can become variegated varieties, different species or completely different plants through trading.
A Backup Plan
Always keep a few propagated plants as backups. When my original monstera developed a fungal infection I had three healthy propagated plants to carry on my collection.
Final Thoughts
Really when it comes to propagating monsteras it’s mostly about being patient and keeping watch on them. You can have all the best equipment in the world or have tons of experience but if you aren’t paying attention and adjusting as things happen nothing is going to work.
Your monstera will tell you what it needs if you know how to look and listen. Roots growing slowly might mean cooler temperatures or lower humidity. Leaves turning yellow could be a sign there’s too much direct light or you’ve overwatered. Black stems usually mean bacterial infection and will need you to deal with it quickly.
Start with one or two cuttings using the water propagation method. Watch them closely, take notes on what works and gradually experiment with other techniques as you get more and more confident.