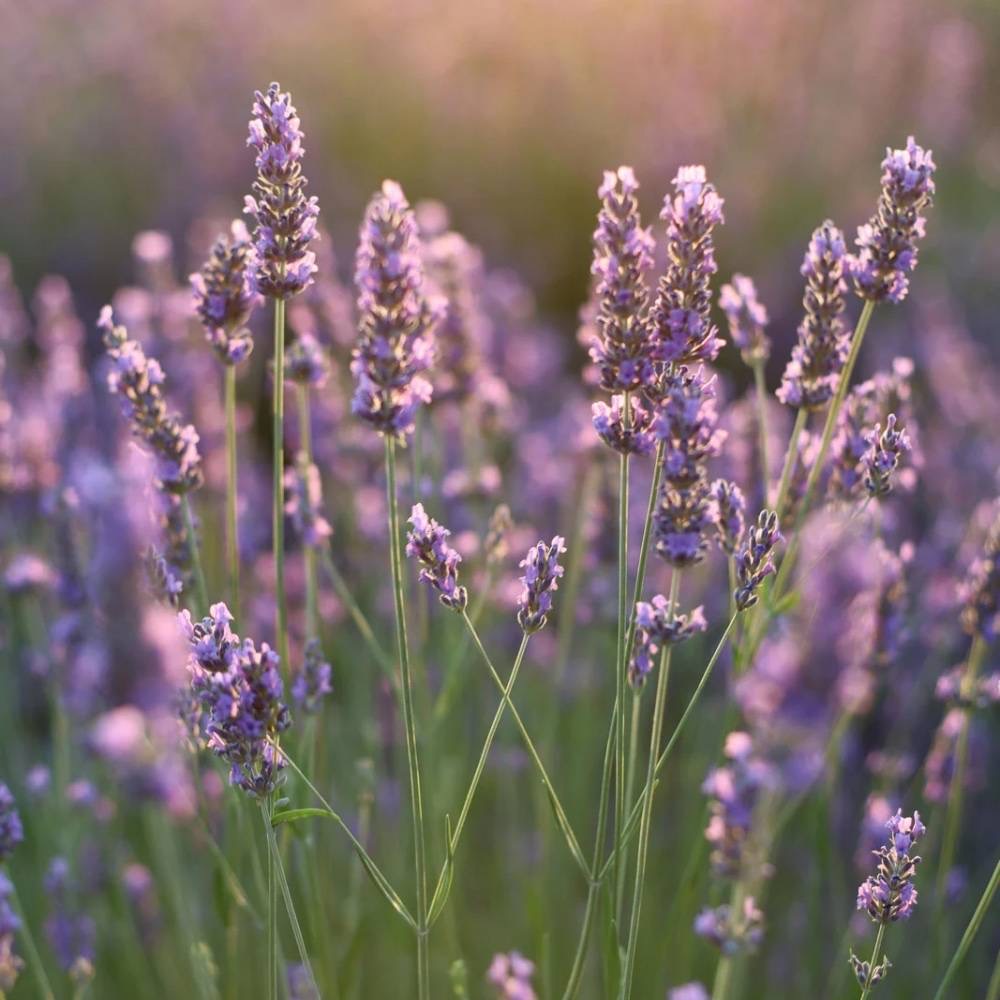
Lavender is a garden favorite. It’s a lovely herb and can be used for both cooking and it’s wonderful smell.
Growing it can be challenging though. There’s a lot to get right and things to avoid to make sure your lavender is successful.
So if you want to grow lavender yourself this easy to follow guide will walk you through everything you need to know to grow and enjoy this delightful herb.
Select the Right Variety
There are several types of lavender and choosing the right one for your climate and needs is the first and most important step:
- English Lavender (Lavandula angustifolia): Best for cooler climates. This variety is known for its sweet fragrance and is commonly used in cooking and for oil extraction.
- French Lavender (Lavandula stoechas): With petals that resemble rabbit ears this type prefers warmer climates and blooms for an extended season.
- Spanish Lavender (Lavandula latifolia): has larger blooms and a stronger, more pungent aroma. This makes it good for ornamental use in mild winter regions.
Think about your climate and the specific use you have in mind for the lavender to choose the most suitable variety.
Find the Perfect Location
Finding a good location for your lavender plants is going to play a big part in their growth and quality of bloom. These tips will help you choose the best spot:
Sunlight Requirements
Lavender is a Mediterranean plant. That means it thrives in full sun. So for the best growth and oil production follow these guidelines:
Sun Exposure The site should receive direct sunlight for at least 6 to 8 hours each day. More sunlight encourages better blooms and a stronger fragrance.
Orientation: South facing locations provide the most consistent sunlight, especially in Northern Hemisphere gardens.

Soil Quality and Preparation
Lavender prefers specific soil conditions that mimic its native habitat. So think about:
- Soil Type: Well drained, sandy or gravelly soil is best. Lavender does not thrive in dense, clay heavy soils because they retain moisture and can cause root rot.
- Soil pH: Lavender grows best in neutral to slightly alkaline soils with a pH between 6.5 and 7.5. If your soil is too acidic you can try adding lime to adjust the pH level.
- Drainage: Good drainage is critical. If you’re working with heavy soil consider raising the planting beds or using generous amounts of sand or gravel to improve the soil texture and drainage. This adjustment will stop water from pooling around the roots, which could be bad to the plant’s health.
Environmental Considerations
The surrounding environment can also affect your lavender’s health and productivity. So
- Wind Protection: While lavender tolerates and even benefits from some wind (it helps reduce the risk of fungal diseases by keeping the foliage dry), extremely windy locations can damage the plants or dry them out too quickly. If your garden is in a particularly windy area then it might be a good idea to plant lavender near a wall or hedge that can act as a windbreak.
- Microclimate: Be aware of your garden’s microclimate. Areas close to large bodies of water, city centers or open fields can have different temperature and humidity conditions compared to the general climate of your region. These factors can influence how well lavender will grow in your garden.
Prepare the Soil
Proper soil preparation is another big part of the success of lavender. It thrives in conditions that replicate its native Mediterranean environment, so you have to plan for that. Here’s how to prepare your garden soil for lavender planting.
Assessing Soil Quality
Before planting it’s important to evaluate your current soil. So look at:
Soil Type: Lavender prefers loose, well drained soil. As mentors earlier heavy clay soils should be avoided or at the least improved to have better drainage and aeration.
Nutrient Level: Although lavender thrives in low fertility soils you’ll want a balanced nutrient level to help young plants gets established. Avoid overly rich soils as they can lead to excessive foliage at the expense of flowers and fragrance.
Enhancing Drainage
Lavender cannot tolerate waterlogged roots, so drainage is a very important consideration:
Adding Grit or Gravel: If your soil is heavy or clayey then add some gravel, crushed stones or coarse sand to make it more permeable. A few inches mixed into the topsoil can make a big difference.
Creating Raised Beds: In particularly problematic areas then you might want to build raised beds. These allow you to completely control the soil texture and drainage, meaning you can get the ideal conditions for your lavender.
Adjusting Soil pH
The pH level of your soil affects nutrient availability and plant health.
Testing Soil pH: First, test your soil’s pH. Lavender prefers a neutral to slightly alkaline pH (between 6.5 and 7.5). Testing kits are available at garden centers or online.
Amending the pH: If your soil is too acidic then add garden lime according to package instructions to raise the pH. If it’s too alkaline then adding sulfur can help lower it, although this is less often required for lavender.
Soil Enrichment
While lavender does not need highly fertile soil, preparing your planting area and enriching the soil can help your lavender grow.
Organic Matter: Instead of rich compost use well rotted manure or a lean organic material sparingly. This can help to improve soil structure while making sure isn’t too rich in nutrients.
Long Term Nutrition: For areas where the natural soil is very poor then consider a slow release, balanced fertilizer at planting time to support initial growth without encouraging lush, weak foliage.
Final Soil Preparation Steps
Once you have adjusted the soil composition and pH then the final steps before planting are as follows:
Tilling the Soil: Lightly till the soil to a depth of about 12 inches to mix in any added amendments thoroughly and to break up compact layers. This helps roots to establish more easily.
Leveling and Settling: After tilling, level the soil with a rake to remove any large clumps and rocks. Water the area lightly to help the soil settle and reveal any areas that may need further leveling.
Plant Your Lavender
Planting your lavender correctly is a key part of ensuring it establishes well and thrives. These steps and tips will help you successful plant it:
Timing Your Planting
Choosing the right time to plant is critical for lavender’s success:
Spring Planting: In cooler climates, planting in spring as soon as the ground is workable and the risk of frost has passed allows lavender to establish before the heat of summer.
Fall Planting: In milder climates, planting in early fall can be beneficial, giving the plants plenty of time to establish roots before the following summer.
Preparing to Plant
Before you begin planting, gather all necessary supplies:
- Lavender Plants or Seeds: Choose healthy nursery plants or quality seeds depending on your propagation choice.
- Gardening Tools: Prepare a spade or garden trowel, watering can or hose, and optionally, gardening gloves.
- Amendments: Have any last minute soil amendments ready such as gravel or sand if you haven’t already mixed them into the soil.
Planting Technique
Proper planting technique will support healthy root growth and adequate drainage:
- Digging the Hole: Dig a hole that is just deep enough to accommodate the root ball of your lavender plant but twice as wide. This allows the roots to spread easily without forcing them too deep into potentially cooler, wetter soil.
- Positioning the Plant: Remove the plant from its pot and gently loosen any tightly wound roots. This encourages them to spread out into the surrounding soil. Place the plant in the center of the hole and make sure that the top of the root ball is level with the soil surface.
- Backfilling the Hole: Fill the hole with a mix of native soil and any necessary amendments like sand or gravel. This mix should help improve drainage while still providing support to the plant.
- Firming the Soil: Gently but firmly press down around the base of the plant with your hands to eliminate air pockets and ensure contact between the roots and the soil.
Watering After Planting
Proper watering immediately after planting is essential and helps establish the plant:
Initial Watering: Water generously right after planting to settle the soil around the roots and hydrate the plant. This initial watering also helps to reduce transplant shock.
Mulching: While lavender typically does not require mulch because it prefers a dry environment, in very hot climates, a light layer of gravel or rock mulch can help reflect heat away from the plant and maintain moisture levels in the soil without retaining excess water.
Post Planting Care
After planting there are a few steps to help make sure your lavender gets a great start:
Watering Schedule: Continue to water the plants deeply but infrequently, aiming to let the soil dry out between watering sessions. Overwatering can lead to root rot and other fungal diseases.
Observation: Keep an eye on your lavender for signs of stress in the first few weeks. Wilting or discolored leaves can show you have watering issues or soil problems.
For more lavender care tips see this guide.
Watering Practices
As lavender is particularly sensitive to over watering you need to get it right. So follow these guidelines so you get just the right amount of moisture.
Understanding Lavender’s Water Needs
Lavender is native to the dry and arid Mediterranean region, which is why it’s water requirements are the way they are.
- Low Water Requirement: Once established lavender plants require very little water. They thrive in conditions that mimic their natural habitat, which is typically dry.
- Deep Watering: When you do water, water deeply. This encourages the roots to grow deeper into the soil, making the plants more drought resistant.
- Frequency: Water newly planted lavenders once or twice a week, depending on the weather, until they are established. After that, watering can be reduced to once every two weeks or less, depending on your climate.
Tips for Effective Watering
How and when you water makes a big difference in the health of your lavender:
Morning Watering: Watering in the morning is ideal as it allows the moisture on the leaves and the surface of the soil to dry out over the course of the day, reducing the risk of fungal diseases.
Use Drip Irrigation or Water at the Base: To avoid wetting the foliage use a drip system or water directly at the base of the plant. This also means that the water goes where it’s needed – the roots.
Avoid Overhead Sprinklers: Wetting the foliage unnecessarily can result in disease. So it’s best to avoid using overhead sprinklers.
Recognizing Overwatering
Be wary about the signs of overwatering, which can do real damage to lavender. Some signs and ways to check:
Signs of Stress: Yellowing leaves or a lack of flowering can be signs that your lavender is getting too much water.
Soil Check: Before watering, check the soil by sticking your finger about an inch down. If the soil feels dry at that depth, it’s time to water. If it feels moist, wait a few more days.
Pruning and Maintenance
Pruning is not only necessary for maintaining the shape and look of your lavender plants but also so you get good growth and longevity:
When and How to Prune
Timing and technique are key for successful pruning:
Best Time to Prune: The ideal time to prune lavender is in the early spring as new growth begins and just after the first flowering in the summer. This not only helps to shape the plant but also encourages a second bloom in varieties that flower twice.
Pruning Technique: Use clean, sharp pruning shears. Cut back about one third of the overall growth, focusing on removing old, non productive wood and shaping the plant. Be careful not to cut into the old wood where there are no green shoots; lavender can be slow to recover from cuts like this.
Regular Maintenance Checks
Keep your lavender looking its best with regular maintenance:
- Deadheading: Throughout the blooming season snip off spent flower stalks to encourage new blooms and to prevent the plant from going to seed.
- Weeding: Keep the area around your lavender plants free from weeds. Weeds can compete for nutrients and water as well as encouraging pests and diseases.
- Yearly Assessment: Each year assess your lavender plants for signs of overcrowding or poor performance. Older plants might need to be rejuvenated by more aggressive pruning or replaced if they are past their prime.
By keeping a close eye on and having the right pruning practices as part of your gardening routine you can give your lavender plants the best chance to remain healthy, vibrant and productive for many years.

Propagation
Propagating lavender can be a rewarding way to expand your garden and share your plants with others. These detailed instructions are for the two two common methods: cuttings and seeds.
Propagating Lavender from Cuttings
Cuttings are a popular and reliable method for propagating lavender because they tend to produce plants that are true to the characteristics of the parent plant.
- Timing: The best time to take cuttings is in late spring to early summer, when the plant is actively growing but not yet blooming.
- Selecting Cuttings: Choose healthy, non flowering shoots from the current year’s growth. These should be about 4 to 6 inches long.
- Preparation: Strip off the leaves from the bottom half of each cutting. Dip the cut end into rooting hormone powder to encourage root growth.
- Planting: Insert the cuttings into a well draining potting mix, such as a blend of peat and perlite. Make sure at least two nodes are buried in the soil mix, as roots will develop from these points.
- Environment: Place the cuttings in a warm, bright place but out of direct sunlight. Covering the pot with a plastic bag can help maintain humidity levels, which improves rooting success.
- Care: Keep the soil moist but not waterlogged. Roots typically begin to form within a few weeks. Once the cuttings have rooted and show new growth, they can be transplanted into individual pots or directly into the garden.
Propagating Lavender from Seeds
Growing lavender from seeds can be challenging. Germination rates are often unpredictable. Follow these steps for the best chance of success:
- Sowing Seeds: Lavender seeds should be sown in late winter or early spring. Use a light seed starting mix and surface sow the seeds. Press them lightly into the soil but don’t cover them as they need light to germinate.
- Environment: Maintain a temperature of about 70°F (21°C) and keep the soil lightly moist. Covering the seed tray with clear plastic can help keep the environment suitable.
- Germination Time: Lavender seeds can take anywhere from two weeks to a month to germinate. Patience is key during this time.
- Care After Germination: Once seedlings appear remove the plastic cover and provide plenty of light by placing the tray in a sunny window or under grow lights.
- Transplanting: When seedlings have several sets of true leaves and are large enough to handle transplant them into individual pots to grow on until they are ready to be planted out in the garden.
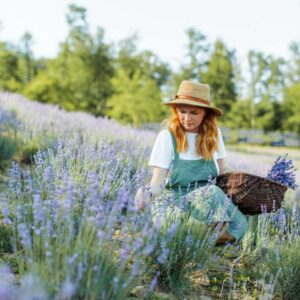
Harvesting
Harvesting lavender at the right time gives you the best chance of strong fragrance and essential oils in the flowers.
When to Harvest
Timing The best time to harvest lavender is when the buds are formed but just before they fully open. This is when the essential oils are most concentrated.
Morning Harvest: Aim to cut your lavender in the morning after the dew has evaporated but before the sun is at its peak as this helps to preserve the oils and fragrance.
Harvesting Technique
Tools: Use sharp scissors or garden shears to make clean cuts, which help prevent damage to the plants.
Method: Cut the flower stalks above the first set of leaves below the flower spike. This encourages the plant to produce new growth and potentially a second bloom.
Handling: Handle the cut flowers gently to avoid bruising which can diminish the fragrance.
Uses of Harvested Lavender
- Drying: Tie the stalks in small bundles and hang them upside down in a dark, well ventilated area to dry. Dried lavender can be used in sachets, for culinary purposes or even as part of decorative arrangements.
- Fresh: Fresh lavender can be used to infuse honey, sugar or vinegar, adding a floral note to these ingredients.
- Oil Extraction: For those interested in making lavender oil the fresh flowers can be processed using oil extraction kits or by steeping the flowers in a carrier oil.
This guide has a full list of ways to use lavender in your garden.
Troubleshooting Common Issues
Growing lavender is generally straightforward. But like any plant it can encounter various issues.
Being able to identify and address these problems early can help the health and vitality of your lavender plants. This guide will help you to troubleshoot common problems:
Recognizing and Managing Pests
Lavender is relatively resistant to pests, but it’s not immune. Here are a few pests to watch out for:
Aphids: These small, sap sucking insects can cluster on the undersides of leaves and along stems. They can cause the plant to become weak and stunted.
Management: A strong jet of water can often dislodge aphids from lavender. For severe infestations then you might want to think about using insecticidal soap or neem oil applied directly to the aphids.
Spittlebugs: Recognizable by the frothy spit like substance they leave on plant stems. Spittlebugs suck plant sap but usually don’t cause serious harm.
Management: You can simply rinse off spittlebugs with water or remove them by hand.
Whiteflies: These tiny white insects can be seen flying around the plants when disturbed. They feed on plant sap and can weaken them.
Management: Yellow sticky traps can catch adult whiteflies and insecticidal soap can help control larvae and adults.
Dealing with Diseases
Lavender is susceptible to a few diseases, especially when grown in conditions that don’t mimic its native habitat. These include:
Root Rot: This is often caused by overwatering or poor drainage. Symptoms include yellowing leaves and a general decline in plant health.
Prevention and Treatment: Good drainage when planting is key and be cautious not to overwater. If root rot is suspected then remove the affected plant and improve soil conditions before replanting.
Fungal Diseases: These include Botrytis, rust and powdery mildew, which can appear when conditions are too humid or damp.
Prevention and Treatment: Prune plants to improve air circulation and make sure they are not overcrowded. Avoid overhead watering to keep foliage dry. Treat with appropriate fungicides if necessary, following organic practices whenever possible.
Environmental Stress
Lavender plants can also suffer from environmental stresses:
Excessive Heat or Cold: Lavender is hardy within certain temperature ranges but can be damaged by unexpected frost or too much heat.
Management: Mulch lightly with gravel to reflect heat and maintain balanced soil temperatures. In cold climates you can cover plants with a frost cloth during unusually cold snaps.
Poor Soil Conditions: Lavender will not thrive in heavy, compacted or overly fertile soils.
Management: Fix poor soil with sand or small gravel to improve drainage. Avoid enriching the soil with too much compost or fertilizer as it encourages soft, sappy growth that is more susceptible to pests and diseases.
Regular checks, proper cultural practices and timely interventions are the way to avoid major problems and enjoy good lavender.
Closing Tips
Growing lavender can be so rewarding it adds beauty to your garden and brings soothing aromas to your home. By following these steps you’ll be in a great position to grow and maintain vibrant, healthy lavender plants that will thrive for years.