Orchids can be tricky, even for seasoned gardeners. They have an annoying habit of dying on us!
But don’t worry, they can be revived. These tips will help you to bring your orchid back from the brink when it’s on it’s last legs.
Quick Answer
- Check for Root Rot (Most Common): Take the orchid out of its pot, trim away any soft or brown roots and then repot it.
- Fix Watering Habits: Water only when the roots turn white and let all the excess water drain away completely — never let the plant sit in water.
- Improve Light and Airflow: Put the orchid in bright, indirect light and make sure it has good air flow around it.
Need more help? See these 7 Mistakes You’re Making with Your Orchids (And How to Fix Them).
Video: How to Revive a Dying Orchid
Understanding Your Orchid
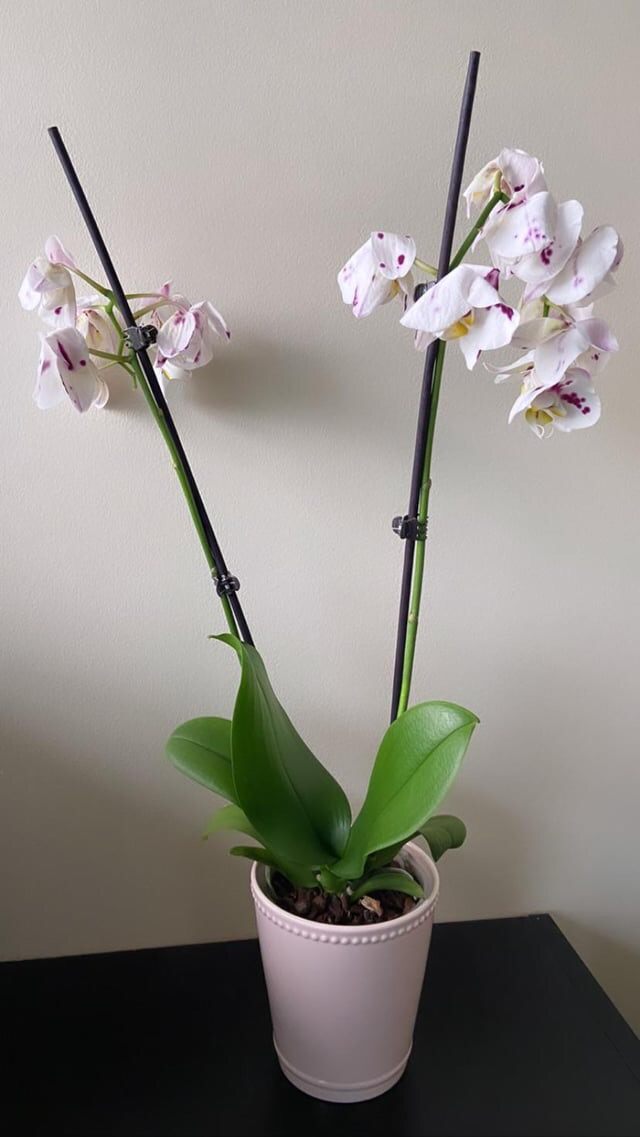
Before you get started on saving your orchid it’s good to understand it. There are quite a few different types of orchids and many of them have unique requirements. But the most commonly grown ones, like Phalaenopsis (moth orchids), have similar needs when it comes to caring for them.
Phalaenopsis are known for their beautiful, long lasting flowers and can bloom multiple times a year if properly looked after. They are epiphytes, which means they naturally grow on other plants or trees, rather than in soil. And rather than getting what they need from soil they instead absorb moisture and nutrients from the air and their surroundings.
It’s useful to know this because it means we can better look after them and what they need. So things like giving them the right amount of light, water and nutrients.
A few other popular types of orchids include Cattleya, Dendrobium and Oncidium, each having slightly different care requirements. However, the principles we’ll go through here apply to all varieties of orchids.
So with all that let’s get into the practical steps to save your struggling orchid.
Worried you're killing your orchid?
Orchids fail for a small handful of specific reasons. My free guide 7 Gardening Mistakes That Are Killing Your Plants covers all of them — and what to do instead.
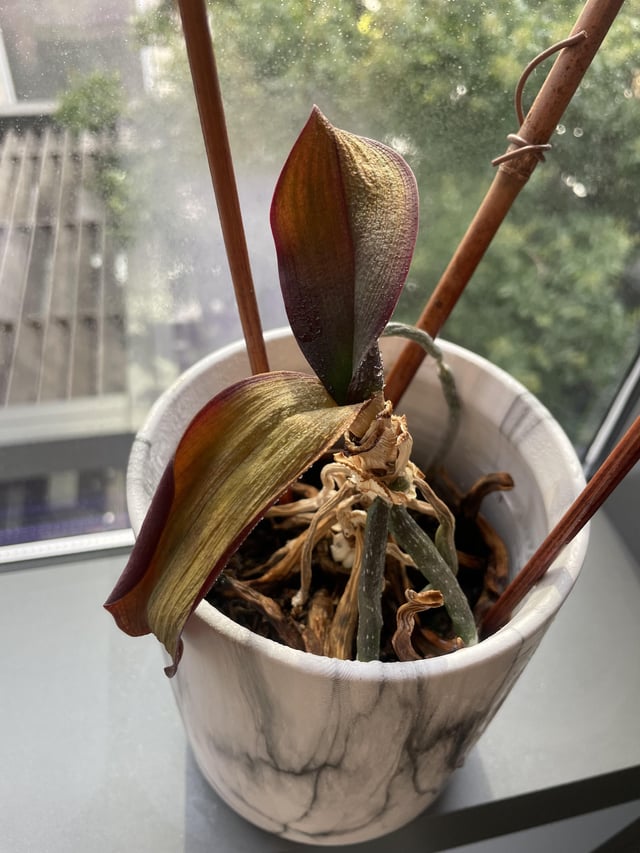
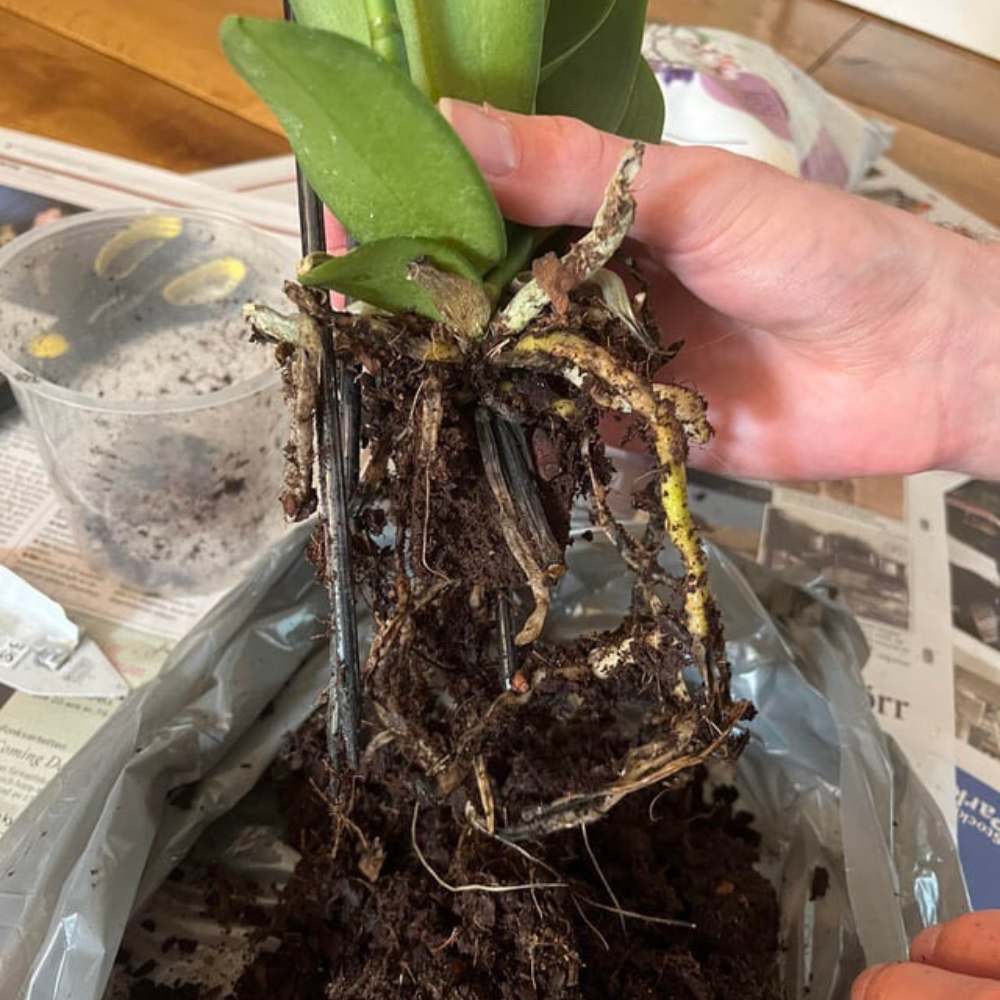
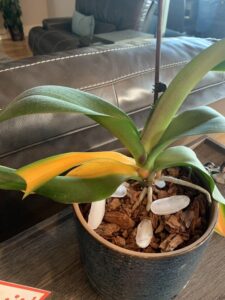
1. Inspect the Roots
Healthy roots are firm and green. If your orchid’s roots are mushy or brown they need immediate attention.
Roots are one of the most important things to keep healthy in virtually every plant. Without functioning roots your orchid can’t absorb water or the nutrients it needs. On top of that they help to anchor it too.
What You’ll Need:
- Sterilized scissors
- Hydrogen peroxide
- Orchid potting mix
Steps:
- Gently remove the orchid from its pot. Be careful not to damage the roots as you do.
- Rinse the roots to remove old potting mix. This will help you see the condition of the roots more clearly.
- Trim off any brown, mushy roots with the sterilized scissors. Healthy roots are usually firm and white or green.
- Treat the remaining healthy roots with a bit of hydrogen peroxide to kill any bacteria. This should prevent infections and it will help with healthy growth.
- Repot in fresh orchid potting mix. Use a mix that is specifically designed for orchids. This will usually contain bark, perlite and sphagnum moss. A mix like this will give your orchid proper drainage and air flow.
2. Adjust Watering Habits
Overwatering is one of the most common mistakes when looking after an orchid. They need a balance when it comes to water
Too much or too little can be damaging. Orchids have adapted to survive periods of drought so their roots need to dry out between waterings.
Tips for Proper Watering:
- Water once a week and let the the potting mix dry out in between. Stick your finger about an inch into the potting mix. If it feels dry then you know it’s time to water.
- Use room temperature, distilled water. Tap water can be full of minerals and chemicals that do harm to orchids.
- Water it in the morning to give the plant time to dry before night. Doing so helps stop any fungus or bacterial growth that develop overnight in damp conditions.
For more tips, including how often, when to and more, use this orchid watering guide.
3. Look at Humidity Levels
Orchids do best in humid environments but too much moisture can lead to rot. Orchids often grow in tropical and subtropical climates where humidity is high. So we want to give them something similar, if possible.
How to Maintain the Best Humidity:
- Aim for a humidity level of 50 to 70%.
- Use a humidity tray or a room humidifier. A humidity tray is simpler to make. Just put a layer of pebbles in a shallow tray filled with water. Put the orchid pot on top of the pebbles and make sure the pot doesn’t sit directly in the water.
- Mist the orchid a little if necessary but avoid soaking the leaves. Misting can help increase humidity but should be done sparingly. If you over do it then water can collect on the leaves which can lead to rot.
4. Provide Adequate Light
Orchids love bright, indirect light. Direct sunlight can burn the leaves but too little light will affect how well they bloom (if at all). Light is one of the most important factors when looking after an orchid.
Light Tips:
- Put your orchid near an east or west facing window. These windows provide bright light but don’t get the intense midday sun.
- Use a sheer curtain at your window to diffuse any direct sunlight. This will protect your orchid from direct sun rays that will burn the leaves.
- If you don’t have enough natural light for your orchid then it may be time to use a grow light. Grow lights can supplement natural light and also provide the full spectrum of light that orchids need.
5. Temperature Control
Orchids are sensitive to changes in the temperature. They really like consistency. So temperature fluctuations can stress the plant and that will affect their blooming.
Ideal Temperatures:
- Daytime: 65 to 75°F (18-24°C)
- Nighttime: 55 to 65°F (13-18°C)
6. Fertilize Sparingly
Over fertilizing can burn the roots and leaves. Orchids need a balanced, weak fertilizer. Too strong and it will definitely hurt your plant.
But fertilizing is still important. It gives them help with the important nutrients they need for growth and flowering.
Fertilizer Schedule:
- Use a balanced orchid fertilizer (20-20-20). This ratio is equal parts of nitrogen, phosphorus’s and potassium, all essential for their healthy growth.
- Dilute the fertilizer to half strength. As mentioned orchids are sensitive to fertilizer. So it’s better to be safe rather than sorry, and in this case a weaker solution is safer.
- Fertilize every two weeks during the growing season and once a month during winter.
7. Pruning Dead or Dying Blooms
Regular pruning helps the plant to conserve energy and at the same time encourages new growth. When you remove the dying or dead blooms it lets the plant send the resources and energy it would have spent on those to focus on new, healthy growth.
Pruning Tips:
- Use sterilized scissors or pruners.
- Cut the spike about 1 inch above a node (that’s a small bump on the stem). This can encourage the plant to produce a new flower spike from the node. Use this guide to grow a new orchid spike.
- Remove any dead or yellow leaves to stop the spread of disease. Leaves that are yellowing or dead can be a sign of underlying issues and should be removed. Check out this guide for why your orchid has yellow leaves and what to do.
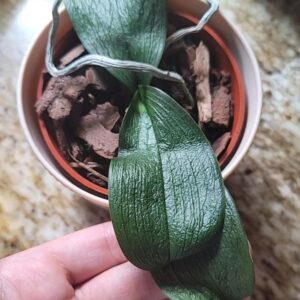
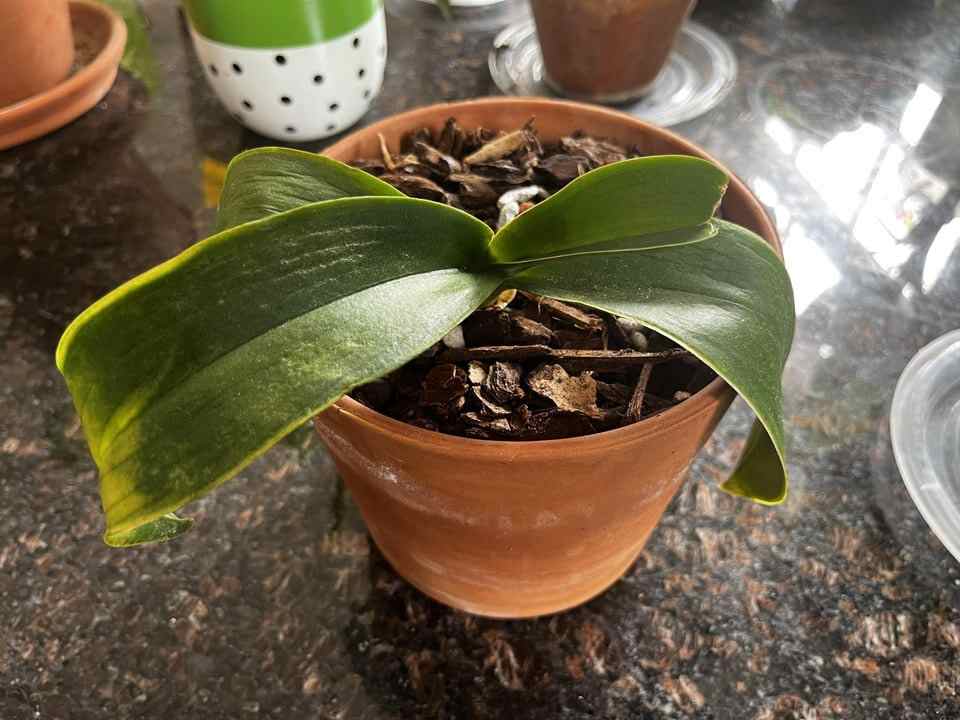
8. Repot Regularly
Orchids need fresh potting mix every 1 to 2 years. If they don’t get this there’s a good chance they will develop root rot and and not be getting the nutrients they need. Over time the potting mix breaks down and loses its effectiveness.
Repotting Steps:
- Choose a pot slightly larger than the one your orchid is currently in. Orchids like to be slightly snug in their pots.
- Use a fresh orchid potting mix. The mix should be well draining and airy.
- Gently loosen the roots and move the orchid in to the new pot. Spread the roots out to prevent them from being too compacted.
- Fill in with potting mix and make sure the plant is stable. Press the mix gently around the roots so they are supported.
This guide will take you through the orchid reporting process in full.
See this guide for why your orchid is wilting and how to fix it.
9. Keep an Eye on Pests
Orchids can attract pests like aphids, spider mites and scale. Regular checks can help keep these pests at bay. If your orchid were to get pests they can damage the plant and eventually even kill it.
Pest Control Methods:
- Inspect the plant regularly for signs of pests. Look under the leaves and along the stems where pests like to hide.
- Use insecticidal soap or neem oil to treat any infestations that develop. These sort of treatments are safe for orchids and work well against most pests.
- Isolate the affected plant to stop any infestations from spreading to other plants. Quarantining them helps to manage and control any pest problems until you have them sorted.
Try this guide for more tips on dealing with orchid pests.
Common Orchid Issues and Solutions
Yellow Leaves
Cause: Overwatering or too much direct sunlight. Overwatering suffocates the roots which leads to yellowing leaves. Direct sunlight can burn them too causing them to turn yellow.
Solution: Adjust your watering schedule and move the orchid to a spot with indirect light. Check the potting mix dries out between waterings and avoid putting the orchid in direct sun.
See this guide for more reasons orchid leaves turn yellow.
Dropping Buds
Cause: Sudden temperature changes or low humidity. The temperature fluctuating can shock the plant and low humidity can cause buds to dry out and fall off. See this guide for why the flower are falling off your orchid.
Solution: Keep the temperature as consistent as possible and increase the humidity. Use a humidifier or humidity tray if necessary and keep the orchid in an environment where it won’t be subjected to fluctuations or changes.
Root Rot
Cause: Overwatering or poor drainage. Roots need air to survive and too much water can result in rot.
Solution: Trim the affected roots and repot in fresh mix with proper drainage. Use a well draining orchid mix and a pot with good drainage holes.
Orchid Care Table
| Issue | Cause | Solution |
|---|---|---|
| Yellow Leaves | Overwatering or direct sun | Adjust watering, indirect light |
| Dropping Buds | Temperature change, low humidity | Consistent temperature, increase humidity |
| Root Rot | Overwatering, poor drainage | Trim roots, repot in fresh mix |
Orchid Care Calendar
| Month | Activity |
|---|---|
| January | Reduce watering, minimal fertilizing |
| February | Check humidity, adjust as needed |
| March | Begin regular fertilizing |
| April | Repot if necessary |
| May | Increase watering, check for pests |
| June | Maintain regular care |
| July | Monitor light exposure |
| August | Keep humidity levels up |
| September | Prepare for blooming season |
| October | Regular fertilizing |
| November | Reduce watering slightly |
| December | Minimal care, monitor health |
FAQs
How often should I water my orchid?
Water your orchid once a week and let the potting mix dry out between each watering. Change how frequently you water based on your home’s humidity and temperature.
Can I use regular potting soil for my orchid?
No, orchids need a special potting mix that gives them proper ventilation and drainage. Regular potting soil will hold on to too much moisture which can lead to root rot.
Why are my orchid’s leaves turning yellow?
Yellow leaves can be caused by overwatering, direct sunlight or a lack of the right nutrients. Change up your care routine where you need to and give them proper watering, light and feeding.
How do I increase humidity for my orchid?
Use a humidity tray, a room humidifier or mist the plant lightly. You should be aiming for a humidity level of 50 to 70%. You can also group your plants together. When they’re in a group they will create a humid microclimate with each other.
When should I repot my orchid?
Repot your orchid every 1 to 2 years or when you notice the potting mix breaking down and compacting.
Final Thoughts
Saving a dying orchid requires patience and attention to detail. But if you take the time to really understand what your orchid needs and then adjust what you’re doing to care for it in the right way it isn’t beyond saving.
Recommended for orchid care
As an Amazon Associate I earn from qualifying purchases.

Better-Gro Special Orchid Mix - Premium Grade Orchid Bark Potting Mix for Potting, Repotting, Enhanced Drainage, Air Flow & Root Ventilation, Ideal for Phalaenopsis, Cattleyas, Dendrobiums - 4 Quarts
Coarse bark replicates the airy, fast-draining medium orchid roots evolved for.

TRUEDAYS Orchid Pot – 4 Pack 5 Inch Clear Orchid Pots with Drainage Holes for Repotting – Ideal for Healthy Root Growth – Sturdy Plastic Plant Pot for Indoor & Outdoor Plants
Lets you check root health at a glance — green roots good, brown roots a problem.

Organic Ready to Spray Orchid Food Mist - Bloom Booster Fertilizer for Orchids in Pots - Plant Nutrients for Healthy Flower & Reblooms (8 oz)
Formulated for the lighter feeding schedule orchids prefer — feed weekly, weakly.

XLUX Long Probe Deep Use Soil Moisture Meter, Water Monitor Indicator Sensor, Hygrometer for Outdoor Indoor Large Pot Plants, Flower, Gardening, Farming
Removes the guesswork from the orchid watering rule: thorough soak, then near-dry.
Worried you're killing your orchid?
Orchids fail for a small handful of specific reasons. My free guide 7 Gardening Mistakes That Are Killing Your Plants covers all of them — and what to do instead.
Be good to have this especially calendar suitable for Australian conditions. Thank you!☺️
Great information. I gave a question…,
I have new leaves growing @ the top of the stem. What do I do w/ them ???
Why are my leaves wrinkled and drooping? What if I can’t find any roots?